Newsletter Subscribe
Enter your email address below and subscribe to our newsletter

HVAC made simple

By Jake Lawson — The HVAC Specialist
Mini splits have a reputation for being easier to install than traditional central HVAC systems, and there is some truth behind that perception. There is no large duct system to fabricate, an indoor wall-mounted unit can look relatively straightforward to hang, and many online videos make the entire installation appear like a manageable weekend project.
The reality is more complicated. Installing a mini split involves several different trades and skills at once: HVAC system design, refrigeration work, electrical work, condensate management, structural mounting and equipment commissioning. A homeowner who is comfortable drilling through a wall and mounting equipment may still have no experience evacuating refrigerant lines, checking electrical requirements or verifying that a system is operating according to the manufacturer’s specifications.
That does not mean every homeowner should automatically dismiss every DIY-oriented mini split. Some products are specifically designed to simplify portions of installation. It does mean that you should understand exactly what “DIY” involves before comparing a low equipment price with a professionally installed system.
For me, the question is not simply “Can I physically install this mini split?” A better question is whether you can install the particular system safely, legally and correctly while preserving the performance, warranty coverage and long-term reliability you expect from it.

The appeal starts with installation cost. Professional HVAC installation can represent a meaningful portion of the total project price, particularly when the job involves several indoor units, difficult line-set routing, electrical upgrades or challenging access. A homeowner shopping online might therefore see a mini-split package and think the savings are obvious. Buy the equipment, mount the indoor air handler, position the condenser outside, connect the lines and keep the difference.
Some of the work can indeed look familiar to an experienced DIYer. The indoor unit normally needs a mounting plate, a wall penetration must be created for the refrigerant lines, drain and wiring, and the outdoor condenser needs a stable mounting location with appropriate clearances.
The difficulty is that mechanically mounting the equipment is only one part of a successful installation. Refrigerant-system integrity, electrical safety, condensate drainage, equipment sizing and commissioning can determine whether that attractive piece of equipment actually delivers its advertised comfort and efficiency. The U.S. Department of Energy and ENERGY STAR both emphasize appropriate sizing and installation when discussing heat-pump performance. ENERGY STAR specifically recommends working with a professional installer familiar with ductless systems and notes that correct sizing is essential to performance and comfort.
ENERGY STAR — Ductless Heating & Cooling
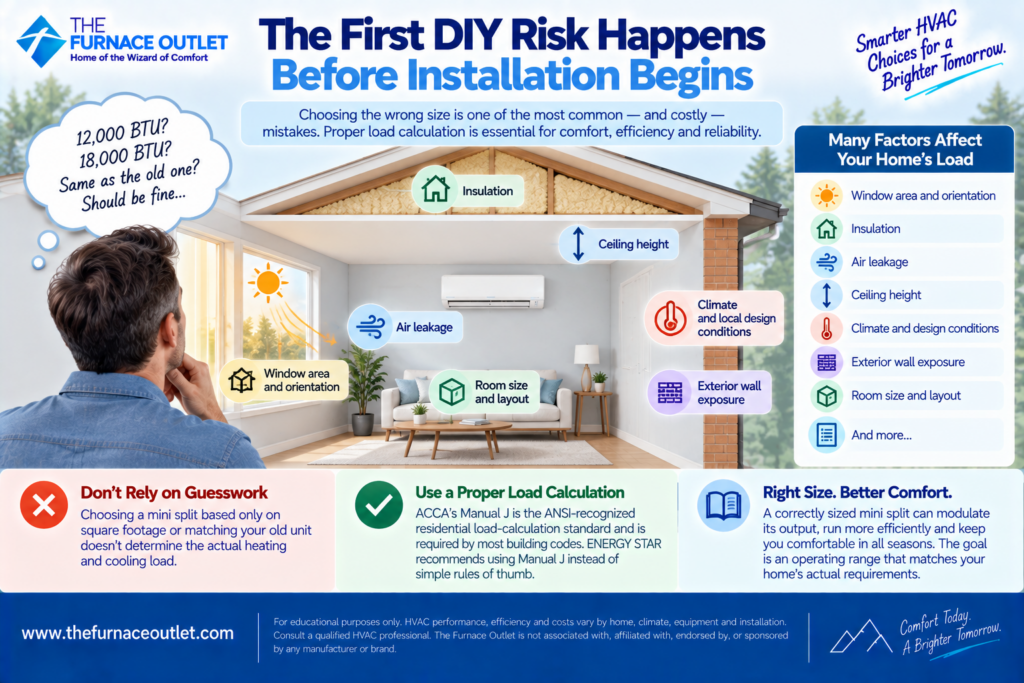
One of the easiest mistakes to make occurs before anyone picks up a drill. A homeowner may decide that a 12,000 BTU mini split is appropriate because the room is a certain number of square feet. Another might replace an existing 18K system with another 18K system simply because the old unit had that capacity. Neither approach establishes the actual heating and cooling load.
Window area and orientation, insulation, air leakage, ceiling height, climate, exterior wall exposure and other building characteristics affect the load. A sunny room with large west-facing windows can behave very differently from an equally sized shaded room.
ACCA’s Manual J is the ANSI-recognized residential load-calculation standard. ACCA says proper load calculations are required by national building codes and most state and local jurisdictions, while ENERGY STAR recommends that contractors use Manual J rather than simply relying on a rule of thumb.
ACCA — Manual J Residential Load Calculation
For a mini split, sizing becomes especially important because one of the major advantages of inverter equipment is its ability to modulate output. You want an operating range that matches the room or home’s actual requirements, not merely a large nominal capacity that looks reassuring on paper.
This is where the difference between hanging equipment and installing HVAC equipment becomes especially important. The indoor and outdoor units are connected by refrigerant tubing. Depending on the particular equipment and installation design, the process can involve cutting tubing, making flare connections, pressure testing, evacuation with a vacuum pump, verifying system integrity and potentially adjusting refrigerant charge according to manufacturer requirements.
Moisture and non-condensable gases do not belong inside a refrigeration circuit. Neither do poorly formed connections that eventually leak refrigerant. A connection can look perfectly acceptable from the outside and still leak. Likewise, simply seeing the system produce cold air immediately after installation does not establish that the refrigeration circuit was properly prepared or that the equipment will continue operating correctly for years.
ENERGY STAR’s HVAC quality-installation guidance specifically identifies proper refrigerant charge as important to energy consumption, comfort and system reliability. That is why I would never evaluate a DIY installation solely by asking whether the unit switched on successfully.

Homeowners in the United States should also understand that refrigerant work is regulated. The EPA explains that Section 608 technician certification is required for activities that can reasonably be expected to violate the integrity of a stationary appliance’s refrigerant circuit. In its homeowner guidance, EPA specifically addresses mini splits and states that adding or removing refrigerant, connecting or disconnecting hoses or pre-charged lines, and similar activities involving the refrigeration circuit can require Section 608 certification.
That distinction matters because people sometimes assume that buying equipment online automatically means they are legally permitted to perform every part of its installation themselves. It does not necessarily work that way.
The exact requirements can depend on the equipment design and the work being performed. Local mechanical, electrical, permitting and inspection rules can add additional requirements beyond federal refrigerant regulations. Before treating any mini split as a DIY project, determine what your particular equipment requires and what federal, state and local rules apply where the equipment will be installed.
U.S. EPA — Homeowner Refrigerant and Section 608 FAQs
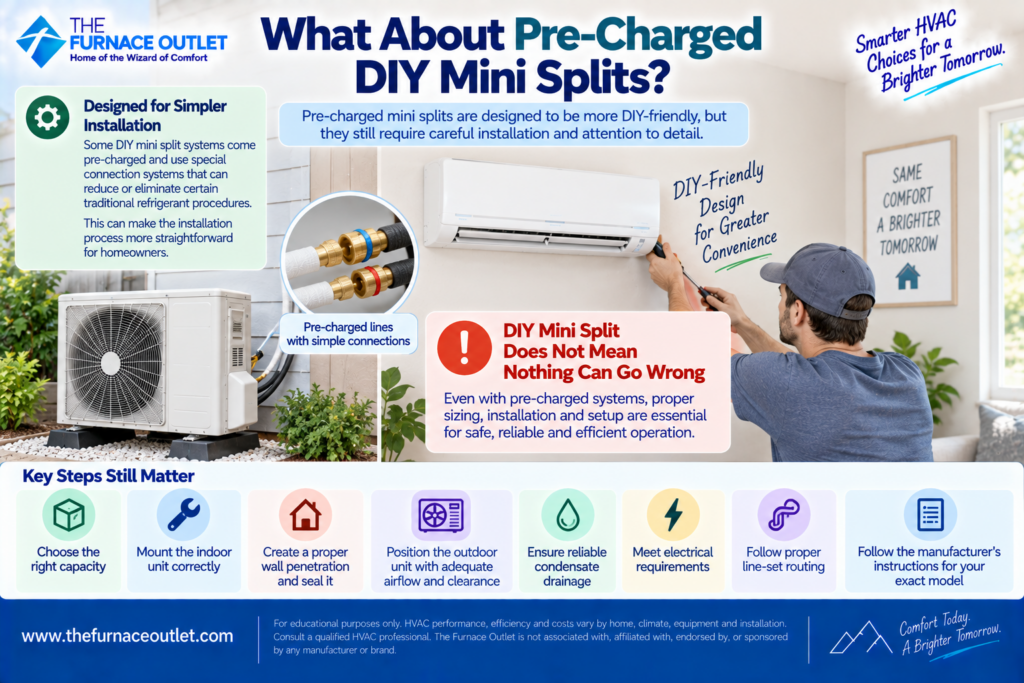
This is where the discussion becomes more nuanced. Certain mini-split systems are marketed specifically toward DIY installation and use connection systems intended to reduce or eliminate some conventional field refrigerant procedures. That can substantially change the practical installation process.
However, the phrase “DIY mini split” should never be interpreted as “nothing can go wrong.”
You still need to select the appropriate capacity. The indoor unit must be mounted correctly. The wall penetration must be properly located and weather-sealed. The outdoor condenser needs appropriate airflow and clearances. Condensate must drain reliably. Electrical requirements still need to be satisfied, and the line-set routing needs to comply with the manufacturer’s instructions.
Most importantly, follow the instructions for the exact model you purchased. Do not assume that a procedure shown in a video for one manufacturer’s DIY system applies to a conventional mini split from another manufacturer.
A mini split is not a portable appliance that you simply plug into whichever receptacle happens to be nearby. Many systems require a dedicated circuit and disconnect, and electrical requirements vary with equipment capacity and design. The manufacturer’s documentation specifies voltage, minimum circuit ampacity, maximum overcurrent protection and other electrical requirements.
Electrical codes and permit requirements also vary by jurisdiction. Even if a homeowner performs some mechanical portions of an installation, having a qualified electrician perform or verify the electrical portion may be appropriate. This is particularly important when the project requires a new circuit, panel work, disconnect installation or other modifications to the home’s electrical system. Saving installation money is not worthwhile if the savings depend on improvising electrical protection or wiring.
The indoor mini-split unit removes moisture from the air during cooling operation. That water needs somewhere to go. Gravity drainage is often straightforward when the installation permits a continuous downward slope, but poor routing can lead to standing water, leaks, odors or water damage. Some installations require condensate pumps because gravity drainage is not practical.
A DIY installation may look excellent on the wall while concealing an improperly pitched drain line behind it. I recommend thinking about drainage before deciding where the indoor unit will be mounted. The shortest or most visually attractive refrigerant-line route is not necessarily the best route for reliable condensate drainage.
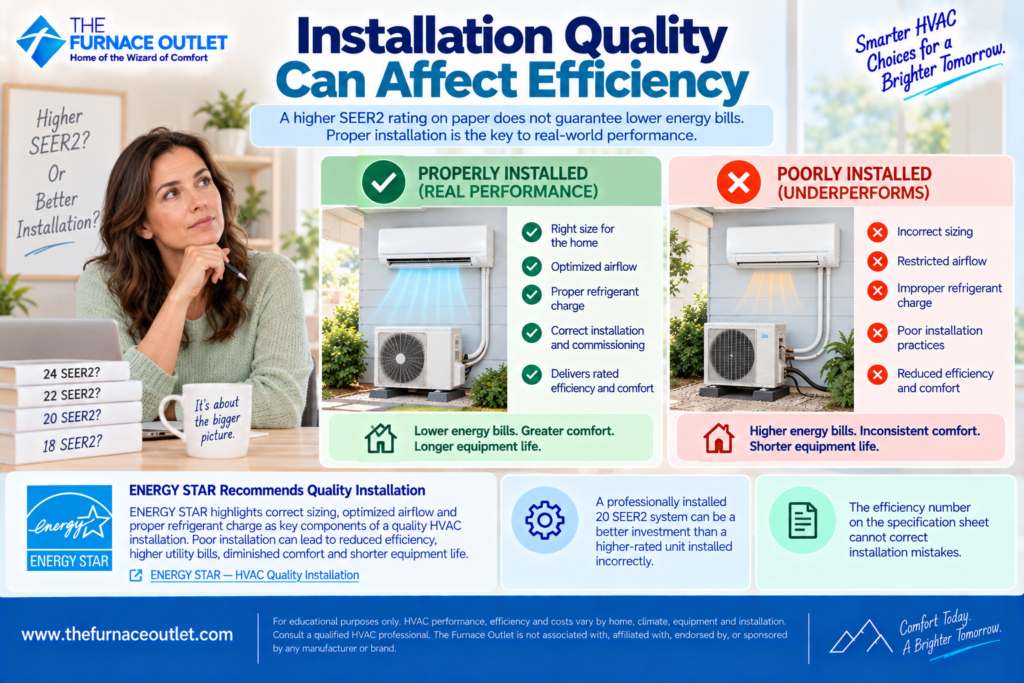
Homeowners sometimes spend considerable time comparing 18, 20, 22 and 24 SEER2 equipment while paying much less attention to installation. That priorities list should be reconsidered. A laboratory efficiency rating assumes standardized conditions. Your home does not reproduce those laboratory conditions, and installation quality influences actual system operation.
ENERGY STAR highlights several components of quality HVAC installation, including correct sizing, optimized airflow and proper refrigerant charge. It warns that poor installation conditions can contribute to reduced efficiency, higher utility bills, diminished comfort and shorter equipment life.
ENERGY STAR — HVAC Quality Installation
A professionally installed 20 SEER2 system that is properly sized and commissioned can therefore be a better HVAC investment than a higher-rated unit installed incorrectly. The efficiency number on the specification sheet cannot correct installation mistakes.

This is where many online comparisons become misleading. A DIY calculation often starts with the equipment price and compares it with a contractor’s complete installed quotation. The difference is then described as “labor.”
But the contractor’s price may include considerably more than someone physically mounting equipment. Depending on the proposal, it may include load calculations, equipment selection, permits, electrical work, mounting hardware, line-set materials, condensate management, refrigerant procedures, specialized tools, commissioning, cleanup, labor warranty and responsibility for resolving installation-related problems.
A DIY project can also require tools that the homeowner does not already own. Conventional installations may require a vacuum pump, gauges or specialized test equipment, tubing tools, torque tools and electrical test instruments, depending on the equipment and procedures involved. Therefore, I would not publish a universal figure claiming that DIY installation saves a particular dollar amount or percentage. Equipment, labor rates, building conditions, electrical requirements and local permitting vary too widely. Compare complete project scope against complete project scope.
There is another financial factor that is easy to overlook: the cost of getting professional help after a DIY project goes wrong. Imagine that the equipment has been mounted and connected but does not perform correctly. A contractor now has to determine whether the problem is equipment-related, installation-related, electrical, refrigerant-related, drainage-related or caused by improper sizing.
That is different from arriving at a new installation where the contractor controls the process from the beginning. Some HVAC companies may be willing to diagnose owner-installed equipment, while others may have restrictions regarding equipment they did not supply or install. Labor rates and warranty responsibility may also differ. Before choosing DIY primarily to save money, it is worth asking what your backup plan will be if commissioning does not go as expected.

Warranty coverage is one area where homeowners should never rely on general internet advice. Terms differ among manufacturers, product families, sellers and jurisdictions. Registration requirements may apply. Certain warranties may distinguish between parts coverage and labor coverage, and installation requirements may affect eligibility.
Do not assume that buying a mini split automatically gives you the same protection that another homeowner received with a professionally installed system. Before purchasing, download the current warranty document for the exact model or product family you are considering. Look specifically for installer qualifications, registration deadlines, proof-of-purchase requirements, maintenance obligations, exclusions and provisions concerning improper installation.
If any language is unclear, ask the manufacturer for clarification before installation and retain the response. A manufacturer’s parts warranty also should not be confused with an installer’s labor warranty. Even if a failed component qualifies for replacement, removing the defective part, installing the replacement and handling refrigerant or other service work may involve labor that is not covered by the manufacturer’s parts warranty.
Mini-split installations may fall under mechanical, electrical and building requirements, depending on jurisdiction and project scope. Rules can differ significantly from one city or county to another. Some installations may require permits or inspections, and electrical modifications may have separate requirements. This is another reason generic statements such as “mini splits don’t need permits” should be treated cautiously.
Check with the local authority having jurisdiction before purchasing equipment. If you hire a contractor, ask who is responsible for permits and inspections and make sure that responsibility appears clearly in the proposal. A low installation quote becomes less attractive if it quietly assumes that required permits will simply be ignored.

There is an important point on the other side of this comparison: paying a contractor does not automatically guarantee excellent work. Contractors vary in training, experience and attention to detail.
ENERGY STAR recommends finding a reputable contractor familiar with ductless or mini-split systems. ACCA’s standards provide an even broader framework for residential HVAC design. Manual J addresses load calculations, while Manual S addresses equipment selection using building loads and manufacturer performance information.
ACCA — HVAC Technical Manuals and System Design Standards
When reviewing professional proposals, I would therefore ask more than “How much?” Ask how the contractor determined capacity. Request the exact indoor and outdoor model numbers. Ask how the refrigerant circuit will be evacuated and tested when applicable, how condensate will be routed, whether electrical work and permits are included, what commissioning will be performed and what labor warranty the contractor provides. The best professional-installation comparison is based on scope and quality, not simply the lowest bid.
DIY becomes more reasonable when the equipment has genuinely been engineered and documented for homeowner installation, the homeowner has the necessary mechanical skills, local rules permit the work, the electrical requirements can be handled appropriately and the manufacturer clearly allows the intended installation approach.
A simple single-zone installation with accessible wall construction and an easy outdoor-unit location is also fundamentally different from a five-zone project involving long refrigerant runs through multiple floors. Experience matters too. Someone who routinely performs skilled construction and electrical work is starting from a different position than a homeowner whose most ambitious previous project was installing a ceiling fan.
DIY should therefore be treated as a project-specific decision rather than an ideology.

Professional involvement becomes increasingly valuable as the consequences of design or installation errors increase. Whole-home systems, multi-zone configurations, difficult line-set routes, cold-climate primary-heating applications, complicated condensate drainage, substantial electrical modifications and projects requiring conventional refrigerant procedures all deserve greater caution.
I would be particularly reluctant to shortcut professional design when a mini split will serve as the home’s primary heat source in a severe climate. In that situation, equipment capacity at the winter design temperature matters enormously. A system can operate perfectly from a mechanical standpoint and still fail to keep the house comfortable if it was incorrectly selected. That is a design failure, not necessarily an equipment failure.
Before making the decision, I would put both options through the same evaluation. Determine the home’s actual heating and cooling loads, identify the exact equipment combination, read the manufacturer’s complete installation manual and warranty terms, verify local permit and electrical requirements, and determine whether any refrigerant work requires certified personnel.
Then calculate the complete DIY cost, including materials, tools, electrical work, permits and any professional services that will still be required. Compare that figure with professional proposals that clearly identify equipment, installation scope, commissioning, permits and labor warranty.
Finally, consider your risk tolerance. Saving money upfront has value, but so do accountability, verified commissioning and having one company responsible when something does not work correctly.
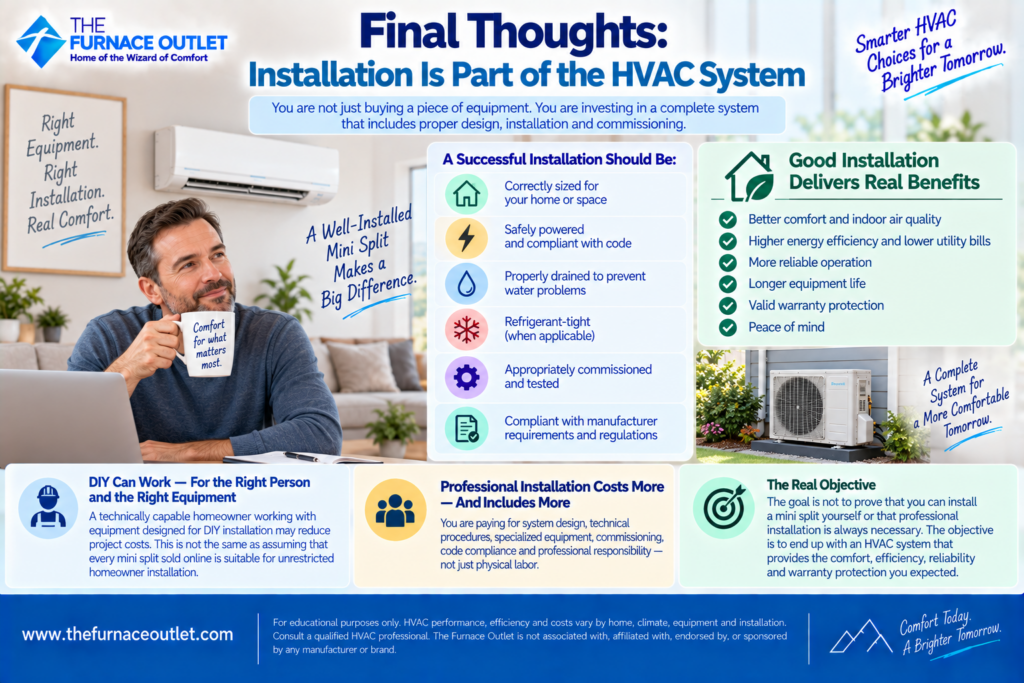
When homeowners shop for mini splits, the equipment receives most of the attention. They compare SEER2, HSPF2, BTU capacity, noise ratings, Wi-Fi controls and compressor technology. But the installation is effectively part of the system you are buying.
A technically capable homeowner working with equipment genuinely designed for DIY installation may have a reasonable path to reducing project costs. That is very different from assuming that every mini split sold online is suitable for unrestricted homeowner installation. Professional installation costs more because you are purchasing more than physical labor when the job is done properly. You are paying for system design, technical procedures, specialized equipment, commissioning, code compliance and professional responsibility.
Whichever route you choose, judge success by more than whether the mini split turns on. A good installation should be correctly sized, safely powered, properly drained, refrigerant-tight, appropriately commissioned and compliant with the applicable manufacturer requirements and regulations. The objective is not to prove that you can install a mini split yourself or that professional installation is always necessary. The objective is to end up with an HVAC system that provides the comfort, efficiency, reliability and warranty protection you expected when you bought it.
https://thefurnaceoutlet.com/best-mini-split-systems-of-2026-complete-brand-model-comparison/
This article is for educational purposes only and is not a substitute for manufacturer installation instructions, electrical or mechanical codes, refrigerant regulations or professional HVAC advice. Installation requirements vary by equipment, refrigerant, jurisdiction and project conditions. Homeowners should verify current federal, state and local requirements and consult qualified HVAC and electrical professionals when appropriate.
The Furnace Outlet is not associated with, affiliated with, endorsed by or sponsored by manufacturers or brands referenced in its editorial content, and manufacturer inclusion does not imply endorsement. Equipment specifications, installation requirements and warranty terms can change, so homeowners should verify current information directly with the manufacturer before purchasing or installing equipment.