Newsletter Subscribe
Enter your email address below and subscribe to our newsletter

HVAC made simple
By Jake Lawson — Jake the HVAC Specialist
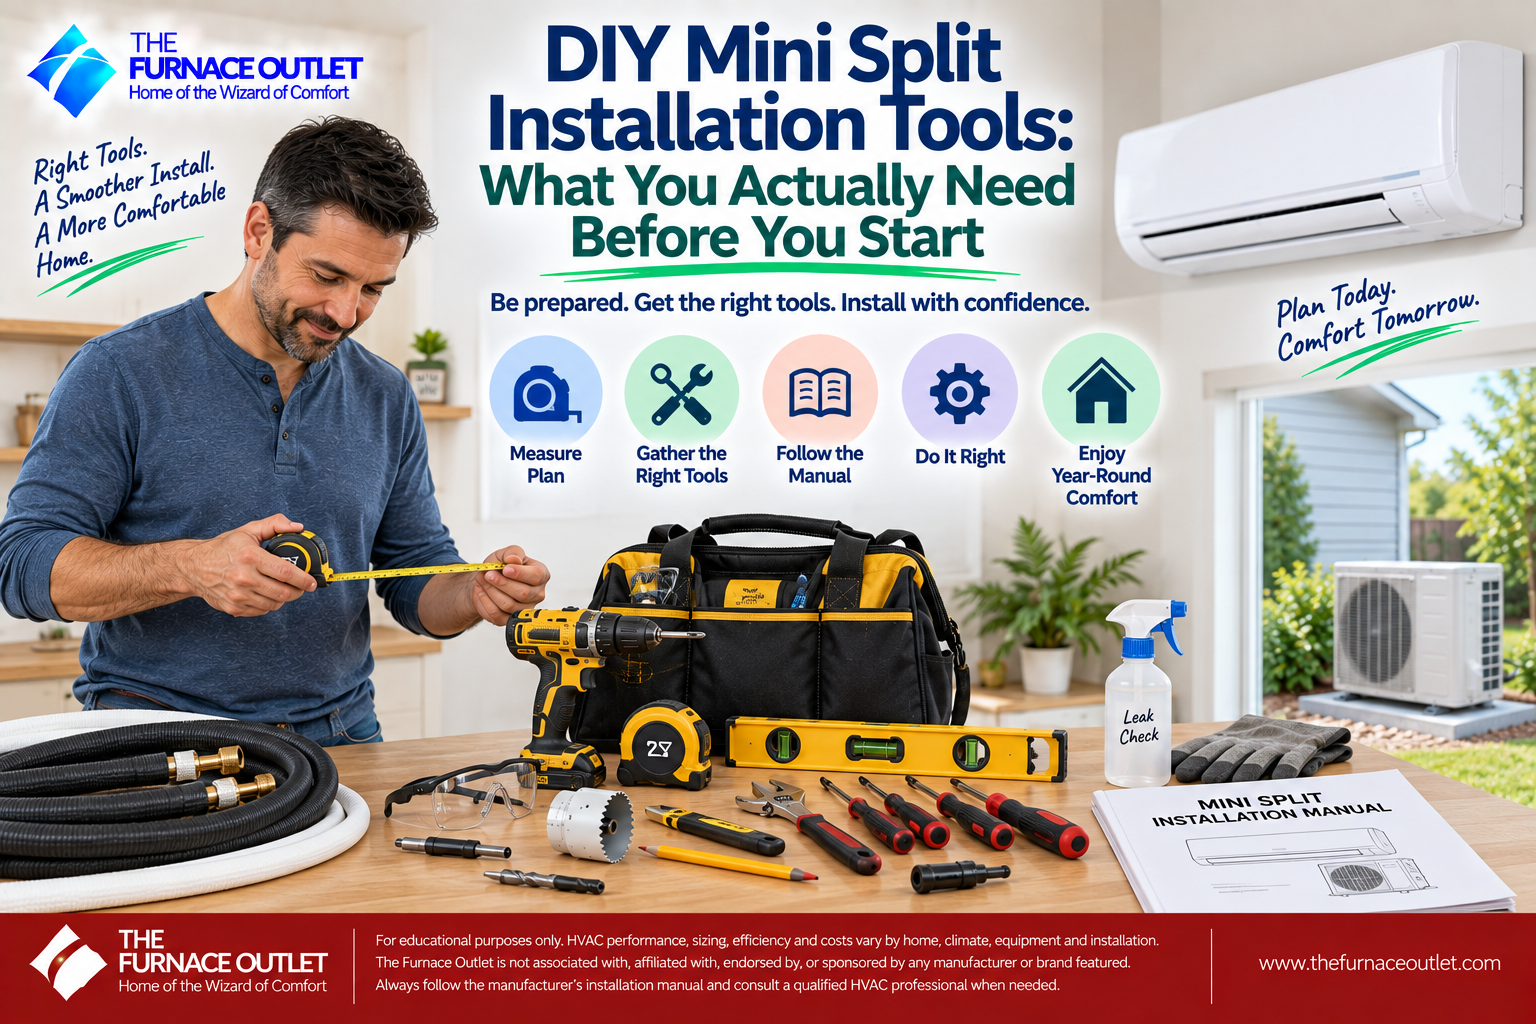
One of the biggest attractions of a genuine DIY mini split is that you shouldn’t need a service truck full of specialized HVAC equipment to install it. Purpose-built homeowner systems can simplify some of the work that normally requires refrigeration tools, particularly when they use factory-prepared, pre-charged line sets and manufacturer-engineered quick-connect fittings. That simplicity, however, doesn’t mean you should open the boxes with nothing more than a cordless drill and hope the rest works itself out.
The tool list depends heavily on the exact mini split you’re installing. A conventional ductless system and a purpose-built DIY system can require very different equipment, particularly on the refrigerant side. MRCOOL’s published DIY installation guidance, for example, lists ordinary homeowner tools such as a hole saw, adjustable wrenches, tape measure, level, drill, ladder and screwdriver, while its current fifth-generation quick-start guide provides a specific installation sequence for mounting, wall penetration and factory-prepared line-set installation.
My advice is to build your tool list from the installation manual for your exact model, not from a generic mini-split installation video. The right tools make the installation easier, but more importantly, they help you avoid damaging equipment that was designed to make the job simpler in the first place.
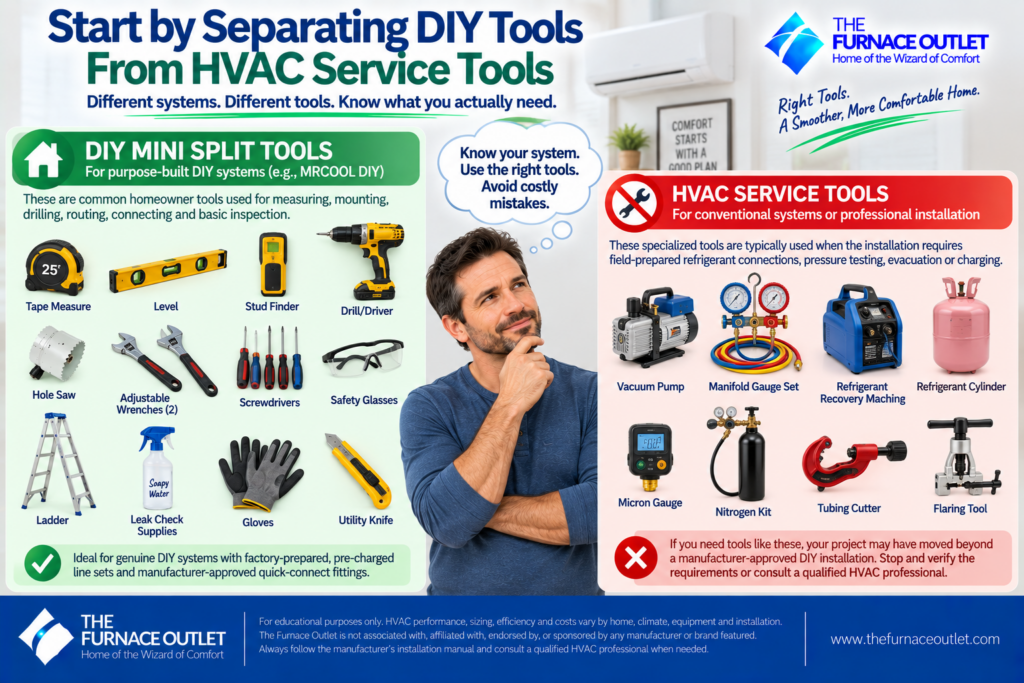
Before buying anything, determine what type of system you actually have. If you purchased a purpose-built DIY mini split with an approved factory-prepared line set, the manufacturer’s installation method may eliminate some of the specialized refrigeration procedures associated with conventional installations. Current MRCOOL fifth-generation DIY products, for example, use compatible pre-charged Quick Connect line sets, and the company states that qualifying configurations do not require conventional evacuation during installation.
MRCOOL DIY System Installation Must-Haves
That is very different from assuming that every factory-charged mini split is a no-vacuum DIY system. Conventional mini splits may still require field-prepared refrigerant connections, leak or pressure testing, evacuation and commissioning with specialized equipment.
For a genuine purpose-built DIY installation, your homeowner tool kit should primarily help you measure, level, mount, drill, route, connect and inspect. If you suddenly find yourself shopping for refrigerant cylinders, recovery equipment or tools intended to open and service a refrigeration circuit, stop and verify whether the work has moved beyond the manufacturer’s homeowner installation procedure.
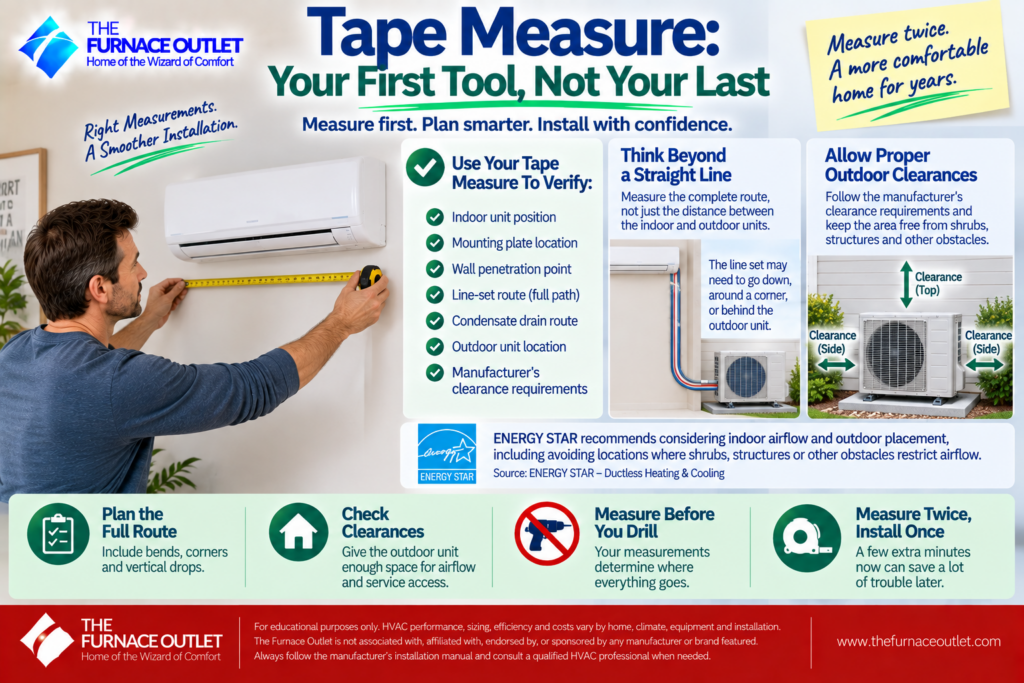
I would start with a reliable tape measure before touching a drill. You need it to verify the indoor-unit position, mounting-plate location, wall penetration, line-set route and outdoor-unit location.
Measure the complete route rather than simply measuring the straight-line distance between the indoor and outdoor units. The refrigerant bundle may need to travel down a wall, around a corner or behind the outdoor condenser. The condensate drain also needs a workable route, and the outdoor equipment needs the manufacturer’s required clearances. ENERGY STAR specifically recommends considering indoor airflow and outdoor placement, including avoiding locations where shrubs, structures or other obstacles restrict airflow. Those placement decisions should be made before drilling because they determine where much of the installation ultimately goes.
ENERGY STAR — Ductless Heating & Cooling
Measure twice is old advice, but mini-split installation is a particularly good place to follow it.
The mounting plate establishes the position of the indoor air handler, so I consider a level one of the most important tools in the basic kit. Don’t assume a ceiling, window frame or trim line is perfectly level and use it as your reference. MRCOOL’s current fifth-generation quick-start guide instructs installers to level the mounting plate before securing it.
A compact spirit level is usually sufficient, although a longer level can be helpful when checking mounting surfaces and the outdoor base. A laser level can be convenient if you already own one, but I wouldn’t buy an expensive laser specifically because you’re installing one mini split.
The goal isn’t to own sophisticated equipment. It is to establish accurate reference points and install the equipment according to the manufacturer’s instructions.
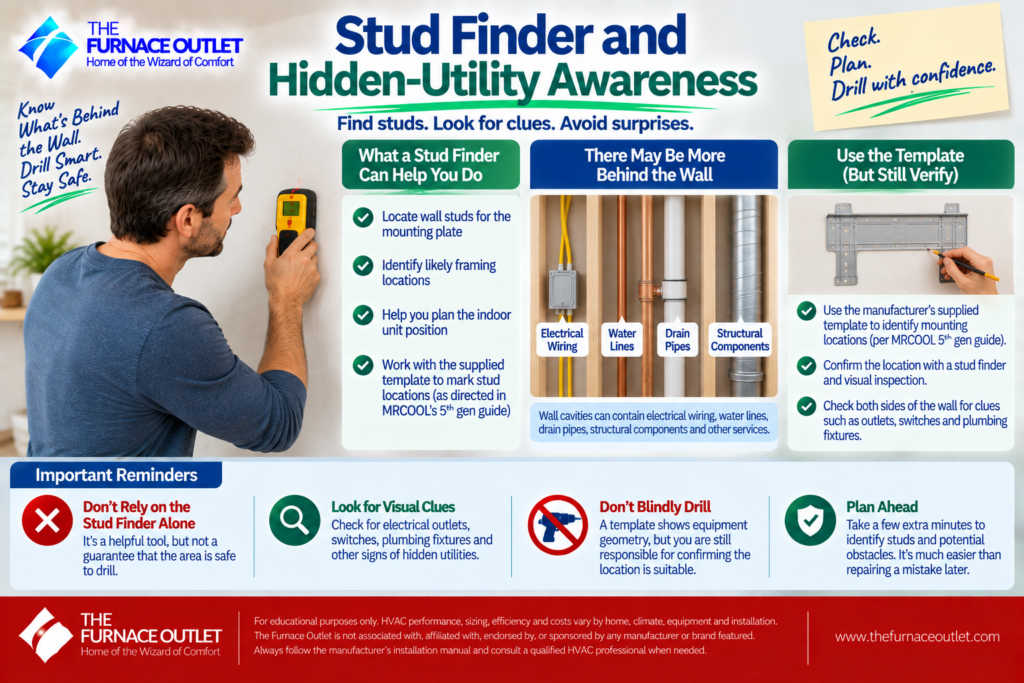
Before attaching the mounting plate or drilling the large wall penetration, you need to know what is behind the finished wall. A stud finder can help identify framing for mounting purposes, but don’t treat it as a magic device capable of guaranteeing that an area is safe to drill. Wall cavities may contain electrical wiring, water lines, drain pipes, structural components and other services.
The current MRCOOL fifth-generation quick-start guide directs installers to use the supplied template to identify mounting locations on wall studs. I would therefore include a suitable stud finder in my basic tool kit and combine it with careful inspection of both sides of the wall. Look for electrical receptacles, switches, plumbing fixtures and other clues that utilities could be present. Blindly drilling a large hole because a template says “hole here” is not good DIY practice. The template establishes the equipment geometry; you are still responsible for confirming that the location is suitable.
A cordless drill/driver is probably the tool you’ll use most often during the mechanical installation. It can be needed for mounting-plate fasteners, pilot holes, outdoor mounting hardware, line-hide components and other installation details.
Bring an assortment of appropriate drill and driver bits rather than assuming one universal bit will handle everything. Wall construction matters. Drilling drywall is different from drilling wood framing, masonry or other building materials, and the fastening method should be appropriate for the structure. The equipment has to remain securely mounted for years, so don’t improvise fastening simply because a screw happens to fit through the mounting plate.
If your installation involves masonry, concrete or another difficult substrate, that can change both the tools and anchors required. Plan for the actual construction of your home rather than relying on the tool list from someone else’s installation.
A wall-mounted mini split generally requires a substantial wall penetration for the refrigerant piping, drain hose and interconnecting cable. A properly sized hole saw helps create a cleaner opening than trying to cut the penetration freehand.

MRCOOL’s published DIY tool checklist specifically includes a hole saw, while its current fifth-generation quick-start guide specifies a 3.54-inch opening for the equipment covered by that guide. That dimension is not a universal mini-split hole size; it illustrates why the manual for your exact model needs to determine what you buy and use.
MRCOOL 5th Gen DIY Quick Start Guide
You’ll also need to consider wall thickness and construction when selecting the arbor, pilot bit and hole saw. If the manufacturer’s instructions call for the wall opening to slope slightly toward the exterior for drainage, maintain that orientation while drilling. Check both sides of the wall before you start. A beautifully drilled hole is still a bad hole if it exits behind a downspout, electrical box or structural obstruction.
For systems using threaded quick-connect fittings, you may need wrenches to make the manufacturer-specified connections. MRCOOL’s DIY installation tool guidance lists two adjustable wrenches among the homeowner tools. Two matter because a refrigerant connection should not be tightened by allowing the tubing or opposite fitting to twist freely. One tool may support the connection while the other applies force according to the manufacturer’s procedure.
Don’t interpret an adjustable-wrench recommendation as permission to tighten a refrigerant fitting as hard as possible. Follow the connection procedure and any specified torque requirements in the exact installation documentation. If a manufacturer specifies a torque wrench or another particular tool for your equipment, that instruction overrides a generic tool list. Cleanliness also matters. Keep connector surfaces protected until you’re ready to join them, avoid cross-threading, and don’t use pliers or other unsuitable tools simply because they’re nearby.
A selection of screwdrivers belongs in virtually every installation kit. Depending on the system, you may need them for access panels, accessory housings, line-hide components or other manufacturer-approved assembly tasks. MRCOOL’s fifth-generation quick-start guide, for example, shows a screwdriver being used during installation of the USB dongle on the equipment covered by that guide.
I would also keep basic hand tools nearby, including appropriate nut drivers or sockets if the installation manual calls for them. A utility knife may be useful for packaging and certain finishing materials, but it should never become a substitute for the correct tubing or electrical tool.
The important distinction is between ordinary assembly tools and tools used to modify critical components. Don’t cut refrigerant tubing, alter factory wiring or modify a pre-charged line set just because you happen to have a tool capable of doing it.
A wall-mounted air handler is normally installed high on a wall, which means safe access deserves more consideration than it often receives in DIY videos. MRCOOL includes a ladder in its published DIY tool checklist. Use a stable ladder appropriate for the working height and surface, and don’t stretch sideways while supporting an indoor unit or drilling a wall penetration.
An extra pair of hands can be more useful than another expensive tool when mounting the air handler. One person can support the equipment while the other watches the piping bundle, condensate hose and mounting bracket. Gloves and appropriate eye protection are also sensible when drilling, handling sheet-metal components or working around construction debris. Personal protective equipment won’t compensate for unsafe working practices, but it should be part of a properly prepared installation.
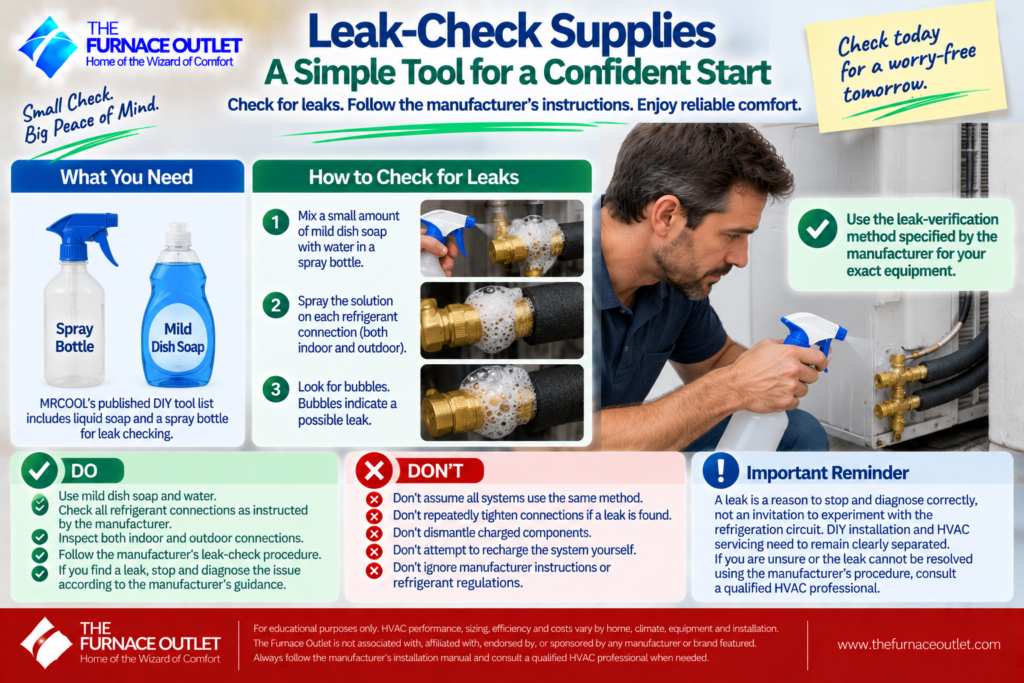
A purpose-built quick-connect system may simplify refrigerant installation, but connections still need to be checked according to the manufacturer’s instructions before commissioning. MRCOOL’s published DIY tool list includes liquid soap and a spray bottle for leak checking. Use the leak-verification method specified by the manufacturer for your exact equipment rather than assuming that one method applies universally.
This is another area where DIY installation and HVAC servicing need to remain clearly separated. If a connection fails the prescribed check, don’t repeatedly tighten it, dismantle charged components or attempt to recharge the system without understanding the manufacturer’s procedure and applicable refrigerant rules. A leak is a reason to stop and diagnose correctly, not an invitation to experiment with the refrigeration circuit.
This is where genuine DIY equipment can significantly reduce the traditional tool requirement. A conventional mini-split installation may involve tools such as a vacuum pump, micron gauge, manifold or appropriate service gauges, nitrogen equipment, tubing cutter, deburring tools, flaring tools and torque tools appropriate to the refrigerant connections.
A purpose-built pre-charged quick-connect system may remove several of those operations from the homeowner installation when the manufacturer explicitly designs and documents it that way. MRCOOL states, for example, that certain current fifth-generation DIY systems use a pre-charged Quick Connect line set that eliminates vacuuming for the specified installation.
That doesn’t mean vacuum pumps are unnecessary for mini splits in general. It means your particular installation method determines the required tools. If your equipment manual calls for field flaring, pressure testing and evacuation, you do not have the same installation procedure as a no-vacuum DIY quick-connect system.
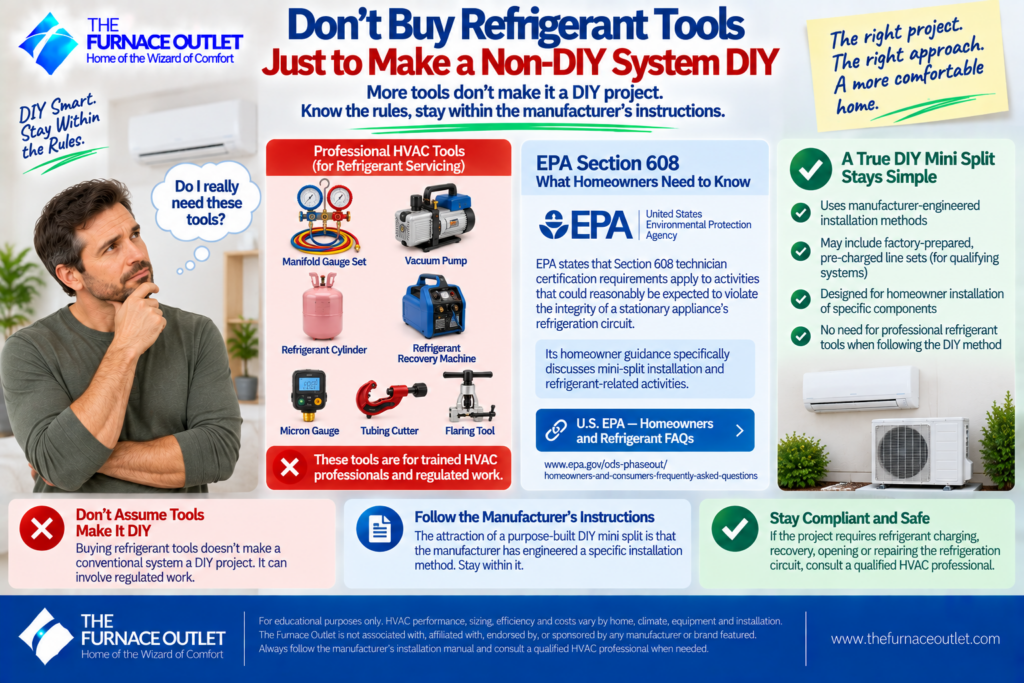
There is also a regulatory boundary homeowners need to understand. EPA states that Section 608 technician certification requirements apply to activities that could reasonably be expected to violate the integrity of a stationary appliance’s refrigeration circuit, and its homeowner guidance specifically discusses mini-split installation and refrigerant-related activities.
U.S. EPA — Homeowners and Refrigerant FAQs
So if your project starts requiring refrigerant charging, recovery, opening or repairing a refrigeration circuit, or other regulated servicing, don’t assume purchasing professional HVAC tools makes the work equivalent to the manufacturer-approved DIY procedure.
The attraction of a purpose-built DIY mini split is precisely that the manufacturer has engineered a specific installation method. Stay within it.
I deliberately separate electrical tools from the mechanical DIY tool list because installing the electrical supply can be an entirely different job. Depending on the system and local requirements, a mini split may require a dedicated branch circuit, breaker or fuse, appropriately sized conductors, disconnect, grounding and indoor-to-outdoor wiring. MRCOOL’s support guidance states that electrical work should be handled by a licensed electrician or appropriately qualified person even when the equipment itself is intended for DIY setup.
MRCOOL — DIY Self-Install vs. Technician Installation
If an electrician is handling that portion, you don’t need to buy electrical testing equipment merely because you are doing the mechanical installation yourself. If you are legally and technically qualified to perform the electrical work, the necessary tools depend on the circuit and applicable code. Either way, the electrical tool list should come from the electrical installation requirements rather than a generic mini-split shopping list.
Tools aren’t the only things worth gathering before installation day. Depending on the kit and site, you may need an outdoor condenser pad or approved wall bracket, additional drain material, exterior-rated sealing materials, line-set protection or line-hide, appropriate fasteners and locally required components.
MRCOOL notes that its DIY kits include many items, such as the mounting plate and template, hardware, wall sleeve, drain hose and certain insulating materials, but additional items can be necessary depending on the installation.
Open every box and inventory the components before drilling the wall. Confirm that the indoor and outdoor units match, the line set is compatible, required adapters or couplers are present, and the supplied line length works with your planned route. Finding out that an essential component is missing after the indoor unit is hanging from the wall is avoidable.
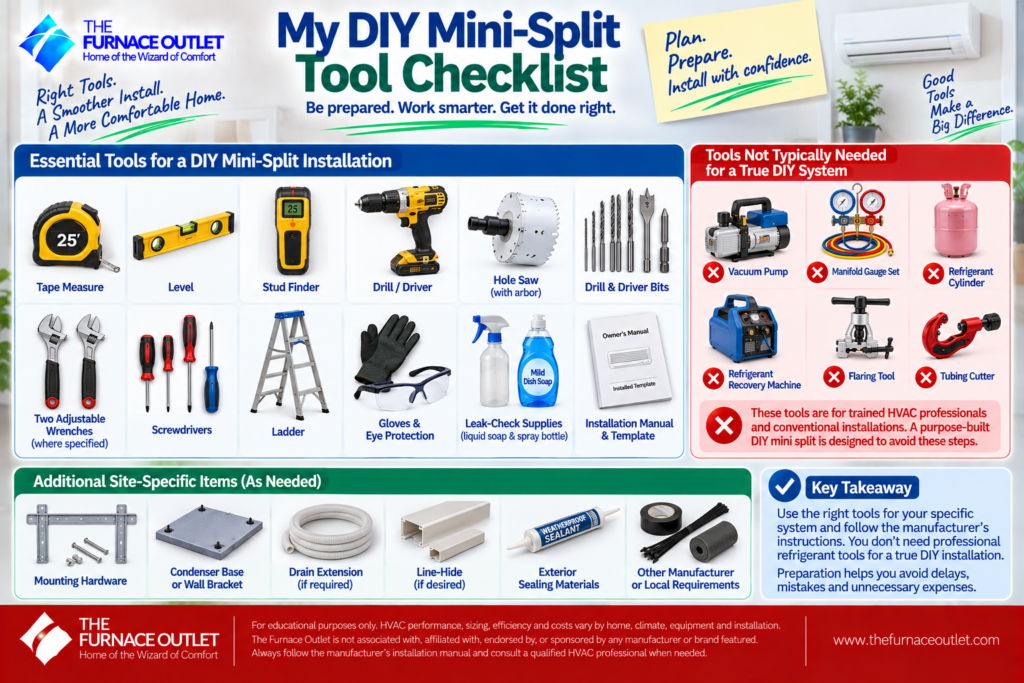
For a typical purpose-built homeowner-installable system, my preparation area would include a tape measure, level, suitable stud finder, drill/driver, manufacturer-specified hole saw, appropriate drill and driver bits, two adjustable wrenches where specified, screwdrivers, suitable ladder, gloves, eye protection and the manufacturer-approved materials needed for leak verification. I would also have the installation manual and supplied template physically accessible throughout the job rather than relying on memory.
Then I would add the site-specific items: appropriate mounting hardware, condenser base or bracket, drain extension if permitted and required, line-hide if desired, exterior sealing materials and any other components called for by the manufacturer or local requirements.
Notice what isn’t automatically on that list: a vacuum pump, manifold gauge set, refrigerant cylinder, recovery machine, flaring tool or tubing cutter. Those tools may be completely appropriate for professional or conventional mini-split work, but their presence on somebody else’s installation video does not mean your purpose-built DIY system requires them.
The smartest way to prepare for a DIY mini-split installation isn’t to buy every HVAC tool you can find. It is to understand exactly which operations your system requires and have the correct tools ready for those operations.

Start with the manual. Walk through the installation sequence before installation day and match a tool to every step. You need something to measure the layout, establish level, locate suitable mounting points, secure the bracket, create the wall penetration, support and mount the indoor unit, route the line set and drain, make the approved connections and verify your work. If the manufacturer’s instructions introduce another tool, add it to the list before you begin.
Just as importantly, recognize when a tool requirement is telling you something about the job. If you thought you purchased a homeowner-friendly no-vacuum system but discover that the installation requires field flaring, evacuation or refrigerant charging, stop and confirm the exact equipment and procedure. If the electrical installation requires panel work or a new HVAC branch circuit and you’re not qualified to perform it, let an electrician handle that portion.
A genuine DIY mini split should make certain parts of installation more approachable. The goal isn’t to prove that you can perform every HVAC trade task yourself. The goal is to install the equipment correctly using the process it was actually designed for.
What basic tools do I need to install a DIY mini split?
The exact list is model-specific, but a purpose-built DIY installation may call for a tape measure, level, drill, appropriate hole saw and bits, stud finder, adjustable wrenches, screwdrivers, ladder and leak-check materials. MRCOOL publishes a similar basic list for its DIY systems, but your exact installation manual should remain the final authority.
Do I need a vacuum pump for a DIY mini split?
Not necessarily. Certain purpose-built DIY systems use factory-prepared pre-charged line sets designed around a no-vacuum installation procedure. Conventional mini splits can still require evacuation, however, so don’t generalize a no-vacuum claim from one product family to another.
Do I need HVAC gauges?
Not automatically. If the manufacturer-designed homeowner installation does not call for gauges, don’t add refrigeration procedures simply because you have seen professionals use them. If the system requires conventional refrigeration commissioning, the job may have moved beyond the intended DIY procedure.
Do I need a torque wrench?
Follow the exact manual. Some connection systems specify particular tightening procedures or torque requirements. If the manufacturer specifies a torque tool, use the correct type and setting rather than tightening by feel.
What size hole saw do I need?
Check the manual for your exact indoor unit. MRCOOL’s current fifth-generation quick-start guide specifies approximately 3.54 inches for the equipment covered by that document, but that should not be treated as a universal mini-split dimension.
Should I buy a flaring tool and tubing cutter?
Not for a factory-prepared pre-charged DIY line set unless the manufacturer explicitly requires or permits those operations. Cutting or modifying a proprietary pre-charged line set can defeat the system’s intended installation method and potentially move the work into regulated refrigerant servicing.
Can I do the electrical work myself?
Electrical requirements depend on the equipment and jurisdiction. Even manufacturers of DIY equipment may recommend or require qualified electrical involvement; MRCOOL’s current guidance says electrical work should be handled by a licensed electrician or appropriately qualified person.
What’s the most important tool to have before starting?
It isn’t the drill or the hole saw. It’s the current installation manual for your exact model. That document determines the mounting procedure, hole requirements, line-set connection method, clearances, drainage arrangement, electrical specifications and commissioning steps that ultimately determine which physical tools you actually need.
Editorial Disclosure: The Furnace Outlet is not associated with, affiliated with, endorsed by, or sponsored by any manufacturer or company featured. We do not receive manufacturer compensation for inclusion or rankings. Equipment requirements and installation procedures vary by model, generation and jurisdiction, so always verify current manufacturer documentation and applicable local requirements before beginning an installation.
https://thefurnaceoutlet.com/best-diy-mini-split-systems-of-2026-no-hvac-technician-required/