Newsletter Subscribe
Enter your email address below and subscribe to our newsletter

HVAC made simple
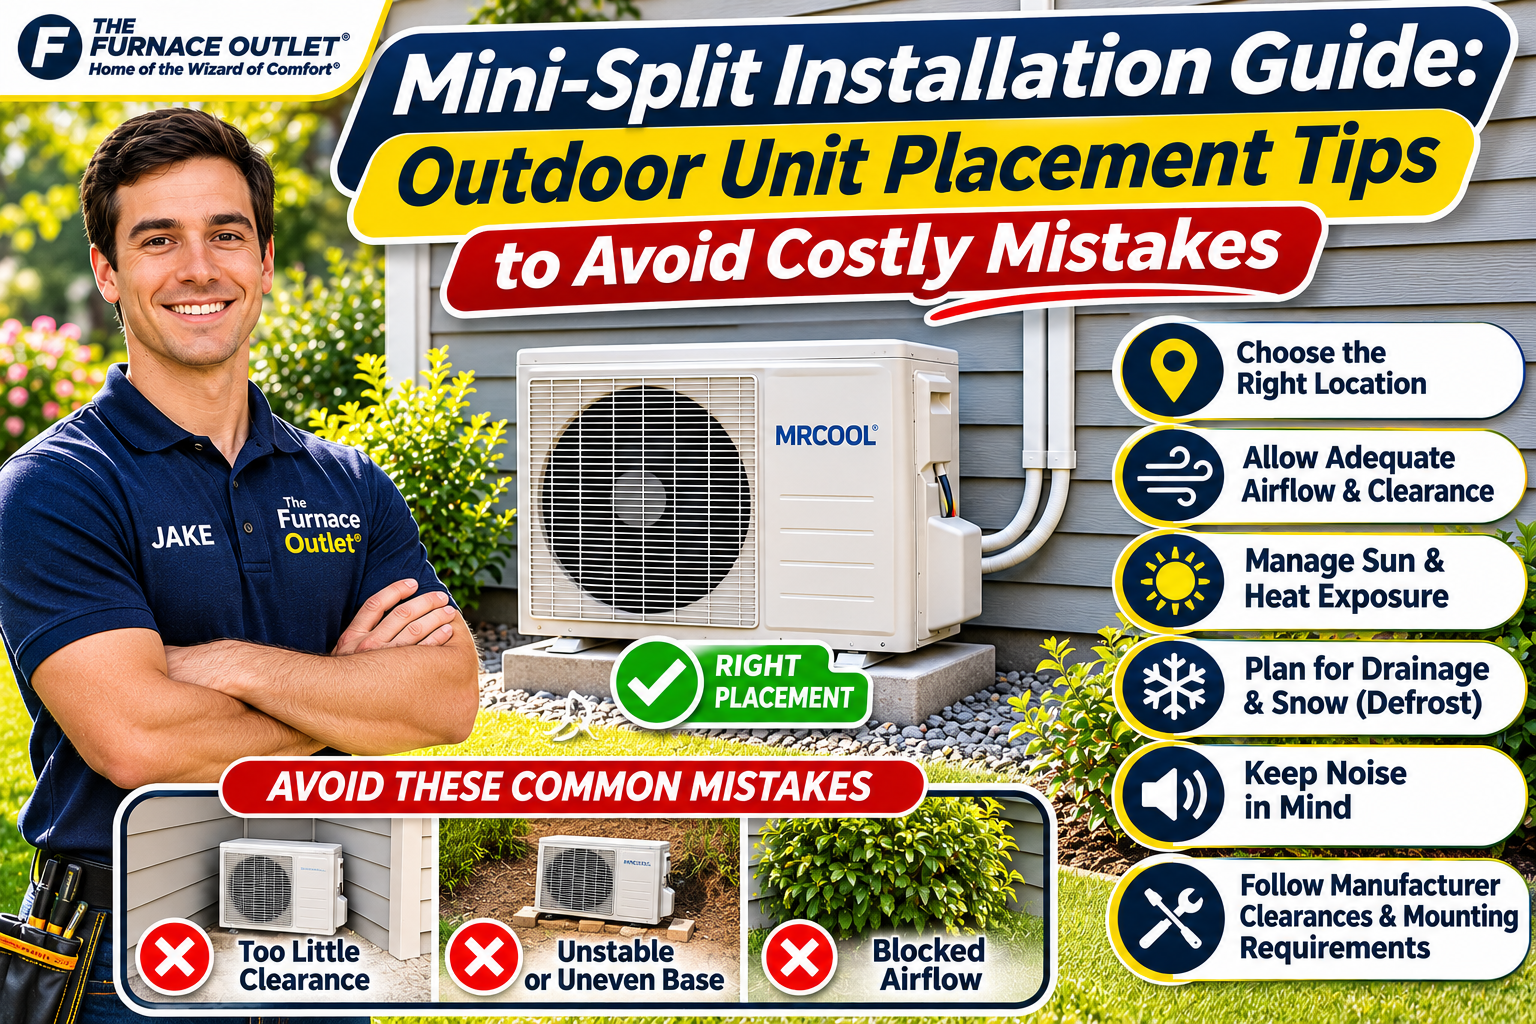
By Jake Lawson | HVAC Specialist | The Furnace Outlet | Updated November 2026
When homeowners plan a mini-split installation, most of their attention goes toward choosing the right brand, deciding where to mount the indoor air handler, and comparing equipment prices. The outdoor condenser often receives less consideration, even though its location can significantly affect efficiency, reliability, noise, maintenance, and long-term operating costs.
I’ve seen installations where excellent equipment struggled simply because the outdoor unit was placed in a poorly ventilated corner, mounted on an unstable surface, or positioned where water and snow could interfere with normal operation. These mistakes aren’t always obvious immediately. Sometimes the system works reasonably well during mild weather but begins experiencing problems during extreme summer heat or winter freezing conditions.
A mini-split outdoor unit needs more than a convenient spot beside the house. It requires adequate airflow, a stable mounting surface, proper drainage, sufficient service access, and protection from environmental conditions that could interfere with operation. For homeowners installing a new ductless system in 2026 or 2027, correct placement is especially important because modern inverter-driven heat pumps can operate across a wide range of outdoor temperatures. Their performance depends partly on their ability to exchange heat effectively with the surrounding air.
In this guide, I’ll explain where to position a mini-split condenser, how much clearance it needs, whether direct sunlight matters, why mounting height is important, and which common installation mistakes can become expensive later.
A mini-split system consists of an outdoor unit connected to one or more indoor air handlers through refrigerant piping and electrical connections. In cooling mode, the outdoor unit releases heat absorbed from inside the home. In heating mode, a heat-pump system reverses the refrigeration cycle and absorbs heat from outdoor air. The outdoor coil and fan are essential to this process. Air must move freely through the coil so that heat can be transferred efficiently.
When airflow becomes restricted, the equipment may need to work harder to maintain the requested indoor temperature. Depending on the conditions, this can increase energy consumption, reduce capacity, or trigger protective operating limits. Modern inverter systems can adjust compressor speed to match heating and cooling demand, but they cannot compensate indefinitely for poor installation conditions. That’s why outdoor placement should be considered part of the system design rather than a minor installation detail.
Clearance is one of the most important considerations when choosing an installation location. Unfortunately, there isn’t one universal clearance requirement that applies to every mini-split brand or model. Some manufacturers permit relatively compact installations, while others require greater distances around the air intake, discharge, and service panels. As a general planning principle, the unit needs unobstructed airflow through its intake and discharge openings, along with enough room for safe servicing.
For example, a manufacturer might require several inches of clearance on one side but considerably more space in front of the fan discharge. Other installations may require larger clearances when multiple units are installed together or when surrounding walls create airflow restrictions. These dimensions must come from the exact equipment installation manual, not a generic online diagram. The key concern is preventing discharged air from being pulled back into the condenser. This condition, called air recirculation, can reduce the temperature difference available for heat exchange and negatively affect performance.
A condenser installed inside a narrow enclosure, behind solid fencing, or beneath a low overhang may experience these problems even when it appears to have adequate space around its cabinet. Before approving the location, ask the installer to show you the manufacturer’s required clearances and explain how the proposed position satisfies them.
Many homeowners assume that a mini-split condenser must always be installed in the shade. The reality is more nuanced. Outdoor condensers are designed to operate in outdoor environments, including direct sunlight. However, intense solar exposure can increase the temperature of surrounding surfaces and potentially affect local air conditions. A shaded location may offer some benefits during hot weather, particularly when it reduces exposure to reflected heat from concrete, brick walls, or paved areas.
That doesn’t mean you should sacrifice ventilation to create shade. A unit placed under a tightly enclosed deck or surrounded by decorative screening may perform worse than one installed in open sunlight. If natural shade is available without restricting airflow or service access, it can be worth considering. Avoid installing the unit near dryer exhaust outlets, kitchen exhaust vents, or other sources of hot or contaminated air. These can introduce additional heat, moisture, grease, or debris into the condenser’s operating environment.
For most homes, I would prioritize airflow, accessibility, and a stable mounting location over shade alone.
Mini-split outdoor units can often be installed on a ground-supported pad or a manufacturer-approved wall bracket. Both methods can work well when properly designed. Ground mounting is common because it provides a relatively straightforward installation and allows easier access for maintenance. A properly prepared concrete or composite pad can support the equipment while keeping it above surrounding soil and vegetation. However, the pad must remain stable and level. Soft soil, inadequate drainage, or poor preparation can allow the equipment to settle or tilt over time.
Wall mounting can be useful where ground space is limited, flooding is a concern, or snow accumulation makes an elevated installation desirable. The main concern with wall mounting is vibration transfer. If the bracket is attached to a lightweight wall or inadequately supported framing, compressor and fan vibration may become noticeable inside the house.
Wall brackets must be rated for the equipment’s weight and installed using appropriate structural anchoring methods. I generally favor a stable ground-supported installation when conditions permit, but wall mounting can be an excellent solution when the building structure and mounting system are suitable.
The correct mounting height depends on climate, drainage conditions, snow accumulation, and manufacturer instructions. In warm climates without significant snowfall, the unit may be installed on an appropriately elevated pad or mounting stand that provides the required clearance above the surrounding surface. In colder regions, greater elevation may be necessary to prevent snow accumulation from blocking the outdoor coil or interfering with the fan.
Heat pumps also produce water during defrost cycles. When outdoor temperatures are below freezing, this water can accumulate as ice beneath the condenser. If the unit is positioned too close to the ground, ice buildup may eventually interfere with drainage or equipment operation. A raised stand can help provide space for defrost water to drain and reduce the risk of snow blocking the equipment. However, mounting height should never be selected from a generic recommendation alone. The installer should consider the manufacturer’s specifications, local snowfall patterns, and the conditions around the proposed installation site.
Drainage is frequently overlooked because homeowners associate condensate water with indoor cooling equipment. During heating operation, however, an outdoor heat-pump coil can accumulate frost. The system periodically enters defrost mode to remove that frost, producing water that must drain away. In freezing weather, that water can refreeze on nearby surfaces or beneath the outdoor unit.
Poor drainage can create slippery walkways, ice buildup around the equipment, and problems with the mounting area. Avoid positioning the condenser where defrost water will regularly discharge onto steps, sidewalks, driveways, or other pedestrian areas. The surrounding ground should direct water away from the building foundation and prevent prolonged pooling beneath the unit.
Some cold-climate installations may require additional drainage provisions or manufacturer-approved accessories. These decisions should be based on the equipment design and local climate. A properly planned drainage arrangement protects both the HVAC system and the surrounding property.
Mini-split systems are often quieter than conventional fixed-speed air conditioners, but outdoor units still produce sound. The compressor, condenser fan, and refrigerant flow can generate noise that changes as the equipment adjusts its operating capacity. A location directly outside a bedroom window may become distracting during nighttime operation, especially if the system is mounted to a wall that transmits vibration.
Sound can also reflect between nearby walls, fences, or narrow passageways, making the equipment seem louder than it would in an open area. Before choosing the location, consider the distance from bedrooms, outdoor seating areas, and neighboring properties. Review the manufacturer’s published sound ratings, but remember that laboratory measurements do not perfectly predict how equipment will sound in a particular yard or building arrangement.
For wall-mounted systems, vibration isolation and proper structural support are especially important. Choosing a slightly different location during installation can prevent years of unnecessary noise complaints.
Sometimes, but only when the installation meets the manufacturer’s clearance, airflow, and service requirements. An open, elevated deck may provide sufficient space around a condenser. A low deck with enclosed sides can create serious ventilation problems. The outdoor unit must be able to draw in surrounding air and discharge it without repeatedly circulating the same air.
A deck can also expose the condenser to water dripping from above, falling debris, and limited maintenance access. If the proposed location requires a technician to crawl into a confined space to inspect the equipment, the long-term service cost may outweigh any initial convenience. Before installing a condenser beneath a deck, verify the exact manufacturer’s requirements and have the installer evaluate airflow, access, drainage, and structural conditions.
When those requirements cannot be satisfied, choose another location.
Fences are often used to hide outdoor HVAC equipment, but they can create airflow restrictions when positioned too close to the condenser. A solid privacy fence may prevent warm discharge air from dispersing properly during cooling operation. Depending on the arrangement, that air can circulate back toward the intake coil. Decorative lattice and slatted screens may allow more airflow, but their suitability depends on the spacing, height, orientation, and equipment configuration.
The fact that a fence contains openings doesn’t automatically mean it provides adequate ventilation. Maintenance access is another concern. Technicians need sufficient working space to inspect electrical components, clean coils, and service refrigerant connections. If you want to conceal the outdoor unit, design the screening around the manufacturer’s clearance requirements rather than trying to fit the equipment into a predetermined enclosure.
Landscaping can improve the appearance of an outdoor installation, but plants should never interfere with airflow or maintenance. Shrubs, vines, tall grass, and seasonal vegetation can gradually grow into the condenser’s clearance area. Leaves, grass clippings, and other debris may also collect around the coil or fan guard, reducing airflow and increasing cleaning requirements.
Avoid placing the unit directly beside areas where lawn equipment regularly throws debris toward the condenser. In regions with heavy leaf fall, a location beneath large trees may require more frequent inspection and maintenance. Homeowners should periodically check that the outdoor unit remains unobstructed and remove loose debris from the surrounding area. Do not use pressure washers or aggressive cleaning methods on delicate condenser fins. Follow the manufacturer’s cleaning instructions or arrange professional maintenance when necessary.
The distance between indoor and outdoor equipment affects refrigerant piping, wiring, installation labor, and potentially system performance. Every mini-split model has specified limits for refrigerant line length and vertical separation. Multi-zone systems may also have separate limits for individual branches and total combined piping length.
Exceeding these limits can interfere with proper refrigerant circulation and may invalidate the manufacturer’s approved installation configuration. Longer refrigerant runs also require additional materials, protective line-set coverings, and installation labor. Some systems require refrigerant charge adjustments when piping lengths exceed a specified threshold.
For precharged DIY systems, the approved line-set configurations and connection procedures are especially important. I recommend selecting a location that balances practical indoor-unit placement with the shortest reasonable refrigerant routing, without compromising outdoor airflow or accessibility. The nearest location isn’t always the best location, but unnecessarily long piping routes can increase installation costs.
Outdoor mini-split condensers require appropriate electrical connections, overcurrent protection, grounding, and a disconnecting means as required by applicable electrical codes. The exact requirements depend on the equipment nameplate, manufacturer instructions, and local regulations. A location that appears convenient for refrigerant piping may be difficult or expensive to supply with the required electrical circuit.
Similarly, positioning the unit too close to a wall or obstruction can make it difficult for technicians to open service panels or access electrical components. These considerations should be addressed before the equipment is mounted. A qualified installer should evaluate the proposed location for electrical accessibility, safe servicing, and compliance with local requirements.
Homeowners should not attempt to modify outdoor electrical connections without the necessary qualifications.
Cold-climate heat pumps require additional attention because outdoor units may operate continuously during periods of low temperatures and heavy snowfall. Snow drifting against the condenser can block airflow. Ice accumulation beneath the equipment can interfere with drainage, while falling snow or ice from a roof may damage the cabinet or fan assembly. Avoid positioning the unit directly beneath roof edges where large amounts of snow or ice can fall.
In some locations, a manufacturer-approved snow hood or protective arrangement may be appropriate, provided it does not interfere with required airflow. The condenser should also remain accessible during winter so that technicians can inspect it without having to remove excessive snow or navigate hazardous conditions. If the equipment is intended to provide primary heating, winter placement deserves just as much attention as summer cooling performance.
One of the most expensive mistakes is selecting a location based entirely on appearance. Homeowners may want the condenser hidden behind a fence or in a narrow side yard, only to discover later that the equipment cannot maintain adequate airflow. Another common problem is installing the unit on an unstable base. Settling or movement can strain refrigerant connections, increase vibration, and create drainage problems.
Insufficient service clearance can also increase maintenance costs because technicians may need additional labor or temporary equipment removal to access components. In cold climates, placing the condenser too low can create repeated snow and ice problems. Long, complicated refrigerant piping routes may increase installation expenses and make future leak detection more difficult.
These mistakes are often avoidable when the outdoor location is planned before equipment is purchased and installation work begins.
Before approving the final condenser location, confirm that the installer has reviewed the exact equipment manual and verified the required airflow clearances. The mounting surface should be stable, level, and capable of supporting the equipment. The location should provide adequate drainage, minimize unnecessary noise exposure, and allow safe maintenance access. Check that the proposed refrigerant piping route falls within manufacturer limits and that electrical connections can be installed in compliance with applicable requirements.
For heat pumps operating in cold climates, evaluate snow accumulation, defrost drainage, and exposure to falling ice. If the installation includes multiple outdoor units, additional spacing and airflow considerations may apply. A few minutes spent reviewing these details before installation can prevent substantial inconvenience and expense later.
Can a mini-split outdoor unit be installed in direct sunlight? Yes. Outdoor condensers are designed for outdoor operation, and direct sunlight is generally acceptable when the installation meets manufacturer requirements. Adequate airflow and clearance are more important than shade alone.
How far should a mini-split condenser be from the wall? The required distance varies by manufacturer and model. Follow the exact installation manual, which may specify different clearances for the rear, sides, front discharge, and service areas.
Can I put my mini-split condenser on the roof? Some equipment can be installed on suitable roof-mounted supports, but the installation must satisfy structural, vibration, drainage, wind-resistance, service-access, and manufacturer requirements. Roof mounting should be professionally evaluated.
Is wall mounting better than ground mounting? Neither is universally better. Ground mounting can provide stable support and easier access, while wall mounting may be useful in areas with limited space, flooding, or heavy snowfall. Proper structural support and vibration control are essential.
Can I hide my outdoor mini-split unit behind a decorative fence? Possibly, provided the fence does not restrict required airflow or service access. Solid or closely spaced screening can create recirculation problems, so the arrangement should be evaluated against manufacturer instructions.
Does outdoor condenser placement affect electricity bills? It can. Restricted airflow and excessive air recirculation can reduce heat-exchange performance and may increase energy consumption. Actual operating-cost effects depend on the equipment and installation conditions.
When homeowners ask me where to place a mini-split condenser, I always start with three questions: Can the equipment breathe properly? Can water drain safely? Can a technician reach it when something needs servicing? Those questions are more important than whether the unit looks better behind a fence or fits neatly into a narrow corner. For a 2026–2027 installation, I recommend reviewing the exact manufacturer clearance diagram, confirming the mounting structure, planning the refrigerant line route, and considering seasonal conditions before finalizing the location.
If you’re installing a heat pump in a snowy region, pay particular attention to elevation and defrost drainage. If you’re installing in a hot climate, prioritize unrestricted airflow and avoid enclosed areas where discharged heat can accumulate. A properly located outdoor unit may not attract much attention once the installation is complete, and that’s exactly the point. Good placement helps the equipment operate efficiently, reduces avoidable maintenance problems, and supports reliable home comfort for years to come.
U.S. Department of Energy — Ductless Mini-Split Heat Pumps: https://www.energystar.gov/products/ductless_heating_cooling
Explains how ductless mini-split systems operate, their efficiency benefits, and important installation considerations.
U.S. Department of Energy — Air-Source Heat Pumps: https://www.energystar.gov/products/air_source_heat_pumps
Provides information about outdoor heat-pump operation, heating and cooling performance, and cold-weather considerations.
ENERGY STAR — Air-Source Heat Pumps: https://www.energystar.gov/products/air_source_heat_pumps
Offers homeowner guidance on efficient heat pumps, equipment selection, and professional installation.
Mitsubishi Electric Trane HVAC US — Installation and Service Resources: https://www.mitsubishicomfort.com/
Provides access to manufacturer equipment information and resources for proper installation and maintenance. Consult the documentation for the exact model.
Daikin — Residential Mini-Split Systems: https://daikincomfort.com/
Provides manufacturer product information and access to equipment documentation. Exact outdoor clearances and mounting requirements must be verified in the relevant installation manual.
This article is intended for general educational purposes and does not replace manufacturer installation instructions, local building codes, or professional HVAC design. Required clearances, mounting methods, refrigerant piping limits, electrical specifications, and cold-weather installation provisions vary by equipment model. Refrigerant handling, electrical connections, structural mounting, and commissioning should be performed by appropriately qualified professionals in accordance with applicable laws and manufacturer requirements.