When a furnace is installed correctly, you barely hear it. The airflow is smooth, the cabinet is quiet, and the home feels comfortable without calling attention to the equipment.
But when a furnace is installed incorrectly, you hear everything:
-
cabinet hum
-
wall resonance
-
floor vibration
-
blower buzz
-
duct “boom”
-
heat strip rattle
-
the infamous “morning roar” when the unit first fires up
And here’s the thing:
90% of HVAC noise problems have nothing to do with the blower or the duct — they come from vibration transfer.
Goodman 68,240 BTU 20 kW Electric Furnace with 2,000 CFM Airflow - MBVK20DP1X00, HKTAD201
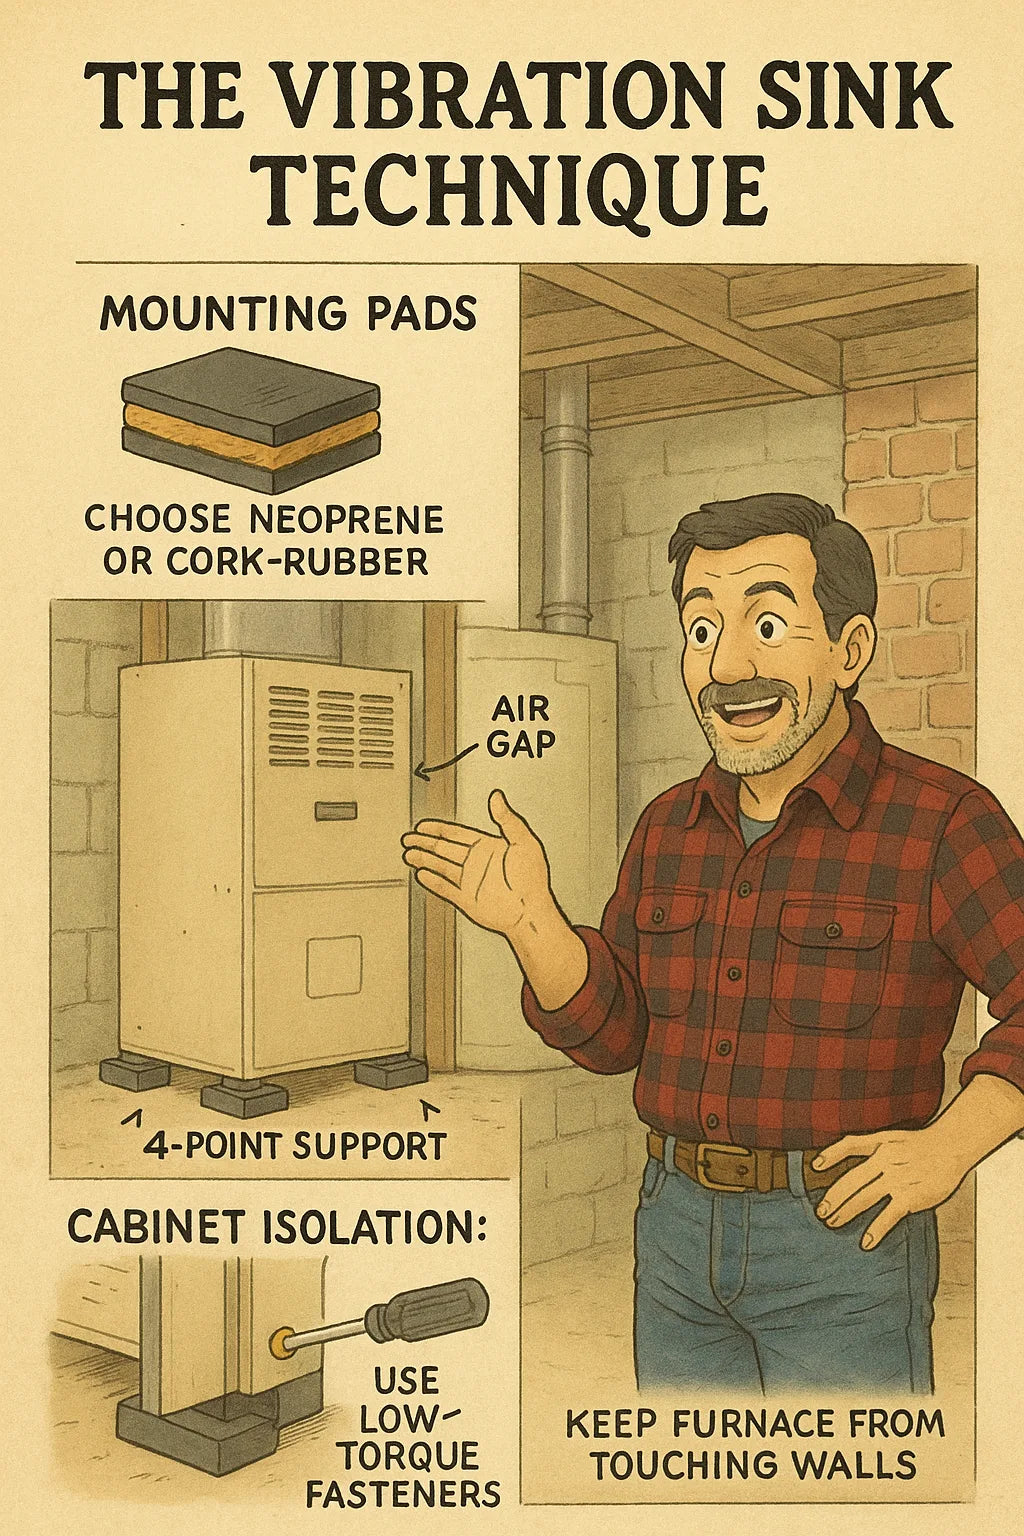
This article introduces The Vibration Sink Technique, Mike’s three-part strategy for eliminating furnace vibration at the source by controlling:
-
Mounting Pads
-
Wall-Break Structures
-
Cabinet Isolation Geometry
If you want a whisper-quiet furnace, this is the system that gets you there.
🔍 1. Why Furnaces Vibrate — And Why Homeowners Hear It
Electric furnaces — especially high-CFM models like the Goodman MBVK20DP1X00 — move a tremendous amount of air. Even a perfectly balanced blower creates small vibrations. The danger isn’t the vibration itself.
The real problem is structural transfer.
When vibration travels into:
-
wall studs
-
floor joists
-
drywall
-
subfloor decking
-
metal duct supports
…it amplifies like sound waves in a guitar body.
A tiny internal vibration becomes a loud external noise.
Mike’s Rule:
Vibration doesn’t need to be eliminated — it needs to be redirected into a sink where it dies quietly.
That’s what this technique is all about.
🧱 2. Mike’s Three-Stage Vibration Sink System
Every furnace installation needs all three:
1. Mounting Pads – absorb and diffuse point-source vibration
2. Wall-Breaks – block vibration from entering structural members
3. Cabinet Isolation – prevent resonance inside the metal housing
When these three are paired correctly, the furnace becomes nearly silent.
🧰 3. The Mounting Pad Formula: Material, Density & Compression
Mounting pads are the first line of defense.
But store-bought rubber squares aren’t enough.
You must use pads engineered to match the weight and vibration profile of the furnace.
🟧 Step 1: Choose the Right Material
Here are the only materials I recommend:
Neoprene (40–60 durometer)
Best for general furnace vibration.
Cork-Neoprene Laminates
Best for mixed-frequency vibration (blower + heat strip hum).
Sorbothane
Premium option — unmatched damping, rarely needed but incredible.
Verified Reference for Vibration-Isolating Materials:
ASHRAE HVAC Applications Handbook
https://www.ashrae.org
🟫 Step 2: Determine Pad Density
Pads compress over time. Too soft → bottoms out. Too firm → transmits vibration.
Rule of thumb:
Pad should compress 10–15% under furnace weight.
Example: A 140-lb electric furnace should sit on pads designed for ~15 lbs/sq in.
🟦 Step 3: Pad Layout (Mike’s 4-Point Distribution)
Never place pads in a straight line.
Instead use:
-
Four corner pads
-
Optional: center pad for long furnaces
This prevents cabinet torque that amplifies noise.
🧱 4. The Wall-Break Strategy: How to Block Structure-Borne Vibration
A wall-break is any method that prevents vibration from entering studs, drywall, or joists.
Most noisy furnace rooms have one of these sins:
❌ furnace mounted directly to a wall
❌ metal plenum touching the studs
❌ return box screwed to shared walls
❌ platform bolted into joist cavities
A wall-break stops all that.
🧱 Wall-Break Technique #1: The Floating Platform
Instead of anchoring the furnace directly to framing:
-
Build a platform on rubber isolation feet
-
Use double-layer ¾” plywood with Green Glue
-
Never tie platform to wall studs
This creates a dead zone where vibration cannot transfer.
🧱 Wall-Break Technique #2: The 1" Air Gap Rule
Furnace cabinets and plenums must maintain a 1-inch minimum gap from:
-
studs
-
walls
-
drywall
-
water lines
Air is the best vibration insulator.
🧱 Wall-Break Technique #3: Flexible Connection to Ductwork
Rigid duct transitions cause vibration transfer.
Use:
-
insulated flex collars
-
vibration-isolation connectors
-
double-shear hanger supports
Valid duct isolation guidance appears in SMACNA manuals:
https://www.smacna.org
📦 5. Cabinet Isolation Tricks: Controlling Resonance Inside the Furnace
Even a perfectly mounted furnace can resonate internally.
The cabinet acts like a drum unless you tune it.
Here’s how I do that.
🎛️ Isolation Trick #1: Panel Decoupling
This technique quiets 70% of hums.
Use:
-
neoprene washer
-
oversized screw holes
-
low-torque fasteners
This allows panels to vibrate independently instead of transferring noise across the housing.
🔩 Isolation Trick #2: The Mass-Loading Patch
Add a 1–3 lb mass to the inside of a resonating panel.
Options:
-
roofing membrane squares
-
automotive sound deadener
-
mass-loaded vinyl
Heavier panels vibrate less.
🪛 Isolation Trick #3: Cross-Bracing the Weak Wall
If the blower side panel drums:
-
Add L-bracket support
-
Use short self-tapping screws
-
Pair with neoprene backing washers
This strengthens the panel without increasing vibration transmission.
🧊 Isolation Trick #4: Return Box Stabilization
Return plenums often “oil can” (pop inward) due to negative pressure.
Fix it by:
-
adding perimeter reinforcement
-
installing a return wall stiffener
-
reducing static pressure
See ACCA Manual D for static pressure guidelines:
https://www.acca.org
🎚️ 6. Frequency Matching: The Key to Stopping Blower Hum
Blower motors operate across multiple RPM bands.
Each RPM band has a “natural frequency.”
If this matches the cabinet’s frequency, the furnace hums.
Mike’s Frequency Matching Process:
-
Run blower at each speed tap
-
Listen for resonance peaks
-
Apply targeted damping to those panels
-
Verify with vibration meter (optional)
This is how you tune a furnace like a musical instrument.
🎤 7. The Return-Air Trap: Why Return Geometry Creates Noise
Most noise complaints come from the return air side.
Common mistakes:
-
undersized return
-
return box touching framing
-
filter door sucking shut
-
plenum rotation creating turbulence
The cure is simple:
✔️ Isolate the return box from structural members
✔️ Add mass to the return wall
✔️ Use long-radius turns instead of sharp elbows
✔️ Seal filter doors and add padding to latches
DOE’s airflow management guidelines support these design principles:
https://www.energy.gov/energysaver/energy-saver
📐 8. Mike’s 7-Point Vibration Sink Checklist
Before I leave any installation, I run through this checklist:
1. Furnace sits on four or five isolation pads
Pads matched to weight and durometer.
2. Furnace platform is floating — not anchored to framing
Platform must break vibration paths.
3. No cabinet surface touches a wall or stud
Maintain 1" clearance.
4. Plenum and return transitions use flex connectors
Rigid-to-rigid equals noise transfer.
5. Resonant cabinet panels mass-loaded or braced
Silence the drum effect.
6. Return-air geometry tuned for smooth flow
No sharp elbows, no undersized grilles.
7. System tested across all blower speeds
High, medium, low — no speed should resonate.
🎧 9. The Vibration Sink Technique in the Real World: What Homeowners Report
After applying this method, homeowners consistently tell me:
-
“The furnace sounds expensive now.”
-
“The low-speed hum disappeared.”
-
“I don’t hear the blower anymore.”
-
“My walls don’t shake when emergency heat kicks in.”
-
“It’s quieter than my old gas furnace.”
Quiet is comfort.
Comfort is quality.
Quality is what keeps systems efficient and homeowners happy.
🧩 10. Troubleshooting Noise: Mike’s Diagnostic Table
If a homeowner calls about noise, here’s where I start.
| Symptom | Likely Cause | Fix |
|---|---|---|
| Low-frequency hum | cabinet resonance | mass-load + decouple |
| “Boom” when turning on | platform touching framing | wall-break correction |
| Rattle near blower | unbalanced torque on panel screws | torque isolation |
| Vibration in vents | rigid duct transition | flex connector |
| High-pitch whistle | return door gap | seal and pad filter door |
| Drumming sound | thin sidewall | L-bracket brace + neoprene backing |
If the noise persists, you haven’t broken the vibration path completely.
🎉 Conclusion: Silence Isn’t Accidental — It’s Engineered
Electric furnaces don’t have burners, combustion, or flue noise — so they should be the quietest systems in the home.
When you apply the Vibration Sink Technique:
✔️ vibration stays in the furnace
✔️ nothing transfers into walls
✔️ no resonance rings through the duct system
✔️ blower sounds disappear
✔️ installation looks and feels premium
Noise isn’t an unavoidable side effect.
It’s a design flaw — one you can eliminate with the right tools, spacing, and geometry.
Follow these rules and you’ll deliver whisper-quiet comfort, every time.
Buy this on Amazon at: https://amzn.to/4nvQIts
In the next topic we will know more about: The Condensate-Free Furnace Room: Mike’s Moisture-Control Prep That Protects Electric Elements


