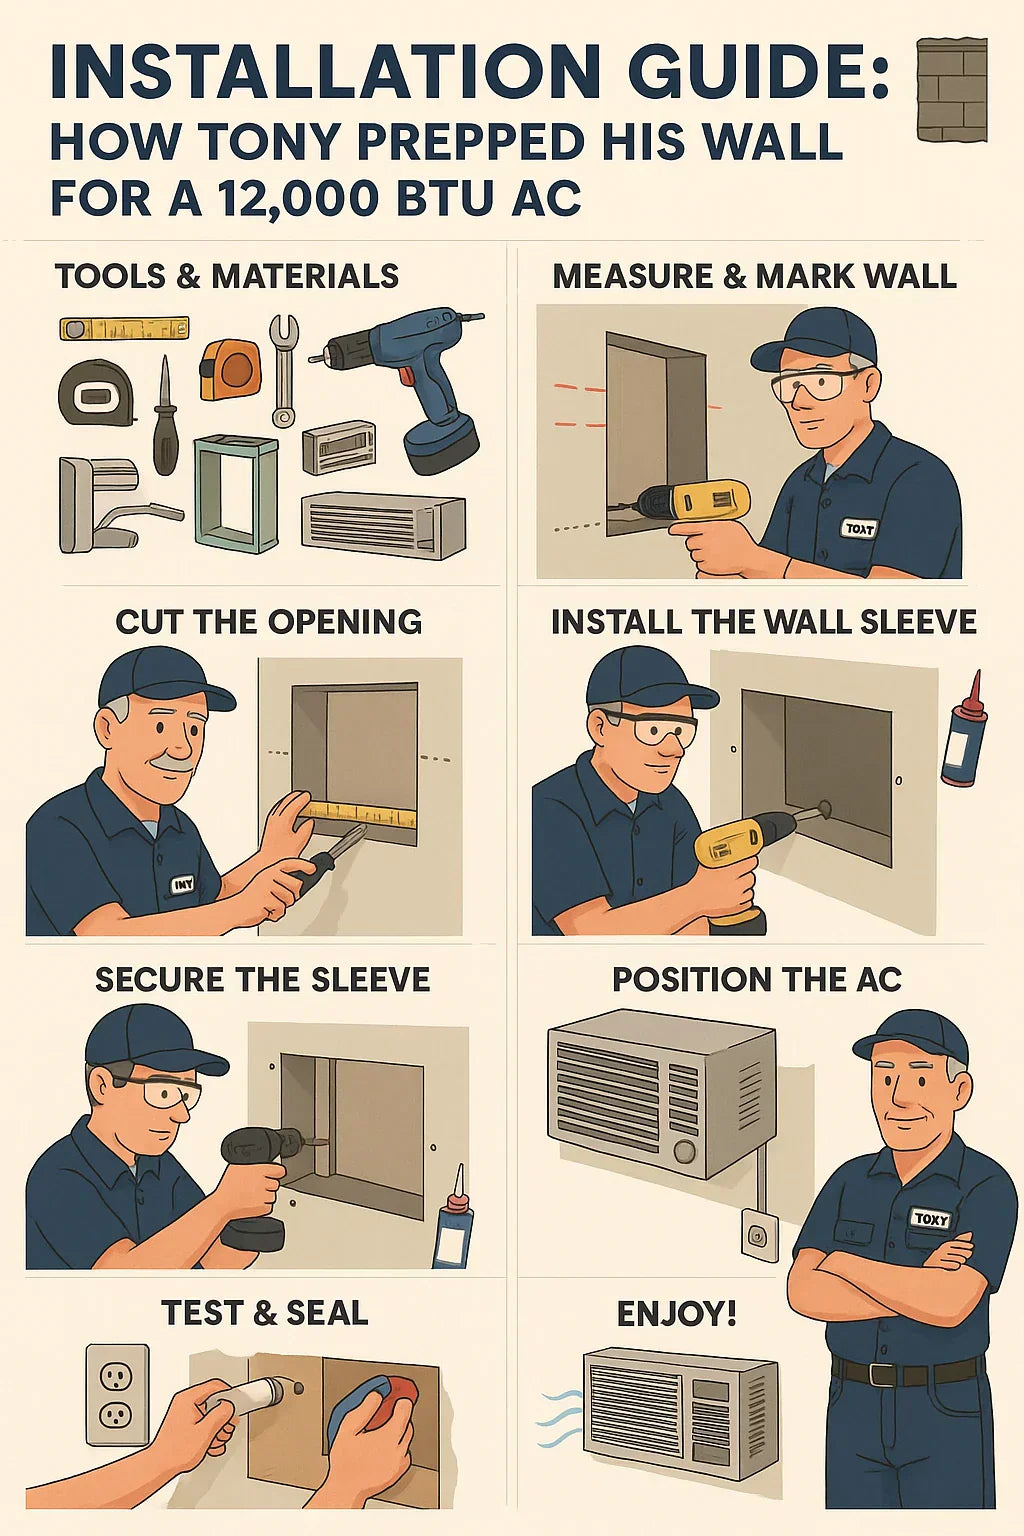
By Tony Marino — A DIY homeowner who wanted a quieter, more efficient cooling system for his family room.
📘 Introduction
For years, I wrestled with a heavy window AC unit every summer. It was noisy, blocked our favorite view, and let warm air sneak through the gaps around it. I finally decided to switch to a 12,000 BTU through‑the‑wall air conditioner — a permanent, efficient solution.
In this guide, I’ll walk you through the exact steps I took to prep and install my wall for a 12,000 BTU AC, so you can decide if DIY or hiring a pro is right for you.
👉 According to Energy Star, properly installed through‑the‑wall ACs can cut energy use by up to 30% compared to poorly sealed window units.
🧰 1. Tools & Materials Checklist
Before touching the wall, gather the right equipment:
🛠️ Essential Tools
-
Tape measure & pencil
-
Level & stud finder
-
Power drill with masonry bits (if brick wall)
-
Jigsaw or reciprocating saw
-
Screwdrivers & socket wrench set
-
Safety glasses, gloves & dust mask
🧱 Materials Needed
-
Wall sleeve sized for 12,000 BTU unit
-
Insulation foam board
-
Weatherproof caulk
-
Exterior screws & brackets
-
Electrical outlet cover (if upgrading wiring)
👉 For a full checklist, see AC Installation Tools.
📏 2. Choosing the Right Wall Location
Location is everything. I chose a south‑facing wall close to an outlet but away from direct sunlight.
✅ Key Considerations
-
Clearance: Leave at least 6–8 inches above and around the unit for airflow.
-
Studs & Wiring: Use a stud finder to avoid cutting into studs, plumbing, or electrical lines.
-
Outdoor Clearance: Ensure the back of the unit will vent freely outside.
-
Height: Position so the cold air flows evenly — not directly at your seating area.
👉 The U.S. Department of Energy recommends avoiding locations near heat sources like lamps, TVs, or ovens.
🧱 3. Marking & Preparing the Wall Opening
Once I picked the wall, I measured the manufacturer’s cutout dimensions (slightly larger than the AC itself, to fit the sleeve).
🪚 Steps I Followed
-
Mark the opening outline with a pencil and level.
-
Drill pilot holes in each corner for the saw blade.
-
Carefully cut along the lines with a jigsaw.
-
Remove drywall and insulation, checking again for hidden wires.
-
Clean the edges and vacuum dust.
🔩 4. Installing the Wall Sleeve
The wall sleeve is the foundation of the installation. It supports the AC and seals the wall against leaks.
🧱 My Process
-
Slid the sleeve into the opening, ensuring it was perfectly level.
-
Screwed it into surrounding studs using exterior‑grade fasteners.
-
Packed any side gaps with rigid foam insulation.
-
Applied weatherproof caulk around the outdoor edges.
👉 The Furnace Outlet’s Wall Sleeve Guide explains why sleeves are crucial for durability and energy efficiency.
⚡ 5. Electrical Setup & Safety
A 12,000 BTU AC typically requires a dedicated 115V or 230V outlet.
⚠️ My Safety Checklist
-
Verified outlet matched the unit’s voltage (mine was 115V).
-
Confirmed breaker could handle the load (15–20 amps).
-
Used a heavy‑duty outlet cover for moisture protection.
-
Hired a licensed electrician for the circuit check — worth every penny for peace of mind.
👉 The DOE Electrical Safety Guide stresses that AC units pulling more than 12 amps should have a dedicated circuit.
📦 6. Positioning & Securing the AC Unit
The fun part was sliding in the new unit.
📌 Steps
-
Removed the front grille of the AC.
-
With a friend’s help, slid the unit into the sleeve until flush with the interior wall.
-
Ensured the rear projected outdoors for proper drainage.
-
Secured using brackets included by the manufacturer.
-
Reinstalled the grille and cleaned fingerprints.
👉 Consumer Reports notes that improper leveling is the #1 cause of water leaks in wall ACs.
🌬️ 7. Testing & Final Adjustments
Before calling it done, I ran a few tests:
-
Power test: Flipped breaker, plugged in, and powered unit on.
-
Airflow check: Adjusted louvers to distribute air evenly.
-
Seal inspection: Felt for air leaks around the sleeve.
-
Condensation drain: Verified water was flowing outdoors.
🧼 8. Clean‑Up & Seasonal Safety Tips
-
Sealed all indoor trim gaps with caulk for a clean look.
-
Stored leftover insulation for future use.
-
Marked the breaker box with “AC” for quick identification.
-
Scheduled filter cleaning every 30 days.
👉 Seasonal care tips are available at The Furnace Outlet Maintenance Hub.
🧠 9. When to Call a Pro Instead of DIY
Even though I love DIY projects, some jobs aren’t worth the risk.
Call a Pro If:
-
Your exterior wall is brick or masonry.
-
You need a new 230V circuit installed.
-
The wall is load‑bearing and requires reinforcement.
-
You’re uncomfortable handling power tools safely.
👉 According to HVAC.com, professional installation may cost $200–$500 but ensures a safe, warranty‑compliant job.
⭐ 10. Tony’s Final Advice
“Prepping the wall took time, but the payoff was huge. The 12,000 BTU through‑the‑wall AC cools my family room quietly and efficiently, and I’ll never wrestle a window unit again.”
Quick Takeaway:
-
If you’re a confident DIYer with the right tools, you can handle the prep and sleeve install.
-
Always consult an electrician for the power side.
-
Long‑term comfort and energy savings make it worth the effort.
👉 Ready to find the right unit? Check the Through‑the‑Wall AC Collection (10,000–12,000 BTUs).
In the next topic we will know more about: Wall Sleeve 101: Choosing the Right Fit for Your 10k–12k BTU AC


