By Tony Marino — DIY homeowner and HVAC enthusiast who learned the hard way why the right wall sleeve makes all the difference.
📘 Introduction
A few summers ago, I installed a 12,000 BTU through‑the‑wall AC without paying much attention to the wall sleeve. Big mistake. The unit leaked cold air around the edges, made more noise than expected, and even let in a few insects.
That experience taught me a valuable lesson: the wall sleeve is just as important as the AC unit itself. In this guide, I’ll break down everything you need to know about sleeves for 10,000–12,000 BTU ACs, so you can avoid the headaches I faced and get the comfort and efficiency you’re paying for.
👉 According to Energy Star, improper installation is one of the leading causes of high energy bills in homes with through‑the‑wall ACs.
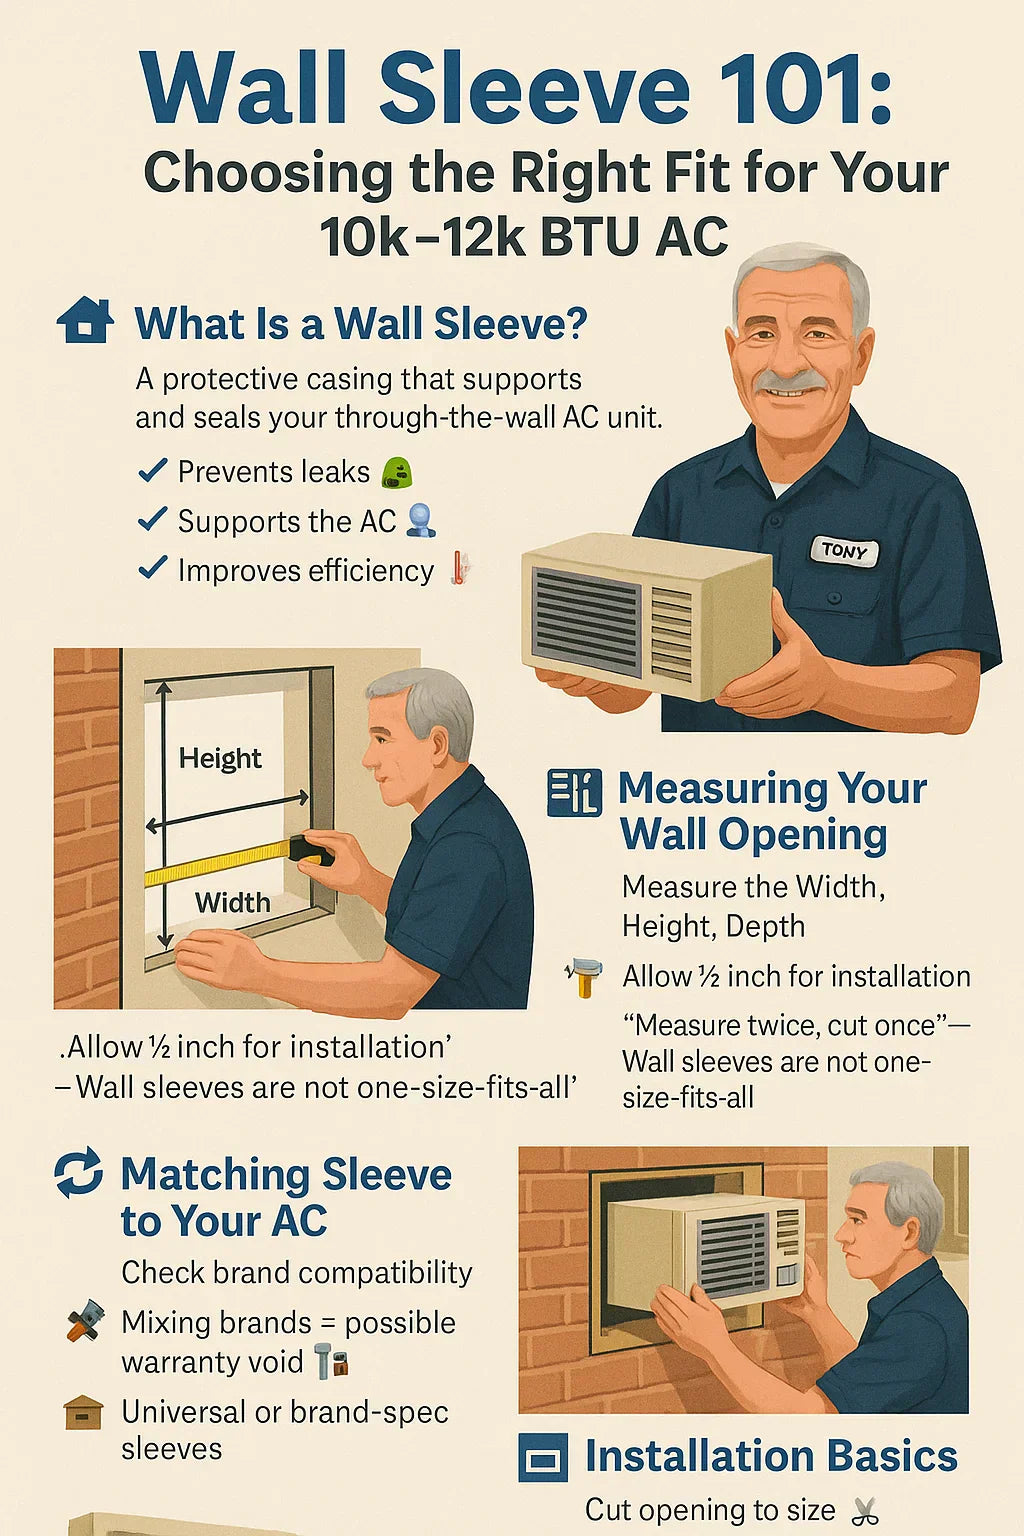
🏠 1. What Is a Wall Sleeve (and Why Do You Need One)?
A wall sleeve is the metal or composite casing that holds your through‑the‑wall AC in place. Think of it as a custom frame that:
-
Supports the weight of the unit
-
Seals the wall opening against drafts, moisture, and pests
-
Improves efficiency by preventing air leaks
-
Protects the AC from weather damage
Without a sleeve, your AC is like a window left cracked open all summer. Not only do you lose cooled air, but you also risk water damage and a shorter unit lifespan.
📏 2. Standard Sleeve Sizes for 10k–12k BTU Units
Through‑the‑wall ACs aren’t one‑size‑fits‑all. Most 10,000–12,000 BTU models fit into sleeves that measure:
-
Width: ~24.5 inches
-
Height: ~15.5 inches
-
Depth: 20 to 20.5 inches
Tony’s Tip: Always check the manufacturer’s spec sheet. Even a ½‑inch difference can make installation a nightmare.
👉 AC Sleeve Buying Guide provides size charts for popular brands.
🧾 3. Measuring Your Wall Opening
Before you order a sleeve, measure your wall carefully:
✅ Steps to Measure
-
Width & Height: Use a tape measure inside the framing studs.
-
Depth: Measure from interior drywall to exterior siding.
-
Level Check: Use a level to confirm your opening isn’t slanted.
-
Clearance: Allow a small gap (about ½ inch) for adjustments.
Tony’s Golden Rule:
“Measure twice, cut once. Re‑cutting a wall opening is no one’s idea of a fun Saturday.”
🔄 4. Compatibility: Matching Sleeves to Your AC
Not every sleeve works with every unit. Some are brand‑specific, while others are universal.
🛠️ Factors to Consider
-
Manufacturer’s Requirements: Many warranties require you to use their specific sleeve.
-
Universal Sleeves: Can work across multiple brands but may require additional insulation.
-
Depth Compatibility: Ensure the sleeve doesn’t protrude too far or sit flush without ventilation.
👉 Consumer Reports notes that mismatched sleeves are a leading cause of poor AC efficiency.
🧱 5. Installation Basics: What to Expect
Installing a sleeve is a straightforward but precise job.
🔨 Tools You’ll Need
-
Stud finder & level
-
Power saw & drill
-
Caulk gun
-
Foam insulation
📌 My Step‑by‑Step
-
Mark sleeve outline on the wall.
-
Cut the opening using a jigsaw.
-
Slide the sleeve into place.
-
Check for level and square.
-
Insulate around edges.
-
Caulk exterior edges for weatherproofing.
⚙️ 6. Insulation & Weatherproofing Tips
This is where most homeowners (including me, the first time) make mistakes.
-
Use rigid foam board around sleeve edges for maximum efficiency.
-
Apply outdoor‑grade caulk to seal the exterior.
-
Ensure the sleeve is sloped slightly downward outdoors (about ¼ inch) for drainage.
-
Double‑check seals after 24 hours.
👉 The Furnace Outlet’s Wall Sleeve Guide highlights how poor sealing leads to condensation issues.
💰 7. Cost Breakdown: Sleeves & Installation
🏷️ Typical Costs
-
Wall Sleeve: $80–$200
-
DIY Installation: ~$50–$100 for tools & supplies
-
Professional Install: $200–$500 labor
Long‑Term Savings:
A properly sealed sleeve can reduce your AC’s energy consumption by 15–25%, paying back the installation cost within a couple of summers.
🔇 8. Noise & Comfort Benefits of a Proper Sleeve
A good sleeve doesn’t just save energy — it improves comfort:
-
Noise Reduction: Prevents vibration from traveling through the wall.
-
Temperature Control: Keeps cooled air inside and hot air outside.
-
Moisture Protection: Prevents indoor humidity from creeping in.
Tony’s Experience:
“My first wall AC without a sleeve sounded like a freight train. With the right sleeve, I barely notice it’s running.”
🧠 9. Common Mistakes to Avoid
-
Wrong Depth: If the sleeve is too shallow, the unit won’t vent properly.
-
Skipping Sealant: Leads to leaks, insects, and water damage.
-
Mixing Brands: Using a sleeve not approved by your AC brand may void the warranty.
-
Forgetting Drainage Slope: Can cause water to back up inside your wall.
👉 According to Energy Star, these small mistakes account for a large share of premature AC failures.
⭐ 10. Tony’s Final Advice
After learning the hard way, I’ll never skip proper sleeve prep again.
“The right sleeve doesn’t just hold the AC — it protects your home, saves money, and makes your summers quieter and more comfortable.”
Quick Checklist:
-
✅ Measure your wall carefully
-
✅ Match the sleeve to your unit’s brand
-
✅ Insulate and caulk thoroughly
-
✅ Double‑check slope for drainage
👉 Explore Through‑the‑Wall AC Units – 10,000–12,000 BTUs and find sleeves designed for your model.
In the next topic we will know more about: Best Brands Compared: LG vs. GE vs. Friedrich in the 10k–12k BTU Range


