When I first decided to upgrade my HVAC system, I assumed the hard part would be choosing the brand and size. But once I settled on the Goodman 4.5 Ton Horizontal Cased Painted A-Coil with Built-In TXV (Model CHPTA6030D3, R-32 Ready), I realized I still had a big question:
👉 Would a horizontal coil actually fit in my home’s attic?
If you’ve ever wondered whether a horizontal A-coil is right for your setup, you’re not alone. I’ll share what I learned about space requirements, noise levels, drainage, and overall design compatibility so you can make the right choice for your home.
📐 Space Requirements: Will It Fit?
One of my biggest concerns was whether the coil would fit through my attic access hatch and into the tight utility space. Here’s what I learned:
-
Typical Dimensions (Goodman CHPTA6030D3): About 25–30 inches wide, 22–24 inches tall, and 45–50 inches long (varies by tonnage).
-
Clearance Needed: At least 24 inches of clearance on the service panel side for maintenance.
-
Access: Measure your attic stairs or hatch! Mine was only 27 inches wide, so I had to verify the coil dimensions carefully.
👉 Horizontal coils are designed for attics and crawlspaces—places where vertical coils simply won’t fit.
🔗 The DOE’s Central Air Guide reminds homeowners to consider installation space before purchasing HVAC components.
🔊 Noise Considerations
I’ll admit: I was worried that putting a large coil in my attic would make my home noisier. Thankfully, horizontal coils often run quieter than vertical ones.
Here’s why:
-
Airflow Direction: Horizontal coils push air sideways, which can reduce turbulence noise compared to vertical setups.
-
Location: Since mine is in the attic, I don’t hear it at all inside the living space.
-
Duct Insulation: Adding duct wrap reduced vibration and airflow noise even further.
👉 The loudest part of my system is still the outdoor condenser, not the coil. Indoors, the horizontal setup is practically silent.
🏠 Design Compatibility
The Goodman horizontal cased coil integrates seamlessly with my system.
-
Air Handlers/Furnaces: The coil sits in a painted steel case that connects directly to the ductwork and blower.
-
Drainage: Built-in primary and secondary drain pans ensure water flows properly even when mounted sideways.
-
Service Panels: Removable side panels give easy access for cleaning and inspections.
👉 The painted casing also helps with durability, which matters in humid attic spaces.
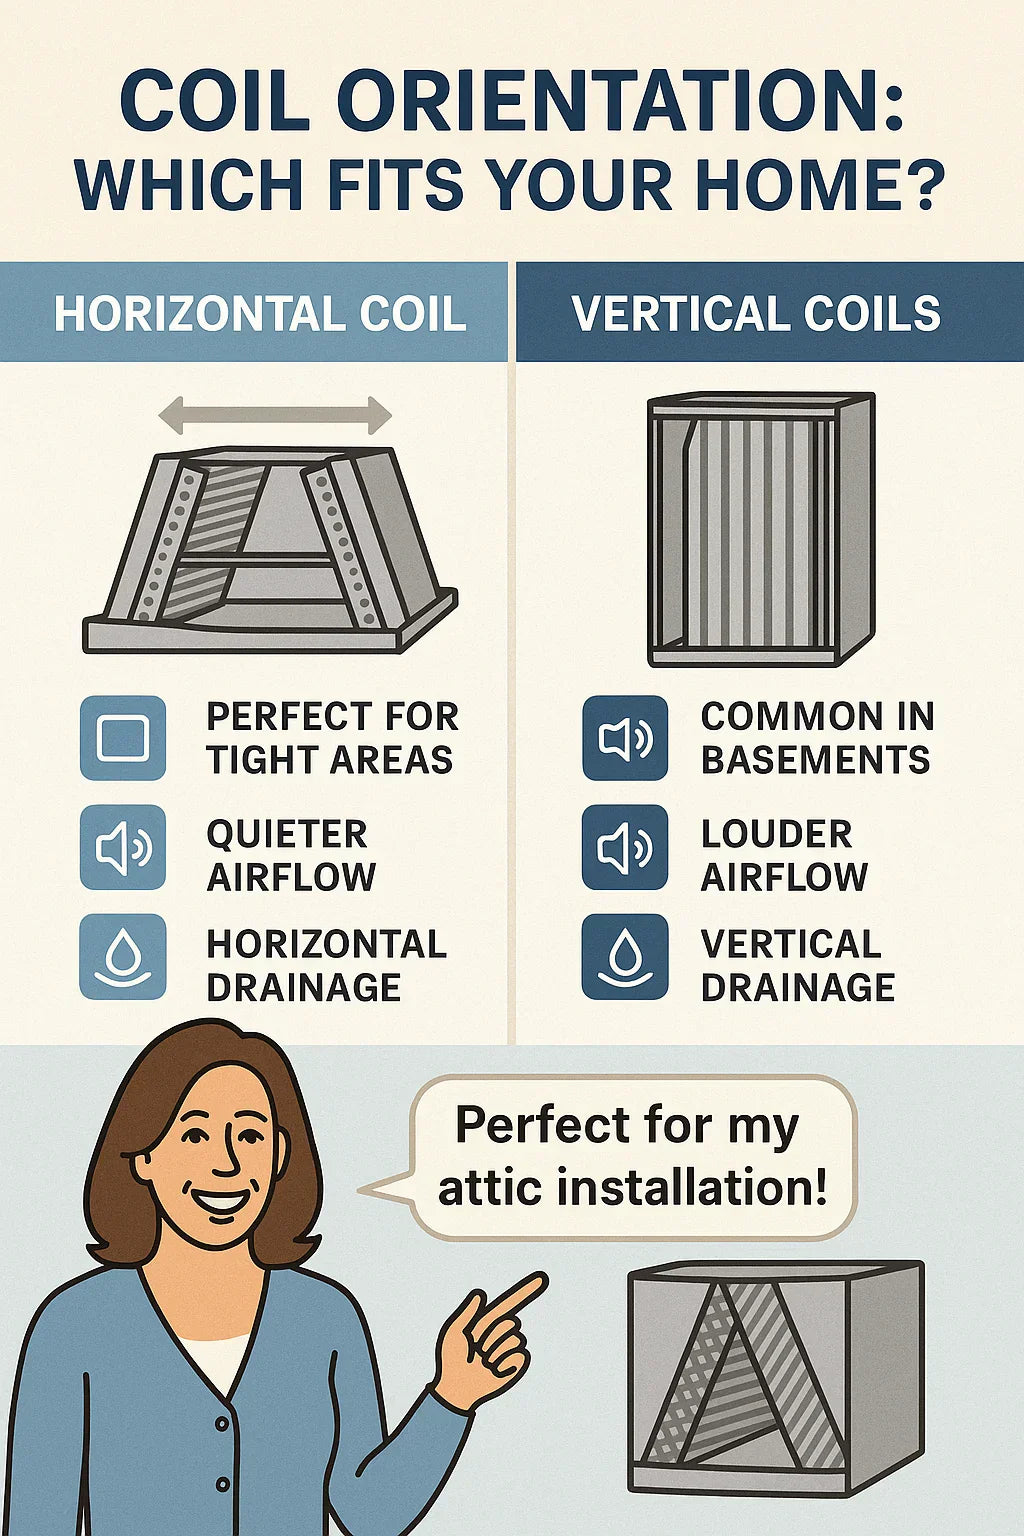
⚖️ Horizontal vs. Vertical Coils
When I was deciding, my contractor walked me through the pros and cons of each orientation.
➡️ Horizontal Coils (like mine)
-
✅ Best for attics, crawlspaces, and tight utility rooms.
-
✅ Quieter airflow.
-
✅ Built-in horizontal drainage system.
-
❌ Require wide clearance for installation.
↕️ Vertical Coils
-
✅ Best for basements and closets.
-
✅ Compact footprint.
-
❌ Not suitable for low-clearance attic or crawlspace installs.
-
❌ Drain pans less effective in sideways installs.
👉 My attic setup made horizontal the only real option—but I’m glad I chose it.
💧 Drainage Setup
One of the trickiest parts of coil installs is condensate drainage. Cooling produces gallons of water per day in humid climates.
-
Goodman CHPTA6030D3 includes a primary drain pan with multiple connections.
-
A secondary drain pan provides backup if the main one clogs.
-
I also added a float switch, which shuts off the system if water starts to back up.
👉 This design is one reason I chose Goodman—it’s built to handle horizontal drainage without flooding risks.
🔗 The International Code Council requires overflow protection in many states.
🛠️ Installation Tips I Learned
Here are a few things I wish I had known before buying:
-
Measure Twice, Buy Once
-
Don’t just check your home’s square footage—measure your access hatch and available space.
-
-
Plan for Service Access
-
Make sure the service panel side isn’t blocked by rafters or walls.
-
-
Check the Slope
-
Coils need to be slightly sloped toward the drain to avoid standing water.
-
-
Think About Future Maintenance
-
Leave space for coil cleaning and drain flushing.
-
👉 A horizontal coil is only as good as the space you give it to breathe and drain properly.
🏡 Samantha’s Real-World Example
When my contractor first saw my attic, he warned me:
-
A vertical coil would never fit.
-
A multi-position coil was an option, but bulkier and more expensive.
-
A horizontal cased coil was the perfect balance of fit, function, and cost.
👉 Once installed, I was relieved—it fit like a glove and has been running quietly ever since.
💵 Cost Differences
Here’s the cost breakdown I found in 2025:
-
Horizontal Cased Coil (Goodman CHPTA6030D3): $900–$1,200.
-
Installation Labor: $1,500–$2,500, depending on attic/crawlspace access.
-
Accessories (drain pans, float switch, insulation): $200–$500.
👉 Expect total installed cost around $3,000–$3,500.
✅ Final Takeaway
A horizontal A-coil is ideal if:
-
Your HVAC system lives in an attic, crawlspace, or tight utility room.
-
You want quieter operation with smart drainage.
-
You want a coil that’s R-32 ready and built for future refrigerant standards.
For me, the Goodman CHPTA6030D3 horizontal coil was the right choice. It fit my attic, ran quietly, and gave me confidence that my system was ready for the refrigerant changes of 2025 and beyond.
👉 My advice: Measure your space, consider your noise tolerance, and always check drainage setup. If those boxes are checked, a horizontal coil might be the perfect fit for your home.
In the next topic we will know more about: Installation Guide: What Samantha Learned About Putting in a 4.5 Ton Goodman A-Coil


