When I decided to replace my aging heating system, I landed on the Weil-McLain CGA-6 Series 3 166,000 BTU Cast Iron Natural Gas Boiler. On paper, it seemed perfect: durable cast iron, enough BTUs to heat my 3,400 sq. ft. colonial in Pennsylvania, and a trusted brand name.
But here’s what I quickly discovered: buying the boiler is just step one. The real journey starts with the installation. Between permits, venting, zoning, and safety checks, I learned a lot—some of it the hard way.
This guide is my way of sharing what I wish I had known before and during the process, so you can walk into your own boiler upgrade with confidence.
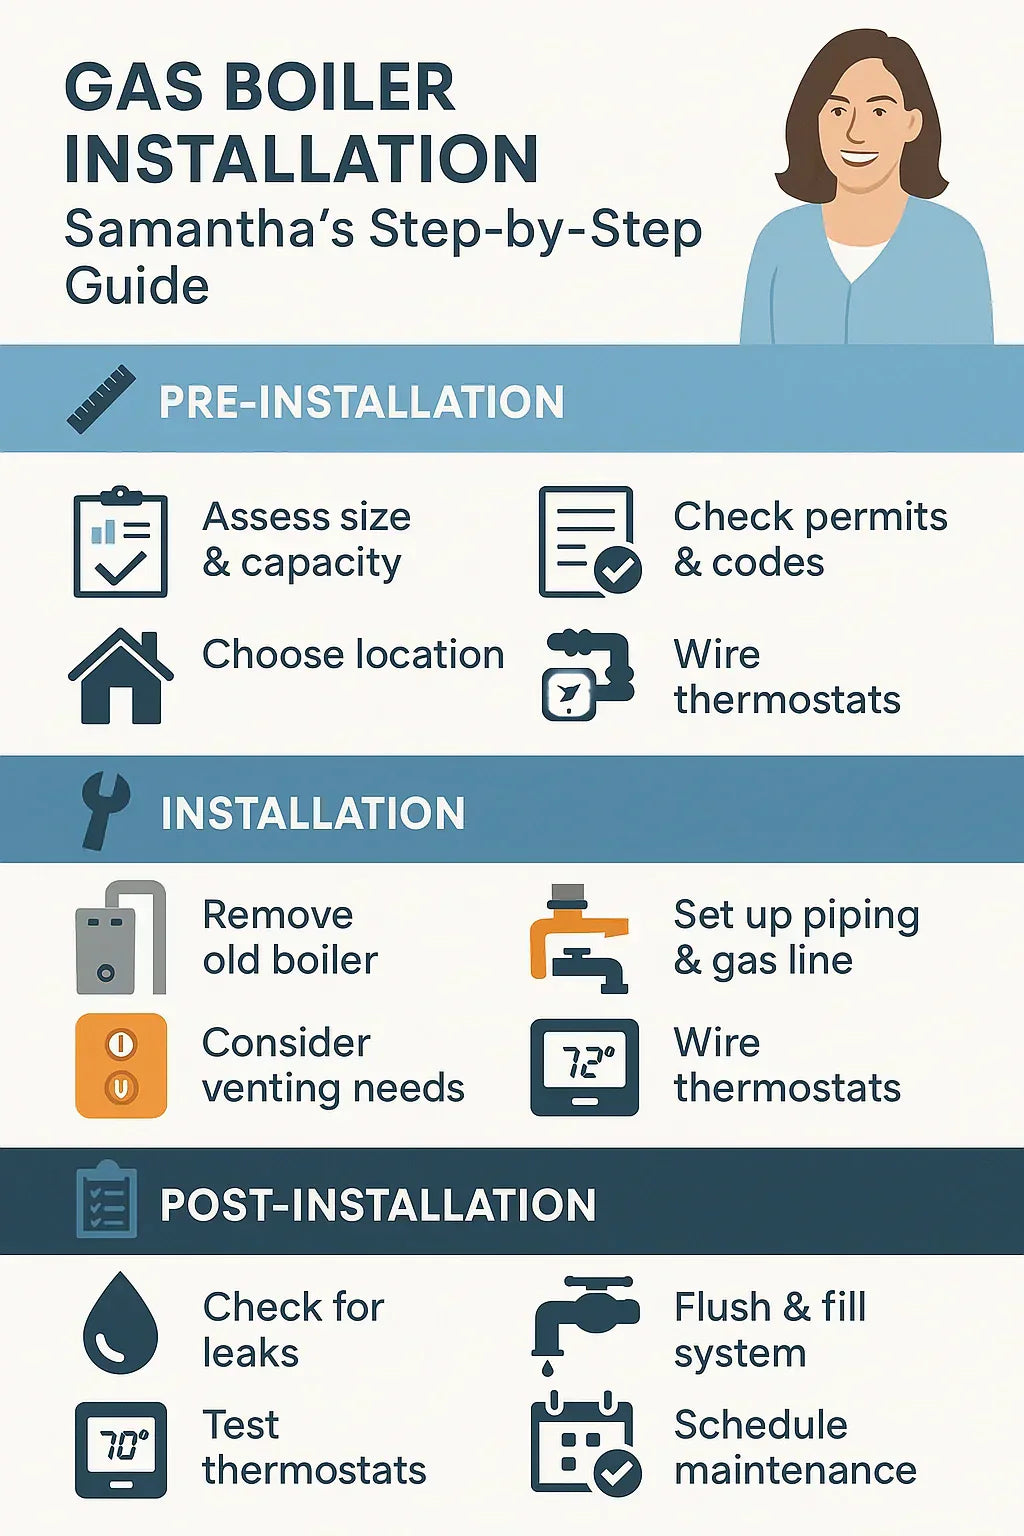
🏡 Step 1: Pre-Installation Prep
📏 Right-sizing the boiler
-
My contractor double-checked the sizing using a Manual J calculation (a professional load calculation).
-
Even though the CGA-6 is 166,000 BTUs, my home’s load was closer to 155,000 BTUs, making it a near-perfect match.
-
Oversizing = wasted money and short cycling. Undersizing = not enough heat in the dead of winter.
🔗 Manual J load calculation basics – Energy Vanguard
📝 Permits and codes
-
I had to apply for a mechanical permit through my township, which cost about $200.
-
Local code required a licensed contractor to handle the gas connection.
-
In some areas, even replacing “like for like” requires inspection.
👉 Lesson: Call your local building office before ordering the boiler.
📍 Choosing the location
-
My old boiler sat in the basement near the chimney.
-
Clearances around the new CGA-6 were crucial: Weil-McLain recommends 24" in front and at least 6" from combustible surfaces.
-
I also had to make space for circulator pumps and an expansion tank.
💡 Samantha’s tip: Sketch your mechanical room layout before installation day.
🔧 Step 2: Day-of Installation
🧹 Removing the old boiler
-
Contractors disconnected gas, water, and electrical lines.
-
The old cast-iron beast weighed nearly 500 lbs—it took two men with a dolly and some creative maneuvering.
-
Disposal fee: $150 at a local scrap yard.
🔩 Setting up piping and gas lines
-
The installer ran new black iron pipe for the gas line, sized for proper flow.
-
All connections were sealed and pressure-tested with soap solution.
-
Copper supply and return lines were sweat-soldered into place.
👉 Important: The CGA-6 requires 1" minimum gas piping depending on length.
🔗 NFPA 54 National Fuel Gas Code
🌬️ Venting and chimney considerations
-
My old chimney wasn’t properly lined for modern efficiency levels.
-
A stainless steel chimney liner was required ($1,200 extra).
-
This prevented condensation damage and ensured safe venting.
🔗 Chimney Safety Institute of America
🎛️ Wiring thermostats and zoning
-
I opted for 4 heating zones (basement, first floor, second floor, attic office).
-
Each zone got its own circulator pump and thermostat.
-
The wiring panel tied them all into the boiler’s control board.
👉 Added cost: $2,000 for pumps, valves, and thermostats, but worth it for comfort.
🔗 HeatingHelp: Zone valves vs. circulators
✅ Step 3: Post-Installation Checklist
🔍 Leak and pressure testing
-
System was filled with water, then pressure-tested at 30 psi.
-
All joints were inspected for leaks.
💦 Flushing and bleeding
-
The installer flushed the system to remove solder flux and debris.
-
Air bleeders on each loop ensured no trapped air would cause gurgling.
🌡️ First fire-up
-
Gas was turned on, and the boiler fired smoothly.
-
Thermostats were checked zone by zone.
-
The relief valve and low-water cutoff were tested for safety.
📅 Scheduling maintenance
-
I booked a one-year follow-up to re-check venting, gas pressure, and efficiency.
-
Recommended maintenance:
-
Annual flue and vent inspection.
-
Check circulators and valves.
-
Flush system every 3–5 years.
-
🔗 DOE – Boiler maintenance guide
💵 Cost and Timeline Expectations
-
Equipment (CGA-6): $4,300
-
Installation labor: $5,200
-
Accessories (pumps, expansion tank, thermostat): $2,000
-
Chimney liner: $1,200
-
Permits & disposal: $350
👉 Total: $13,050 (minus rebates = $12,200 net).
Timeline: 2 days (old removal + new install + wiring + testing).
📝 Samantha’s Key Takeaways
-
Don’t underestimate prep. Permits and chimney liners can delay things.
-
Budget extra. I thought it would cost $10k, but accessories pushed it up by $3k.
-
Hire a pro. Gas lines and venting are not DIY-friendly.
-
Zoning pays off. My heating bills dropped 18% after splitting into four zones.
-
Plan for downtime. We were without heat for a day in January—keep space heaters handy.
✅ Final Word
Installing a Weil-McLain CGA-6 gas boiler isn’t a weekend DIY project—it’s a major investment that requires planning, permits, and professional expertise. But done right, it can transform your home’s comfort and efficiency for decades.
If I had to do it again, I’d budget more, plan further ahead, and still choose the same boiler.
In the next topic we will know more about: Maintenance Checklist: Filters, Drains & Seasonal Care for Your Weil-McLain CGA-6


