If you’re installing a mini-split heat pump yourself, you’re probably eager to mount the indoor head, set the outdoor unit, and run your line sets. But before you open those refrigerant valves, there’s a critical step that determines whether your system will run efficiently for years or fail within months: pressure testing and vacuuming your refrigerant lines.
Skipping these steps—or doing them incorrectly—can lead to refrigerant leaks, moisture contamination, and serious damage to your compressor. In this guide, we’ll walk through the tools you’ll need, the correct procedures, and the common pitfalls to avoid, so you can start your system with confidence.
For a complete step-by-step on installation from start to finish, check out the Complete Guide to DIY Heat Pump Installation.
Why Testing and Vacuuming Are Non-Negotiable
Refrigerant systems must be airtight and moisture-free before operation. Even a pinhole leak or trace of water vapor can lead to:
-
Reduced efficiency and higher energy bills
-
Ice buildup inside the evaporator coil
-
Corrosion in copper tubing
-
Premature compressor failure
📘 The U.S. Department of Energy stresses that a sealed, moisture-free refrigerant circuit is essential for both performance and equipment longevity.
Tools and Materials You’ll Need
Before starting, gather the right equipment:
-
Manifold gauge set – For measuring pressure during nitrogen testing
-
Nitrogen tank with regulator – For pressurizing the system
-
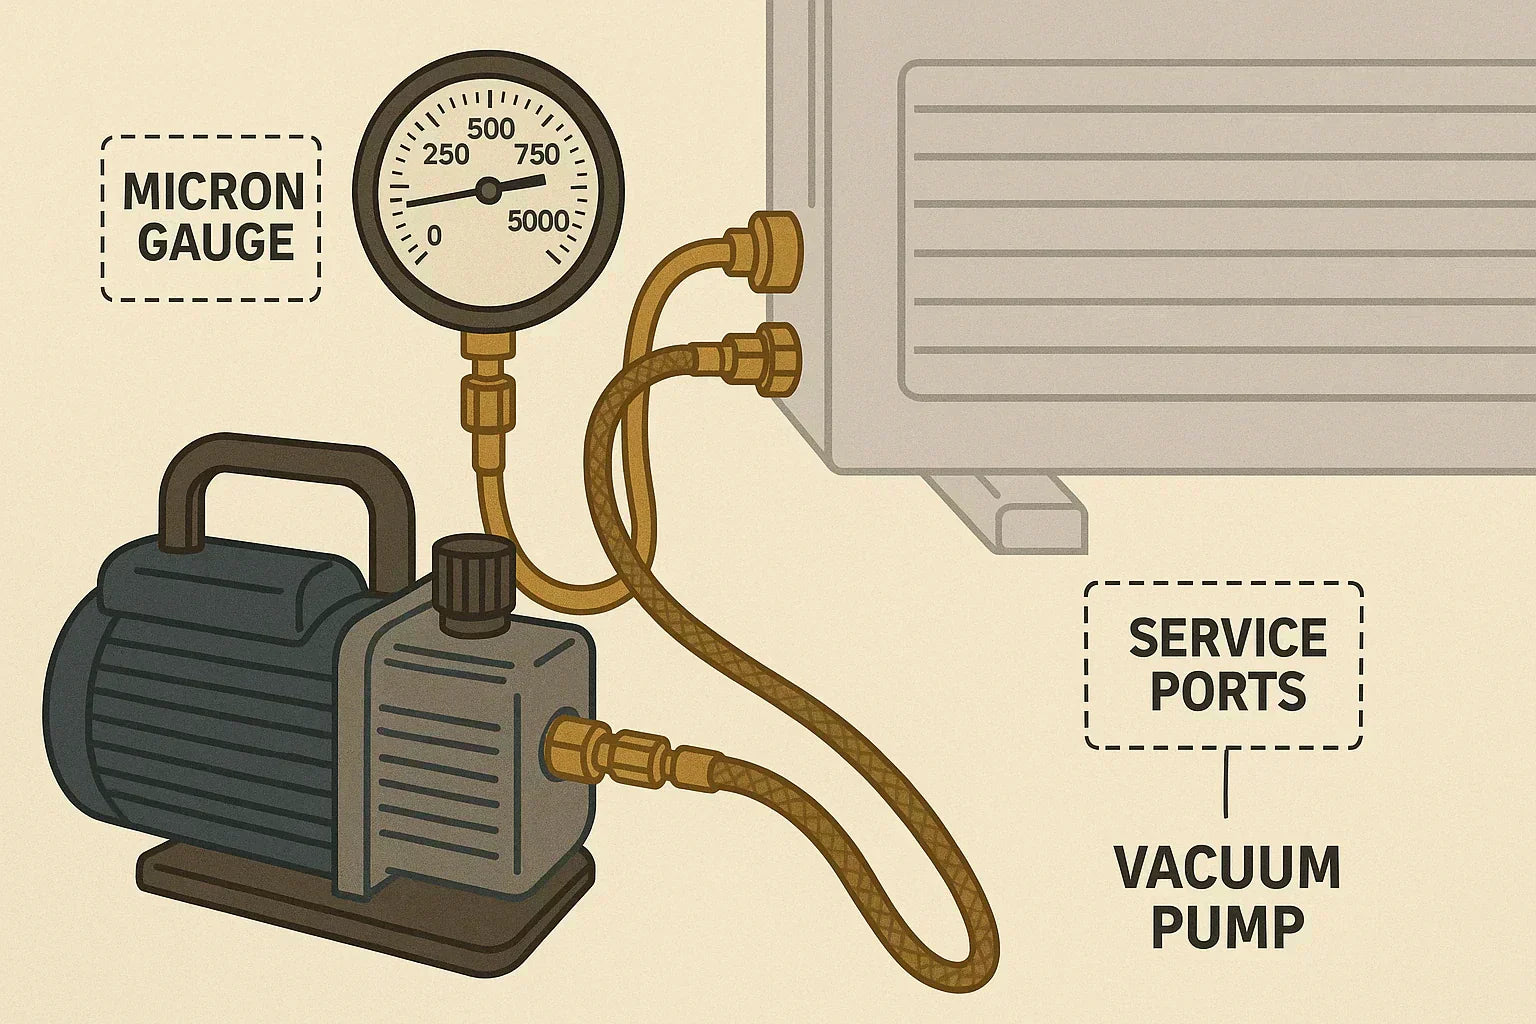
Vacuum pump (HVAC-rated) – To remove moisture and air from the lines
-
Micron gauge – To verify deep vacuum levels
-
Service wrench and core removal tools – For accessing service ports
-
Safety gear – Gloves, safety glasses, and hearing protection when pressurizing
📘 HVAC School provides a detailed overview of essential HVAC tools and why they matter.
How to Pressure Test Mini-Split Lines
Step 1 – Connect Manifold Gauges
Attach the hoses from your manifold gauge set to the service ports on the outdoor unit. Make sure connections are tight to prevent leaks during the test.
Step 2 – Pressurize with Nitrogen
Using a nitrogen regulator, slowly fill the line set to the manufacturer’s recommended test pressure—often between 300 and 500 PSI. Never exceed the max PSI listed in your manual.
Step 3 – Hold and Monitor
Maintain this pressure for at least 30–60 minutes for a quick test, or leave it overnight for a thorough leak check.
Step 4 – Check for Leaks
-
Soapy Water Method – Spray fittings and flare connections; bubbles indicate a leak.
-
Electronic Leak Detector – More sensitive for pinpointing leaks.
📘 The National Institute of Standards and Technology offers resources on leak detection methods and performance standards.
How to Vacuum Mini-Split Lines
Once your lines pass the pressure test, you’ll need to remove all air and moisture before introducing refrigerant.
Step 1 – Connect Vacuum Pump and Micron Gauge
Hook up your vacuum pump to the service ports, with a micron gauge to measure vacuum depth.
Step 2 – Pull a Deep Vacuum
Run the pump until the system reaches 500 microns or lower. This ensures all moisture and non-condensable gases are removed.
Step 3 – Isolate and Monitor
Close the service valves to isolate the vacuum and monitor the micron gauge. If it rises above 1000 microns in 10 minutes, you may have a leak or trapped moisture.
Step 4 – Prepare for Refrigerant Release
Once your system passes the vacuum test, you can safely release the factory refrigerant charge into the lines.
📘 HVACOlink explains that a proper vacuum is just as important as the initial leak test because it removes non-condensable gases and moisture, preventing corrosion and ensuring long-term performance.
Common Mistakes to Avoid
-
Using compressed air instead of nitrogen – Compressed air contains moisture and oxygen, which can damage the system.
-
Skipping the micron gauge – Just watching the vacuum pump gauge isn’t enough; only a micron gauge can confirm a true deep vacuum.
-
Opening refrigerant valves too soon – If you haven’t completed and passed both tests, introducing refrigerant will contaminate the system.
-
Ignoring manufacturer PSI limits – Over-pressurizing can damage coils and flare joints.
Safety Considerations
Working with high-pressure nitrogen and vacuum pumps involves safety risks:
-
Nitrogen can displace oxygen in confined spaces—ventilate the area.
-
Always wear gloves and eye protection when working with pressurized systems.
-
Use regulators rated for HVAC applications to prevent accidental over-pressurization.
📘 OSHA provides safety guidelines for handling compressed gases.
Final Checklist Before Charging the System
Before opening the refrigerant valves, confirm that:
-
✅ Pressure test passed with no leaks detected
-
✅ Deep vacuum pulled to at least 500 microns
-
✅ Micron rise test stayed below 1000 microns in 10 minutes
-
✅ All service valves are closed until ready for refrigerant release
Why This Step Protects Your Investment
Taking the time to pressure test and vacuum your mini-split lines isn’t just about “doing it right” — it’s about avoiding major headaches later. A clean, dry, leak-free system will:
-
Deliver full manufacturer-rated efficiency
-
Reduce compressor strain and extend lifespan
-
Keep your installation code-compliant and warranty-protected
Final Thoughts from Alex
I’ve seen far too many new heat pumps fail early because the installer skipped or rushed this step. Whether you’re a weekend warrior or a seasoned DIYer, think of pressure testing and vacuuming as the “insurance policy” for your entire project.
It’s not the most exciting part of the job, but it’s the part that makes sure your system actually performs as designed.
Next up: Best YouTube Channels and Guides for DIY Heat Pump Projects — discover reliable, step-by-step visual resources to make your installation even smoother.
Alex Lane
Your Home Comfort Advocate


