By Mark — Your Home Comfort Troubleshooter
If you’ve ever seen a brown water stain slowly spreading across your ceiling, you already know water damage is no joke. I’ve been called into homes where just a few hours of unnoticed leakage cost thousands in drywall, flooring, and insulation repairs.
And in most of those cases? A neglected or missing drain pan was the culprit.
This guide covers everything:
-
What a drain pan does
-
Types of drain pans (primary vs. secondary)
-
Materials and sizing
-
Code requirements
-
Maintenance tips
-
My “field checklist” for avoiding disaster
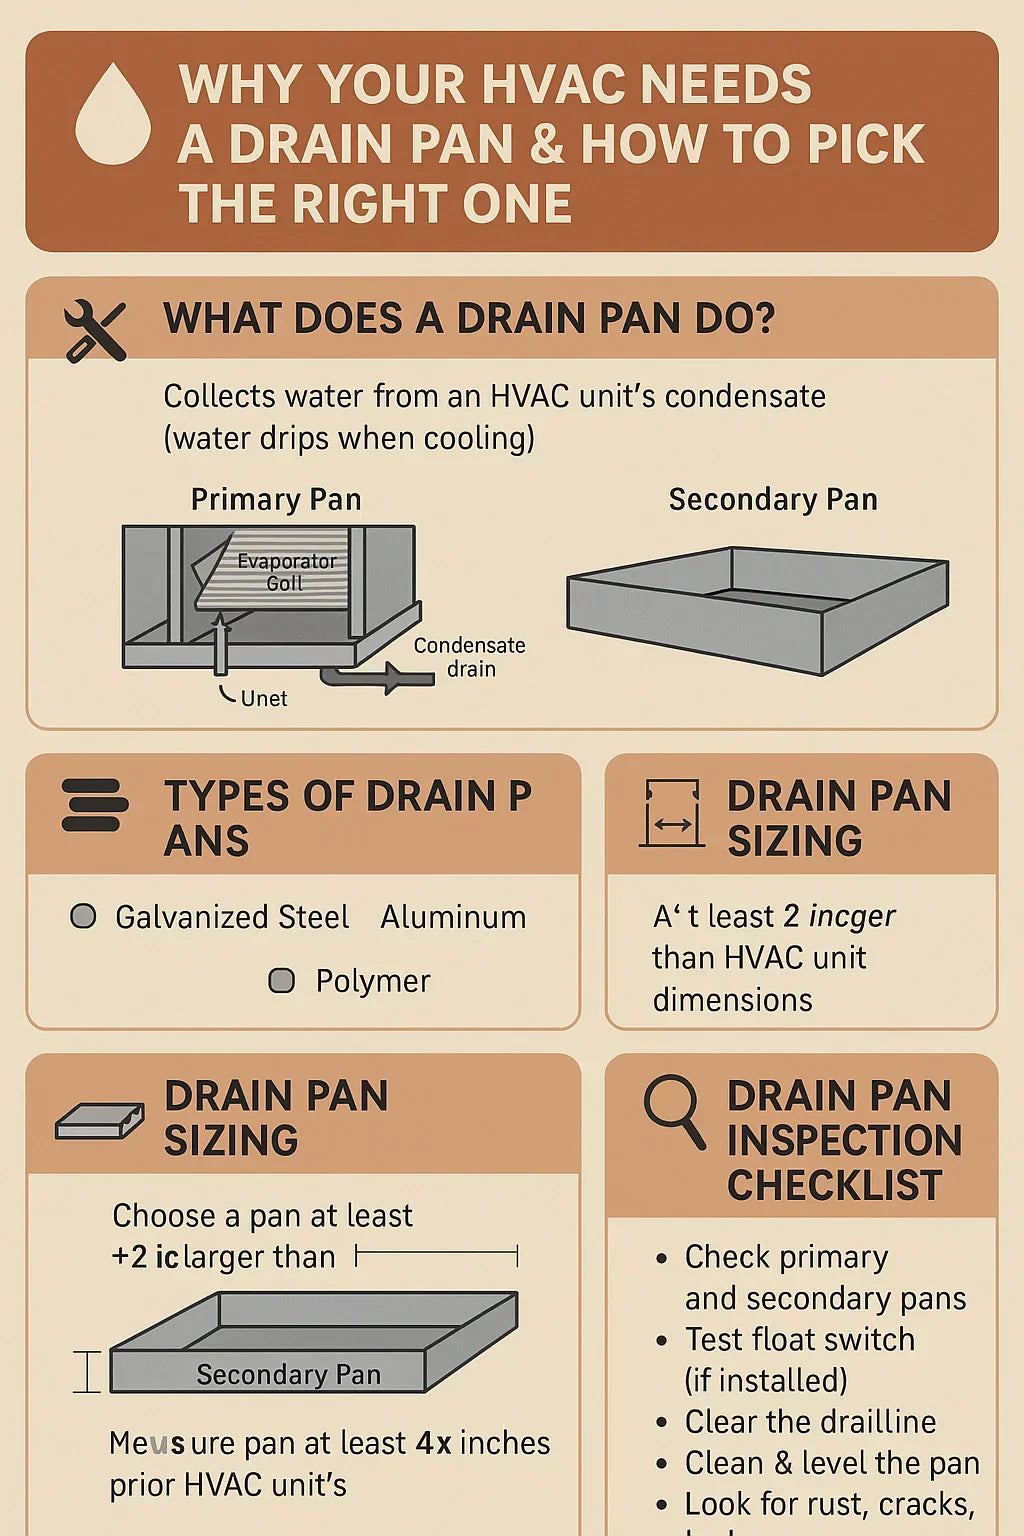
🛠 1. What Exactly Is a Drain Pan?
A drain pan (also called a condensate pan) is a shallow metal or polymer tray designed to collect water that drips from your HVAC unit during the cooling or dehumidifying process.
When warm, humid air passes over your system’s evaporator coil, condensation forms—just like a cold soda can “sweats” in summer. That water needs somewhere to go, and that’s the job of the drain pan.
Primary pan:
-
Built into the unit, directly under the evaporator coil
-
Funnels water into the condensate drain line
Secondary (auxiliary) pan:
-
Sits under the entire air handler/furnace
-
Catches overflow if the primary pan or drain line clogs
-
Often paired with a float switch to shut off the system when full
(U.S. DOE)
🧾 2. Why a Drain Pan Matters
-
Prevents water damage — Without it, leaks can soak drywall, ceilings, and floors.
-
Protects your HVAC — Standing water can rust components and damage insulation.
-
Stops mold growth — Damp, dark spaces are mold magnets.
-
Keeps you code-compliant — Many building codes require secondary pans for attic or interior installations. (ICC Codes)
🛑 3. Real-World Fail: A Cautionary Tale from Mark
A homeowner I worked with had a three-year-old air handler in the attic. The primary drain clogged during a July heat wave. No secondary pan, no float switch. By the time they noticed the wet spot on the ceiling, water had destroyed the drywall, soaked the insulation, and dripped onto hardwood floors below. Insurance covered part of it, but they still paid $2,800 out of pocket.
The kicker? A $40 secondary pan and a $25 float switch would have prevented the whole mess.
🗂 4. Types of Drain Pans
Primary Pans
-
Integrated into the HVAC unit
-
Typically 24-gauge galvanized steel, aluminum, or corrosion-resistant polymer
-
Sloped toward the drain outlet
Secondary Pans
-
Aftermarket accessory, placed under the entire unit
-
Larger than primary
-
Required for attic or horizontal installations in many areas
⚙️ 5. Materials: Pros & Cons
| Material | Pros | Cons |
|---|---|---|
| Galvanized Steel | Strong, long-lasting | Heavy, may corrode if coating damaged |
| Aluminum | Rustproof, lightweight | Can dent more easily |
| Polymer/Plastic | Rustproof, lightweight, inexpensive | Can crack over time in extreme temps |
| Stainless Steel | Highly durable, corrosion-proof | More expensive |
📏 6. How to Size a Drain Pan
-
Measure your HVAC unit’s footprint (length & width)
-
Add 1–2 inches on each side for clearance
-
Check height clearance if installing in tight spaces
-
Confirm drain outlet alignment with your system’s setup
If in doubt, size up slightly—better coverage is always safer.
📜 7. Code Requirements
Most U.S. building codes (and many international) require:
-
Primary drain — Always included
-
Secondary drain or pan — Required if unit is above a ceiling or in an interior space
-
Float switch or secondary drain line — To shut off the system when water is detected
(International Mechanical Code Section 307)
💡 8. Drain Pan Accessories Worth Adding
-
Float switch — Shuts off system to prevent overflow damage
-
Condensate pump — Moves water when gravity drainage isn’t possible
-
Pan treatment tablets — Reduce algae and biofilm growth in standing water
🧽 9. Maintenance Tips
-
Inspect twice a year — Spring and fall
-
Flush the primary drain line — Use a wet/dry vac or vinegar solution
-
Check for rust or cracks — Replace at first sign of failure
-
Test float switches — Make sure they shut the system off when triggered
🔍 10. Mark’s Field Inspection Checklist
-
✅ Primary drain line clear
-
✅ Secondary pan clean and undamaged
-
✅ Float switch installed and tested
-
✅ Pan level and fully under unit
-
✅ No standing water or rust
🆚 11. When to Replace a Drain Pan
-
Visible rust-through or pinholes
-
Warping that prevents proper drainage
-
Cracks or leaks in polymer pans
-
Multiple float switch trips in a season
🏠 12. DIY vs. Pro Installation
DIY:
-
Secondary pans are relatively easy to slide under a unit—if there’s space
-
You can add pan tablets and test float switches yourself
Pro:
-
Needed if the unit must be lifted, ductwork disconnected, or electrical rewired
-
Can check static pressure and ensure proper slope
📌 13. Key Takeaways
-
Drain pans protect your home from water damage, mold, and costly repairs
-
A secondary pan and float switch are cheap insurance
-
Material and size matter—match them to your space and climate
-
Maintenance twice a year keeps your system and home safe
In the next topic we will read more about: Understanding Line Sets: Sizes, Insulation & When to Replace


