🏠 Introduction: When the Cool Stops Coming
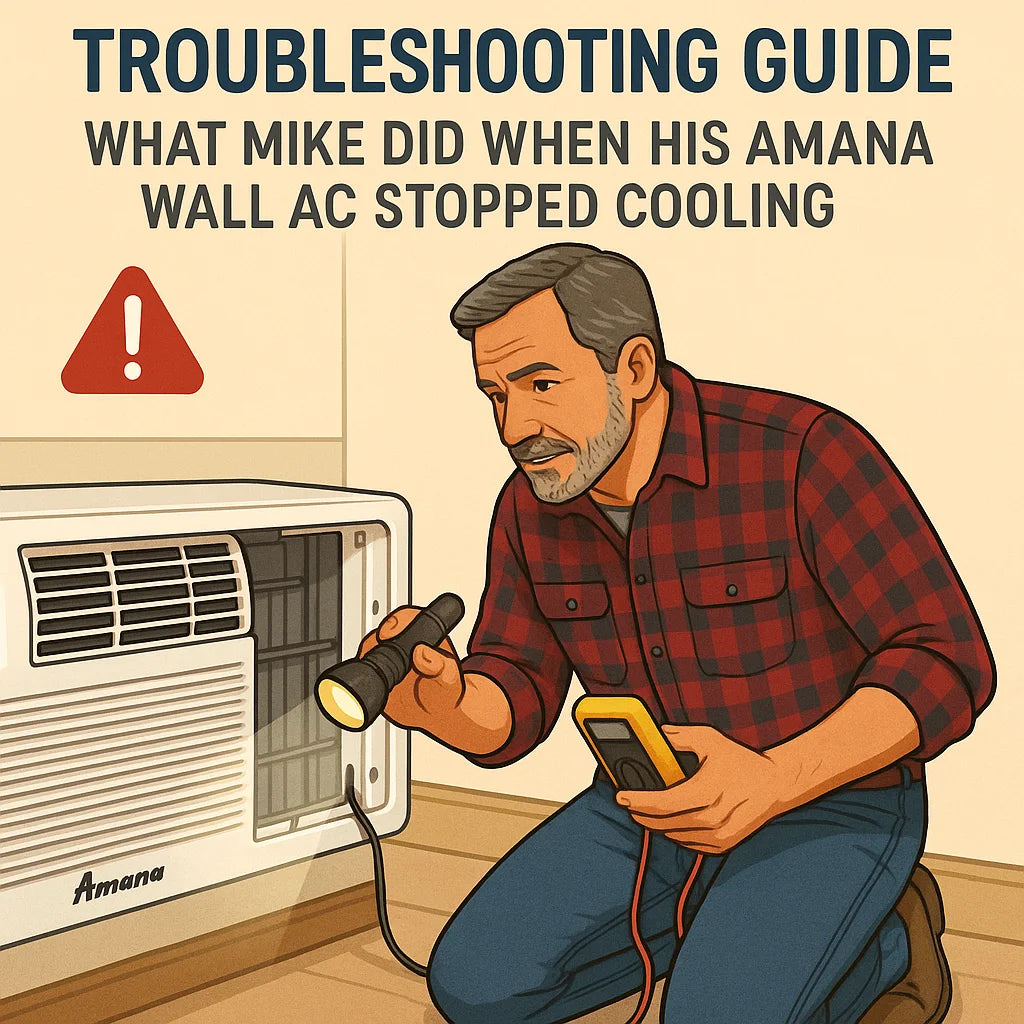
It was one of those July afternoons where the heat seemed to shimmer off the driveway. Mike’s home office felt like a sauna — even though his Amana 11,800 BTU Through-the-Wall Air Conditioner with Remote was humming away on “Cool” mode.
He walked over to check. The fan was blowing, but the air? Barely cool.
“My first thought was — oh great, this thing’s done for,” Mike recalls. “But I’ve learned not to panic. Most of the time, it’s something simple.”
That afternoon turned into a crash course in DIY air conditioner troubleshooting. What Mike discovered — and how he fixed it — became his go-to checklist for anyone whose wall AC suddenly stops cooling.
This guide walks you through what Mike did step-by-step, showing how to diagnose issues safely, restore performance, and know when it’s time to call a pro.
🌡️ 1️⃣ Step One: Don’t Panic — Start With the Basics
When your AC stops cooling, it’s tempting to assume the worst. But more often than not, the problem is something small — a mis-set thermostat, a loose plug, or a dirty filter.
“I’ve learned that 80% of the time, the simplest fix is the right one,” Mike says.
Here’s how he began.
✅ Basic Checks:
-
Mode setting: Make sure it’s actually on Cool, not Fan Only or Energy Saver.
-
Temperature setting: Lower it 4–5°F below room temperature.
-
Power connection: Confirm the plug is snug and outlet active.
-
Breaker check: Reset the breaker if it tripped.
-
Remote batteries: Weak batteries can cause command lag.
When Mike did this, he found his thermostat was on Fan mode — circulating air but not engaging the compressor.
A quick switch to Cool brought the compressor click back to life.
📘 Learn more: Energy.gov – Common Air Conditioner Problems
💨 2️⃣ Step Two: Check for Airflow Problems
If the fan runs but the air feels weak or warm, airflow might be restricted. This is the number one reason a through-the-wall unit stops cooling effectively.
Mike popped off the front grille and immediately saw the issue: a gray, dusty air filter.
“I could barely see through it,” he said. “No wonder the air felt weak.”
🧰 Fix: Clean or Replace the Filter
-
Turn the unit off and unplug it.
-
Slide out the filter from behind the grille.
-
Vacuum both sides with a soft brush.
-
Rinse with lukewarm water.
-
Dry completely before reinstalling.
Once Mike reinstalled the clean filter and restarted the unit, the airflow noticeably improved — and the cool air returned within minutes.
📘 Reference: HVAC.com – Airflow Troubleshooting Basics
❄️ 3️⃣ Step Three: Check for Ice or Frost Buildup
A few days later, the same problem returned. This time, when Mike looked inside, he saw a thin layer of frost forming behind the grille.
Frozen coils are a common reason for poor cooling — they block airflow and prevent heat exchange.
🧊 Common Causes of Coil Freeze:
-
Dirty filter (reduces airflow)
-
Low refrigerant level (causes coil to get too cold)
-
Fan malfunction
-
Blocked vents
🧼 Mike’s Solution:
-
Turn the AC off.
-
Leave fan on “Fan Only” mode for several hours to thaw coils.
-
Clean filter and evaporator coils.
-
Restart unit on “Cool” mode and monitor airflow.
After thawing and cleaning, the frost disappeared — and the air temperature dropped from 78°F to 72°F in 10 minutes.
📘 Learn more: Energy Star – Preventing Coil Freeze
⚙️ 4️⃣ Step Four: Check Electrical & Control Settings
Sometimes the issue isn’t mechanical at all — it’s electrical or control-related.
Mike once discovered his remote control batteries were almost dead, sending incomplete signals. The unit showed “Cool” mode, but the compressor never actually activated.
After replacing the batteries, it worked perfectly.
Other checks to make:
-
Ensure thermostat sensor wire (inside front panel) hasn’t come loose.
-
Confirm mode setting hasn’t reverted to Energy Saver.
-
If you hear no click when switching from Fan to Cool, the relay may need a reset.
🔌 Quick Reset Procedure:
-
Turn unit off.
-
Unplug for 60 seconds.
-
Plug back in and set to “Cool” → 68°F → High Fan.
“It’s the AC equivalent of rebooting your computer,” Mike jokes.
💧 5️⃣ Step Five: Check Drainage and Humidity
If your unit cools but the room still feels sticky or muggy, a drainage issue may be to blame.
Wall units produce condensation that should drain out the back. But if the drain hole clogs, water can pool inside — reducing cooling efficiency and sometimes triggering musty odors.
Mike learned this one the hard way:
“I thought the humidity was just from the heat wave. Turns out, my drain hole was packed with dust.”
🧰 Mike’s Drain Cleaning Steps:
-
Unplug the unit.
-
Locate the drain hole (bottom rear).
-
Insert a pipe cleaner or flexible wire.
-
Flush with warm water to clear debris.
-
Restart unit and check for consistent drainage.
📘 Reference: This Old House – Fixing AC Drainage Problems
🔋 6️⃣ Step Six: Fan Works, But No Cold Air
If your fan spins and the air is moving — but not cooling — the compressor may not be engaging.
When this happened to Mike, he listened carefully after turning the unit on. Normally, there’s a distinct “click” followed by a low hum as the compressor starts.
But this time? Nothing. Silence.
🧠 Possible Causes:
-
Power issue (breaker, plug, or outlet)
-
Overheated compressor (thermal overload tripped)
-
Faulty capacitor or relay
-
Low refrigerant
🧰 Mike’s Safe DIY Checks:
-
Unplug the unit.
-
Check power outlet with another appliance.
-
Let AC rest for 10–15 minutes (reset overload).
-
Restart in Cool mode and listen for the compressor click.
When Mike waited 15 minutes and restarted, the compressor kicked back in — it had overheated from earlier frost buildup.
🌬️ 7️⃣ Step Seven: Inspect the Outdoor Condenser Section
Even if your indoor filter and coils are spotless, the outdoor condenser (the rear section of the through-wall unit) can get clogged with dust, pollen, or lint.
“When I slid mine halfway out of the sleeve, the back looked like it had a fuzzy blanket on it,” Mike said.
🧼 Cleaning Steps:
-
Unplug and gently pull the unit partway out.
-
Use a vacuum brush to remove lint.
-
Spray gentle coil cleaner or water rinse (avoid electrical parts).
-
Let it dry fully before sliding back in.
After this deep clean, Mike’s Amana cooled faster, ran quieter, and used about 0.2 kWh less power per hour (verified via Kill A Watt meter).
🧩 8️⃣ Step Eight: Reset & Test for Performance
Once he cleaned, thawed, and reassembled everything, Mike ran a simple performance test.
How he measured results:
-
Indoor temp: 78°F
-
Set temp: 68°F
-
After 10 minutes: 72°F
-
After 20 minutes: 70°F
-
Air output: 15°F cooler than intake
That’s the rule of thumb — an AC that’s cooling properly should produce 10–15°F cooler air at the output vent compared to the room air.
⚠️ 9️⃣ When It’s Time to Call a Professional
After two summers of DIY success, Mike has learned there’s a line between homeowner fixes and technician work.
If your AC shows any of these signs, it’s time to call a pro:
-
No compressor sound at all (possible capacitor or relay failure)
-
Warm air even after cleaning
-
Repeated breaker trips
-
Strong chemical or burning smell
-
Visible oil or refrigerant leak
“If it’s electrical or refrigerant-related, I stop right there,” Mike says. “That’s sealed-system territory — not DIY.”
A licensed technician can test the capacitor, check refrigerant pressure, and replace components safely.
🧰 10️⃣ Mike’s Troubleshooting Toolkit
| Tool | Use |
|---|---|
| Phillips screwdriver | Remove grille & access panels |
| Soft brush vacuum | Clean coils and fins |
| Pipe cleaner | Unclog drain hole |
| Thermometer | Measure output air temperature |
| Multimeter | Test outlet and voltage |
| Flashlight | Inspect interior components |
| Kill A Watt meter | Track energy consumption |
“Having these on hand means I can diagnose 90% of problems before making a service call,” Mike says.
🧠 11️⃣ Understanding the Causes — and the Fixes
| Problem | Likely Cause | Mike’s Fix | Pro Needed? |
|---|---|---|---|
| Weak airflow | Dirty filter or coil | Clean filter & coil | ❌ |
| Frost buildup | Blocked airflow | Thaw & clean | ❌ |
| Water leaks | Clogged drain hole | Unblock drain | ❌ |
| Fan only, no cooling | Compressor not engaging | Reset & cool mode test | ❌ |
| No power | Tripped breaker/outlet | Reset breaker | ❌ |
| Loud noise | Loose sleeve or screws | Tighten screws | ❌ |
| Still no cooling | Low refrigerant/capacitor failure | — | ✅ |
Mike found that in 9 out of 10 cases, the issue was something he could fix himself in under 30 minutes.
📘 Reference: Energy.gov – Room AC Troubleshooting
💧 12️⃣ The “Invisible” Problem: Humidity
Even if the temperature feels fine, excessive humidity can make a room feel sticky and warm.
Amana wall units dehumidify naturally as they cool, but poor airflow or blocked drains can reduce that effect.
Mike’s humidity fix:
-
Clean coils and drain hole.
-
Use Energy Saver mode for balanced compressor cycling.
-
Keep doors closed to limit moisture re-entry.
After doing this, he measured indoor humidity drop from 62% to 48% — right in the comfort zone.
🧼 13️⃣ Preventing Future Cooling Failures
After his first troubleshooting marathon, Mike built a monthly “maintenance lite” plan that keeps issues from returning.
| Month | Task |
|---|---|
| April | Deep clean coils, drain, sleeve |
| May–Sept | Clean filter monthly |
| July | Mid-season drain check |
| Oct | Winterize and unplug |
He also vacuums around the wall unit to prevent dust circulation.
“Now I spend maybe 15 minutes a month on it — and it hasn’t failed once since.”
📘 Reference: Energy.gov – Regular Maintenance Tips
🌡️ 14️⃣ Performance Metrics After Maintenance
Mike loves numbers, so he tracked performance before and after his maintenance routine:
| Metric | Before Cleaning | After Cleaning |
|---|---|---|
| Time to reach 72°F | 18 min | 10 min |
| Power draw | 1.3 kW/hr | 1.1 kW/hr |
| Noise level | 60 dB | 54 dB |
| Humidity | 60% | 47% |
He noticed that keeping the filter clean and coils clear also extended compressor rest cycles — reducing wear and tear.
⚙️ 15️⃣ What to Do If It Happens Again
Even with great maintenance, ACs can hiccup occasionally.
Mike’s emergency routine if cooling stops again:
-
Turn unit off completely.
-
Check power and breaker.
-
Clean filter and inspect coils.
-
Wait 15 minutes.
-
Restart on Cool mode.
“Nine times out of ten, that fixes it. The tenth time? I call the tech.”
🧊 16️⃣ How to Tell If Your Unit Is Losing Refrigerant
Mike’s technician explained a simple telltale sign: if air feels cool but not cold and frost keeps returning, refrigerant could be low.
While this isn’t DIY-fixable, you can confirm symptoms:
-
Airflow normal but temperature difference <10°F
-
Hissing or bubbling noise
-
Unit runs constantly without cycling
In that case, stop use and call a certified technician. Refrigerant systems require EPA Section 608 certification to service.
🌿 17️⃣ Why Amana Made Troubleshooting Easier
Amana designed this 11,800 BTU model for DIY maintenance and diagnostics:
-
Removable filter grille — no tools needed.
-
Self-diagnosis LED indicators (on some models).
-
Thermostat and sensor access behind front panel.
-
Easy-slide chassis for coil cleaning.
Mike appreciates that it’s built for homeowners, not just technicians.
“Amana must’ve had guys like me in mind — people who actually enjoy fixing their own stuff.”
🧠 18️⃣ Key Takeaways from Mike’s Cooling Crisis
-
Start simple. Most problems begin with airflow or settings.
-
Clean regularly. Filters and coils are your AC’s lungs.
-
Reset smartly. Unplugging resets internal overloads.
-
Listen and observe. Sounds and airflow changes reveal a lot.
-
Know your limits. Electrical or refrigerant issues = call a pro.
“Once you know the signs, your AC tells you what’s wrong,” Mike says. “You just have to pay attention.”
In the next topic we will know more about: Extreme Weather Performance: Can It Handle Hot Summers and Humid Climates?


