📋 Introduction
A through-the-wall air conditioner is generally one of the most reliable ways to heat or cool a single space. Unlike portable or window units, it’s semi-permanent, better sealed, and often more powerful. But like any machine, things can go wrong.
If your unit:
-
Won’t cool in summer
-
Won’t heat in winter
-
Runs but doesn’t change room temperature
-
Blows weak air
…there’s a structured process you can follow to narrow down the cause.
This guide will walk you through step-by-step troubleshooting — starting from quick, no-cost checks to more involved diagnostics. You’ll learn what you can fix yourself, and when it’s best to call a pro.
⚠️ Safety First:
-
Always turn off power to the unit before opening panels.
-
Avoid working on refrigerant lines — it’s illegal to handle refrigerant without EPA certification in the U.S. (EPA Section 608).
2. 🧐 Quick Self-Check Before You Begin
Sometimes the fix is surprisingly simple. Before diving deep, check:
-
Power Supply
-
Is the unit plugged in securely?
-
Is the wall outlet working? Test with another appliance.
-
Check the breaker panel — reset if tripped.
-
-
Remote Control / Thermostat Settings
-
Are the batteries fresh?
-
Is the mode set correctly (COOL or HEAT)?
-
Is the temperature set lower than room temp for cooling, or higher for heating?
-
-
Airflow Direction & Fan Speed
-
Are louvers positioned correctly?
-
Is fan speed set to HIGH for best initial performance?
-
💡 Savvy Tip: About 10% of “broken” AC calls are just incorrect settings or tripped breakers.
3. ❄️ Cooling Problems & Solutions
A. Weak or No Cooling
Possible Causes & Fixes:
-
Dirty Filter
-
Clogged filters reduce airflow and cooling output.
-
Fix: Remove and clean or replace (see ENERGY STAR filter guide).
-
-
Dirty Evaporator Coil
-
Dust acts like insulation, preventing heat absorption.
-
Fix: Turn off power, remove front panel, brush gently, and use no-rinse coil cleaner.
-
-
Blocked Condenser Coil (Outdoor Side)
-
Debris outside prevents heat release.
-
Fix: Slide unit from sleeve, clean coils with soft brush and coil cleaner.
-
-
Low Refrigerant
-
Caused by leaks; only a pro can handle this legally.
-
Fix: Call an EPA-certified HVAC tech.
-
B. Unit Blowing Warm Air in Cool Mode
Possible Causes & Fixes:
-
Mode Error: Ensure it’s not in FAN ONLY or HEAT.
-
Frozen Coil: Caused by dirty filter, very low refrigerant, or poor airflow. Turn off and let thaw.
-
Outdoor Blockage: Ensure outdoor vent isn’t blocked by furniture, plants, or covers.
4. 🔥 Heating Problems & Solutions
A. Weak or No Heat
-
Wrong Mode Selected
-
Set to HEAT or AUTO HEAT.
-
-
Dirty Filter/Coil
-
Restricts airflow, reducing heating output. Clean as above.
-
-
Heat Pump Limits
-
If outdoor temps are below ~25°F, many heat pumps can’t keep up. Use backup heat.
-
-
Electric Resistance Heat Failure
-
Possible burned-out heating element — requires a technician.
-
B. Unit Blowing Cold Air in Heat Mode
-
Defrost Cycle (Heat Pumps): Normal short bursts of cool air while defrosting.
-
Thermostat Calibration Issue: Test with a separate thermometer.
-
Element Failure: For resistance models, a failed element can result in room-temp air output.
5. Airflow & Ventilation Issues
Poor airflow is often the root cause of both heating and cooling failures.
Check:
-
Furniture blocking front grille.
-
Louvers stuck or misaligned.
-
Fan not spinning at correct speed.
Fixes:
-
Relocate obstructions at least 2 feet from the unit.
-
Gently adjust louvers or replace broken ones.
-
If fan motor hums but doesn’t spin — call a pro (possible capacitor or motor failure).
6. ⚡ Electrical & Control Problems
Symptoms:
-
Unit dead (no lights, no sound).
-
Unit runs briefly then shuts off.
-
Unresponsive controls.
DIY Checks:
-
Test outlet with another device.
-
Reset breaker or replace blown fuse.
-
Check GFCI outlet (if applicable).
Pro-Only Repairs:
-
Replacing control boards.
-
Wiring harness repairs.
-
Sensor replacements.
7. 🏠 Environmental & Installation Factors
Even if your unit works perfectly, external factors can cause poor performance.
-
Oversized Unit: Cools too fast without dehumidifying → clammy air.
-
Undersized Unit: Runs constantly but never reaches set temp.
-
Poor Insulation: Heat gain/loss overpowers the AC.
-
Unsealed Wall Sleeve: Allows hot or cold outdoor air leaks.
Fix:
Seal the sleeve with foam gaskets and insulation. Improve room insulation or shading.
8. 🛑 When to Call a Professional
You should call a pro if:
-
You suspect a refrigerant leak.
-
The compressor won’t start.
-
There’s an electrical burning smell.
-
Breaker trips repeatedly.
-
You’ve done all DIY steps with no improvement.
Average Costs:
-
Diagnostic fee: $75–$125
-
Refrigerant recharge: $150–$400
-
Heating element replacement: $120–$250
9. 🔄 Preventive Maintenance to Avoid Future Problems
-
Clean filter every 30–60 days during use.
-
Clean indoor & outdoor coils at least yearly.
-
Check and clear drain hole to prevent leaks.
-
Keep plants and debris 2 feet from outdoor vent.
-
Schedule annual professional inspection.
Reference: DOE Maintenance Recommendations.
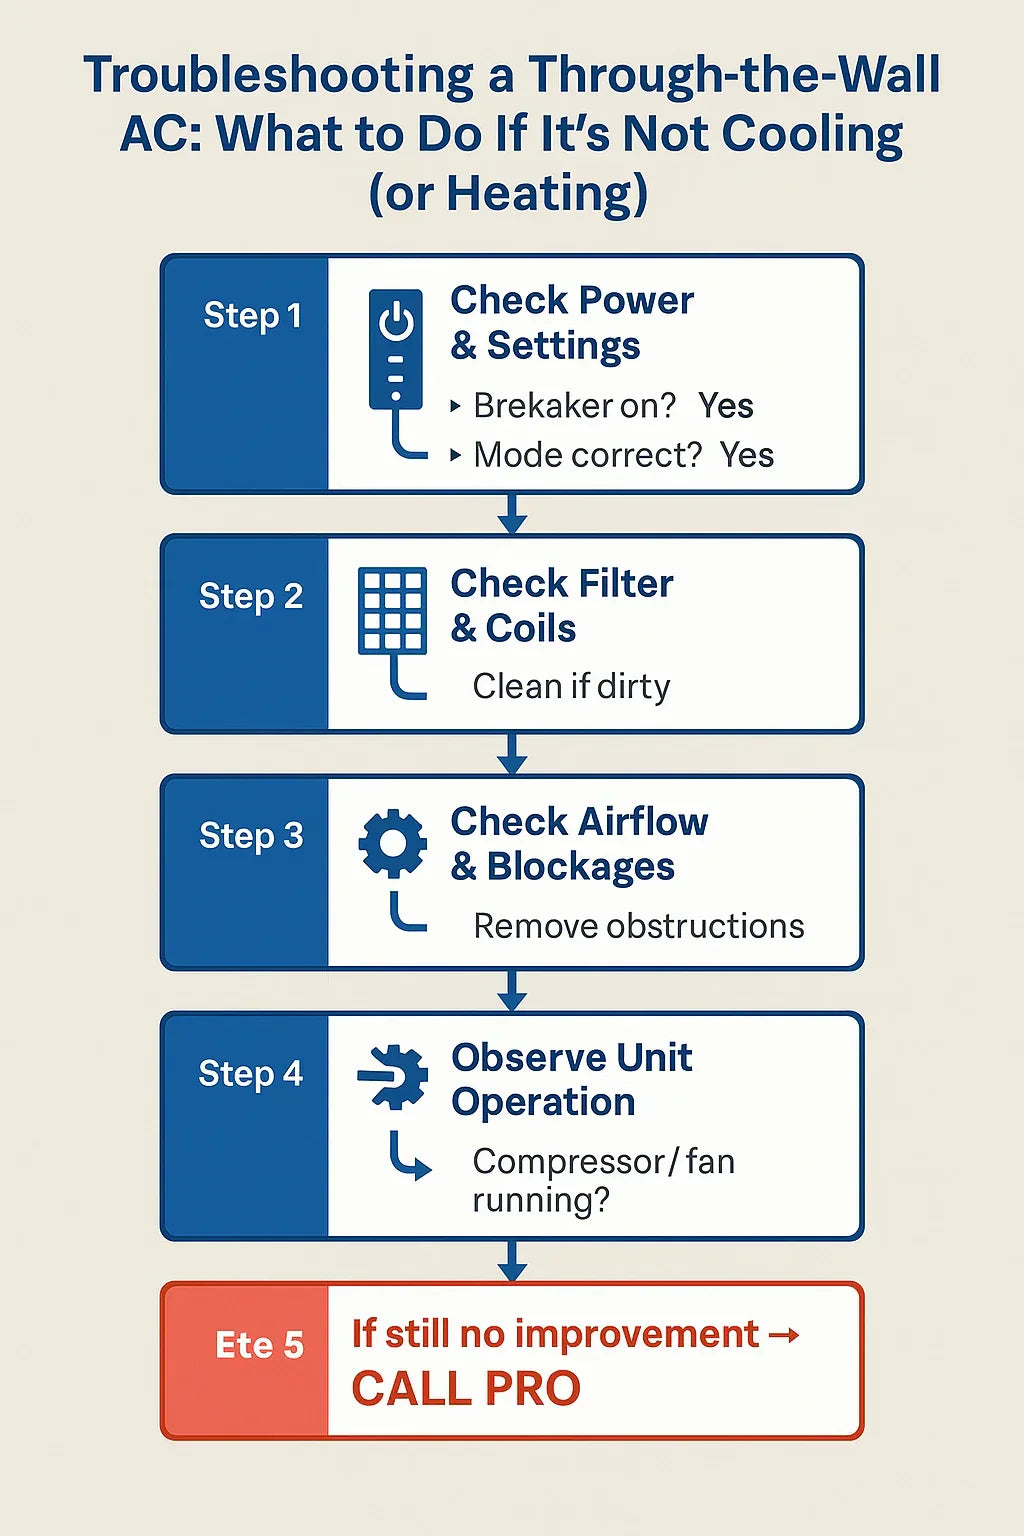
10. 🗺 Savvy’s Troubleshooting Flowchart
No Cooling or Heating?
⬇️
Step 1: Check Power & Settings
-
Breaker on?
-
Mode correct?
⬇️
Step 2: Check Filter & Coils -
Clean if dirty
⬇️
Step 3: Check Airflow & Blockages -
Remove obstructions
⬇️
Step 4: Observe Unit Operation -
Compressor/fan running?
⬇️
Step 5: If still no improvement → Call Pro
11. 📌 Final Thoughts
Through-the-wall AC units are designed for years of service — but like any mechanical system, they require clean airflow, proper settings, and occasional TLC.
By following this step-by-step troubleshooting guide, you can fix many problems yourself, avoid unnecessary repair bills, and keep your space comfortable all year.
For further reading & resources:
In the Next topic we will read more about: Top Through-the-Wall AC Brands Compared: LG vs. Friedrich vs. GE


