Hey folks, Mike here. One of the most common questions I get when talking about horizontal cased A-Coils (like the Goodman CHPTA4830C3) is:
“Will it actually fit in my utility space without causing problems?”
And let me tell you—that’s a smart question. Because it’s not just about whether the coil physically fits. It’s about whether it has the space, airflow, and clearance it needs to operate efficiently and whether it’s going to be quiet and serviceable for years to come.
So in this guide, I’ll walk you through everything you need to know: dimensions, clearance rules, noise issues, drainage, and how to figure out if your utility room, attic, or crawlspace is up for the job.
📐 1. Understanding Coil Dimensions
The Goodman CHPTA4830C3 is a 3.5–4 ton horizontal cased A-Coil designed for residential applications.
Typical Dimensions for a Horizontal A-Coil
While models vary, most horizontal cased A-Coils in this size range measure roughly:
-
Width: 21–24 inches
-
Height: 20–23 inches
-
Depth/Length: 26–30 inches
👉 Always check the exact manufacturer’s spec sheet for your model. For Goodman, you can find it on their official site.
Why Size Matters
-
The casing makes installation easier and protects the coil.
-
But that casing adds bulk—meaning you can’t just “squeeze it in” like a bare coil.
-
You’ll need extra clearance on all sides, not just enough space for the box itself.
Mike’s advice: “Measure twice, buy once. Don’t just trust the dimensions online—actually measure your utility space before committing.”
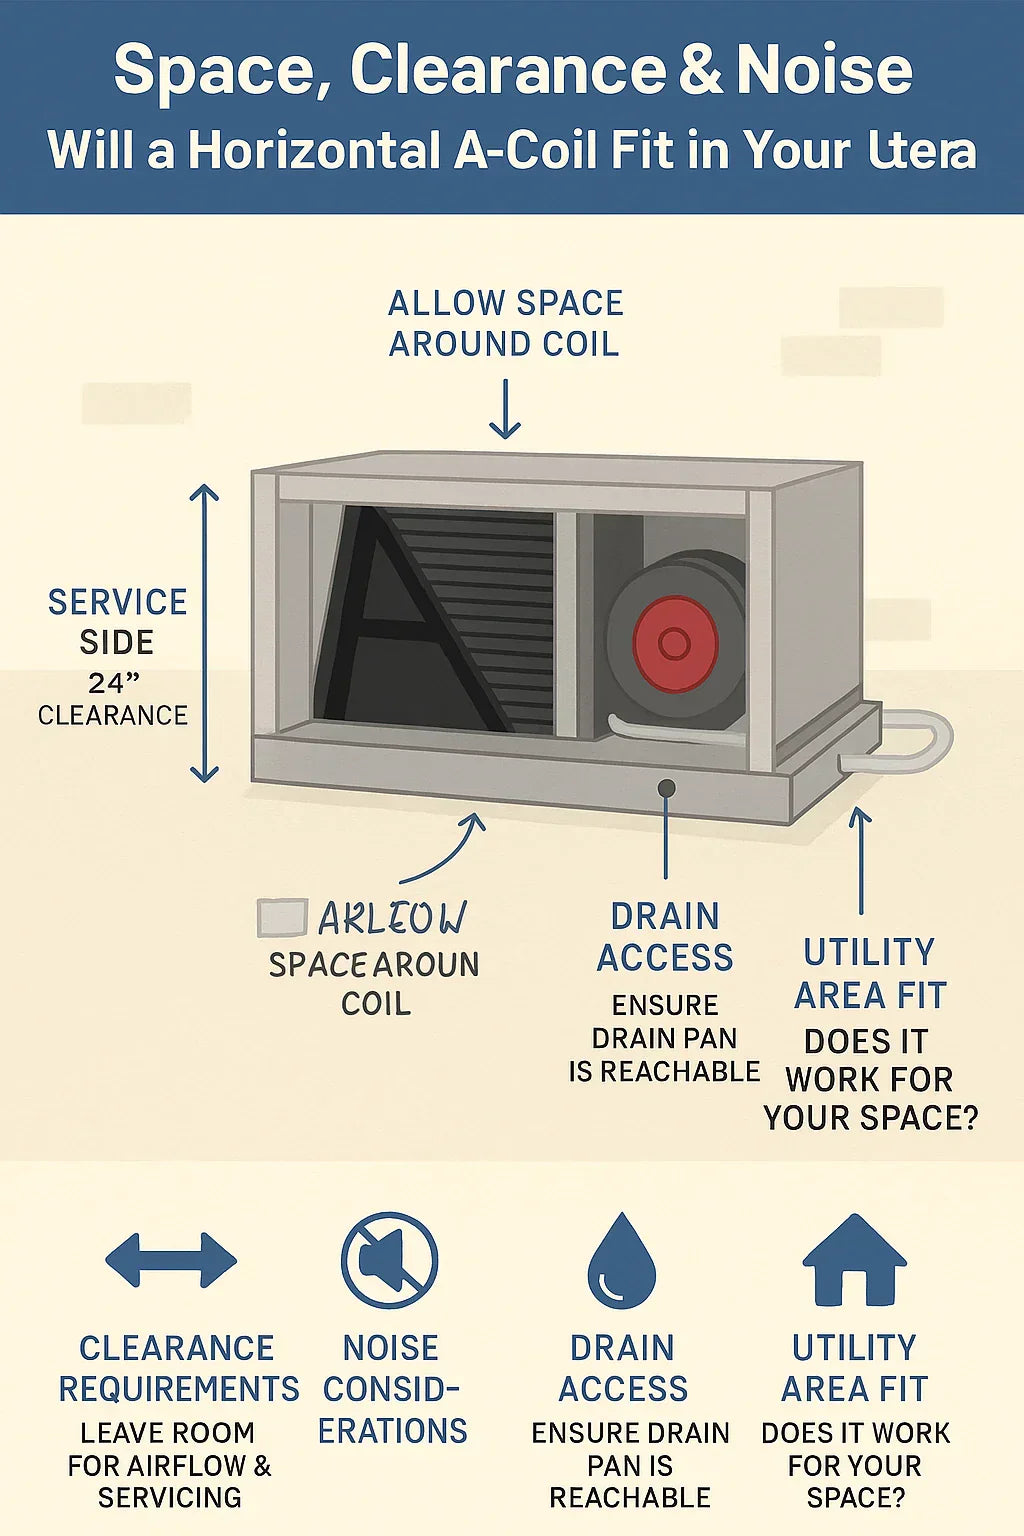
↔️ 2. Clearance Requirements for Airflow & Service
Your coil needs breathing room. If it’s jammed against walls or ductwork, two bad things happen:
-
Airflow restriction – reduces efficiency, strains the blower, and risks freezing the coil.
-
Service access nightmare – your tech can’t clean, test, or repair without tearing things apart.
General Clearance Guidelines
-
Front/Service Side: At least 24 inches clearance.
-
Sides: At least 3–6 inches minimum.
-
Top/Bottom: Follow manufacturer guidance (often 6–12 inches).
-
Drain Access: Clear path to remove and service drain pan.
📖 Reference: ACCA – Residential HVAC Installation Guidelines
Mike’s tip: “If you can’t slide a screwdriver in there, your tech won’t thank you later. Leave room.”
🔇 3. Noise Considerations
Here’s the truth: the coil itself is pretty quiet. The noise comes from the blower and any vibration in the system.
Why Tight Installs Are Noisy
-
Small spaces amplify sound (think of it like an echo chamber).
-
Metal-on-metal contact causes rattles.
-
Lack of insulation means vibrations transfer into walls and floors.
Noise Control Tips
-
Use vibration-absorbing pads under the air handler.
-
Add acoustic insulation in closets or around duct penetrations.
-
Ensure ducts are sealed properly—air leaks cause whistling.
-
Don’t install right against drywall—leave a buffer.
📖 Reference: Energy.gov – Reducing HVAC Noise
Mike’s story: “I once installed a coil in a laundry closet without enough insulation. The homeowner called it the ‘jet engine closet.’ A little acoustic padding fixed it.”
💧 4. Drain Line & Pan Positioning
Horizontal coils generate a lot of condensation in cooling season. If drainage isn’t right, you’ll have leaks, water damage, or even mold.
What to Watch For
-
Coil must be installed with a slight pitch toward the drain.
-
Drain pan must be accessible for cleaning or replacement.
-
Secondary drain line or float switch should be installed (extra protection).
-
Avoid “tight fit” installs where you can’t reach the drain line.
📖 Reference: ACHR News – Preventing Condensate Drain Problems
Mike’s advice: “Test the drain line with a cup of water after install. If it doesn’t flow, you’ll know before your ceiling stains.”
🏡 5. Utility Area Fit Scenarios
Where your coil is installed makes a big difference. Let’s go through common scenarios:
Closet Installs
-
Tightest spaces—clearance is critical.
-
Noise may carry into living spaces.
-
Service access often a challenge.
Attics
-
Usually plenty of horizontal space.
-
Watch out for proper drainage slope.
-
Insulate around the unit to reduce radiant heat.
Crawlspaces
-
Clearance is limited vertically.
-
Humidity can cause corrosion if not sealed.
-
Make sure the area stays dry and pest-free.
Basements/Garages
-
Best option for access and service.
-
Usually quieter since further from living space.
-
Drainage often easier to set up.
📖 Reference: HVAC.com – AC Installation Locations
✅ 6. Homeowner Checklist: Will It Fit?
Here’s my go-to checklist before you install:
-
📏 Measure available space – compare with coil dimensions.
-
↔️ Leave 24” clearance for service access.
-
💧 Check drain access – can you reach it easily?
-
🔇 Consider noise – is it near bedrooms or living areas?
-
📦 Duct connections – make sure you’ve got room for proper alignment.
-
🧰 Serviceability – think ahead: can a tech remove the pan or TXV if needed?
Mike’s tip: “Don’t just think about today’s install. Think about the day you—or your tech—have to replace a part in 5 years.”
⚠️ 7. What Happens If You Don’t Leave Enough Space?
I’ve seen it too many times: a coil shoved into a space that’s too small. The results?
-
Airflow restrictions → higher bills and poor comfort.
-
Drain pan leaks → water damage and mold.
-
Noise complaints → humming, rattling, and whistling.
-
Impossible maintenance → what should be a $150 fix becomes a $1,500 replacement.
📖 Reference: HVAC Repair Costs
💡 8. Mike’s Final Take
Yes—your Goodman horizontal A-Coil will likely fit in your utility space. But fitting isn’t the goal—fitting comfortably is.
Leave space for:
-
Proper airflow.
-
Service access.
-
Drainage slope.
-
Noise control.
Mike’s bottom line: “A tight fit today becomes a headache tomorrow. Give your coil breathing room, and it’ll give you cool comfort for years.”
In the next topic we will know more about: How Much Does a Goodman A-Coil Cost in 2025? Equipment, Labor & Energy Use Explained


