🏢 1. Introduction – Why Rooftop Installations Are Popular
When you’re dealing with 6–10 ton commercial packaged HVAC units, rooftop placement isn’t just an option—it’s often the smart move. In my years managing installs, I’ve seen why so many property owners choose it:
-
Space-saving – No eating up valuable parking lot or loading dock space.
-
Security – Less risk of vandalism or theft compared to ground-level equipment.
-
Noise reduction – Keeps compressor noise away from occupied areas.
-
Maintenance access – Techs can work without disrupting business operations.
That said—installing a multi-ton HVAC unit on a roof isn’t a “just drop it in” job. It’s a project that involves engineering, logistics, safety, and coordination between multiple trades.
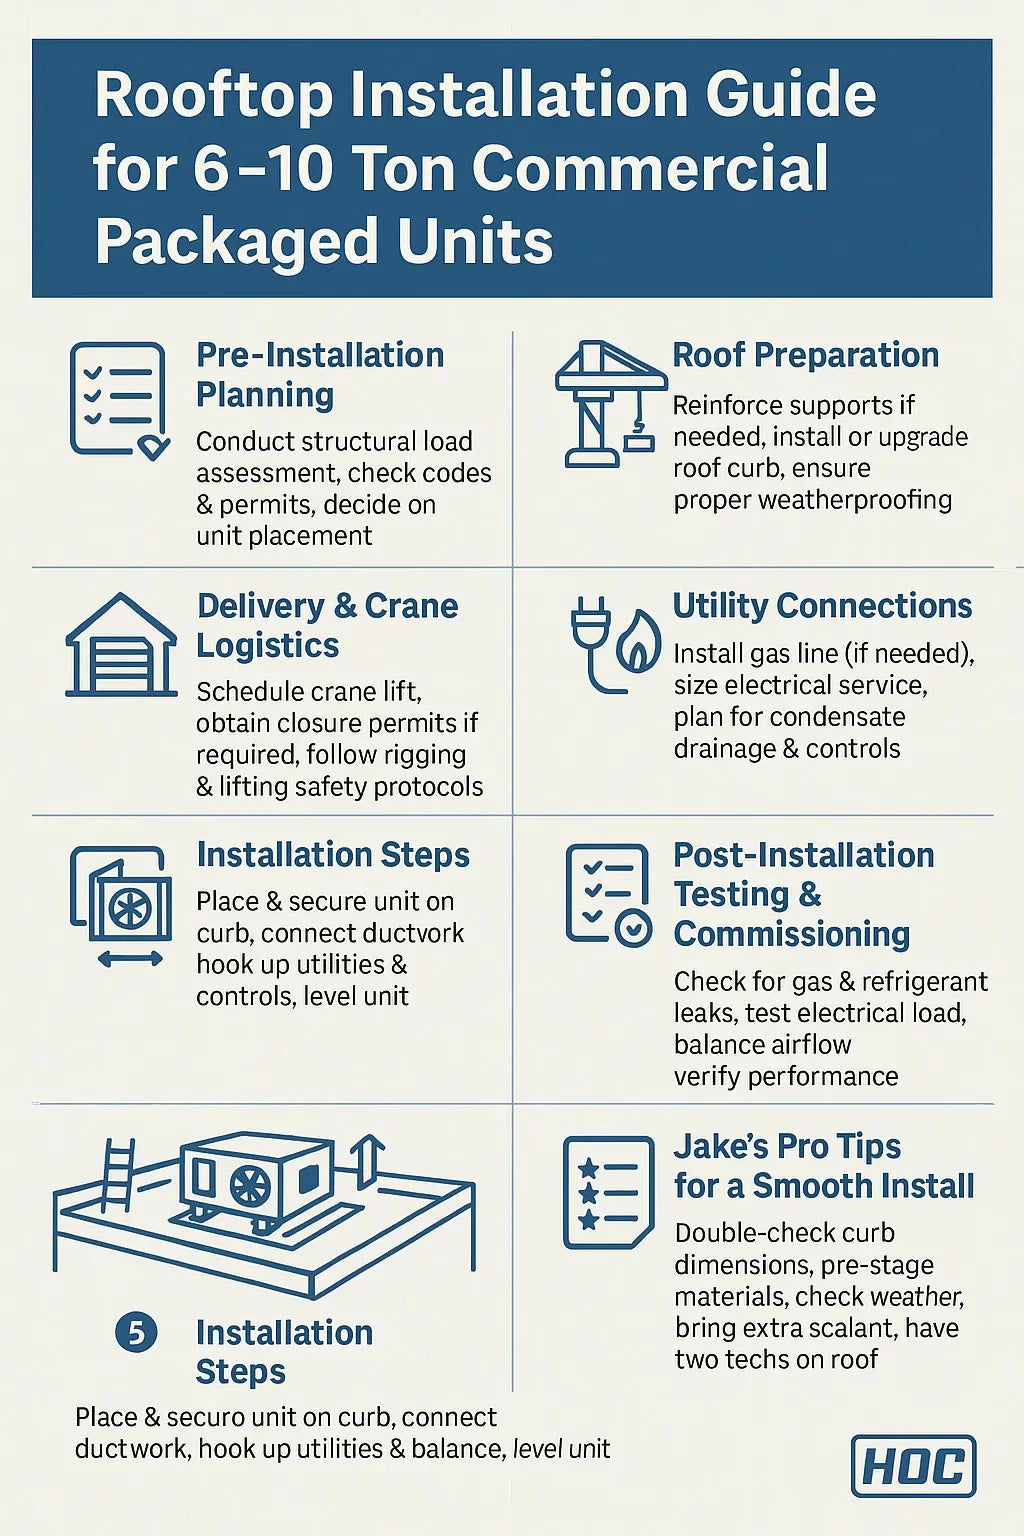
📏 2. Pre-Installation Planning
Step one: never assume the roof can handle the weight.
A 10-ton packaged unit can weigh 1,000–1,500 pounds—sometimes more with accessories.
Checklist for planning stage:
-
Structural Load Assessment
-
Hire a licensed structural engineer to confirm the roof’s live load and dead load capacity.
-
Consider snow load (if in cold climates) + unit weight + service personnel.
-
-
Code Compliance & Permits
-
Check local building codes—many cities require detailed load calcs in permit applications.
-
Secure mechanical and electrical permits in advance.
-
-
Placement Planning
-
Place unit for optimal duct runs and minimal airflow restriction.
-
Maintain clearances per manufacturer specs (usually 3–6 feet on service sides).
-
Consider prevailing wind direction for economizer and exhaust locations.
-
🏗 3. Roof Preparation
A rooftop unit is only as good as the surface it’s sitting on.
Steps before delivery:
-
Reinforce Structure (if engineer recommends) – This could mean adding steel beams under the curb location.
-
Install Roof Curb – A prefabricated frame that supports the unit and mates with ductwork. Curb height is often 14–18 inches for proper drainage.
-
Weatherproofing – Flash and seal around the curb to prevent leaks. Use compatible roofing materials to maintain warranty.
-
Coordinate Trades – Roofing contractor, HVAC team, and possibly electrician or plumber.
🚚 4. Delivery & Crane Logistics
Why the crane step is a big deal: A unit this size can’t be hauled up a ladder—cranes are non-negotiable.
Key steps:
-
Schedule Early – Crane companies often book weeks in advance.
-
Permits for Street Closure – Contact city or county if roads/sidewalks will be blocked.
-
Rigging Plan – Work with crane operator to ensure proper lifting points (manufacturer’s lift points are critical).
-
Safety Briefing – Before lift, all personnel should know their role and PPE requirements.
Pro Jake Tip: Always have a backup lift day in case of high winds or weather delays. A 1,500 lb HVAC unit swinging in gusty winds is a no-go.
🔌 5. Utility Connections
Depending on whether you’ve chosen gas furnace heat or electric heat, utility prep varies.
-
Gas Furnace Models:
-
Size and install gas lines per local code.
-
Include sediment traps, shutoff valves, and union fittings for service.
-
Pressure test before connection.
-
-
Electric Heat Models:
-
Ensure panel capacity can handle full load amps + breakers sized per NEC.
-
Run conduit to curb location before lift day if possible.
-
-
Both Types:
-
Route condensate drains with slope for gravity flow.
-
Integrate thermostat wiring and building control systems.
-
🛠 6. Installation Steps
Here’s the standard rooftop packaged unit install sequence I use:
-
Pre-lift Prep – Confirm curb adapter matches unit base. Stage tools and duct seals.
-
Lift & Place – Crane operator sets unit squarely on curb; installers guide with tag lines.
-
Level & Secure – Use shims or adjustable curb mounts if roof slope is significant.
-
Duct Connection – Supply and return ducts connected, sealed with mastic or UL 181 tape.
-
Utility Hookup – Gas line/electrical connections, condensate drains, and controls wired in.
-
Startup Checks – Initial power-up, verify fan rotation, inspect belts, and confirm refrigerant pressures.
🧪 7. Post-Installation Testing & Commissioning
Never leave a rooftop install without a full commissioning checklist completed.
-
Gas Leak Test – Soap solution or electronic detector.
-
Electrical Load Test – Check amperage draw vs. nameplate data.
-
Airflow Balancing – Adjust dampers for proper CFM to each zone.
-
Thermostat & Control Test – Verify communication with building automation system (if used).
-
Performance Verification – Compare measured EER/IEER with manufacturer’s spec.
📑 8. Maintenance Access & Safety Tips
Keep future techs in mind:
-
Roof Access: Permanent ladder, interior hatch, or OSHA-compliant exterior ladder.
-
Fall Protection: Guardrails or tie-off anchor points if roof edge is within 6 feet.
-
Service Clearance: Maintain per manufacturer—don’t crowd other rooftop equipment.
-
Clear Pathways: Avoid placing units where snow or debris will block access.
📝 9. Jake’s Pro Tips for a Smooth Install
-
Double-check curb adapter dimensions before delivery—wrong size = costly delays.
-
Pre-stage all materials the day before the crane arrives.
-
Check weather twice—once 48 hours ahead, and again the morning of lift.
-
Bring extra sealant—you’ll always use more than planned.
-
Have two techs on the roof and one on the ground during the lift for communication.
✅ 10. Final Checklist Before You Sign Off
-
Unit level and secured to curb
-
Duct connections sealed & insulated
-
Utilities connected and tested
-
Controls operational and labeled
-
Roof penetrations sealed and flashed
-
Commissioning report completed
-
Owner’s manual and maintenance schedule delivered to building staff
In the next topic we will know more about: Maintenance Schedule for Commercial Packaged AC & Gas Furnace Units


