🌬 Introduction
Jake thought buying his new 8,000 BTU through‑the‑wall AC was as simple as picking one online and plugging it in. The unit itself was $550—reasonable enough. But then came the wall sleeve, the installation tools, the sealant, and the unexpected weekend of labor.
By the time the job was done, Jake’s “$550 AC” had actually cost closer to $900.
This guide lays out everything Jake learned—so you’ll know the true costs of owning a 6,000–9,000 BTU wall AC, whether you’re going the DIY route or hiring a pro.
❄ Step 1: Cost of the Wall AC Unit
📊 Price Ranges by Size
-
6,000 BTU: $350–$500
-
8,000 BTU: $400–$600
-
9,000 BTU: $450–$700
Jake’s choice: An LG 8,000 BTU ENERGY STAR model for $550.
⚙️ Factors That Affect Price
-
Brand
-
LG: Premium pricing, quiet operation, ENERGY STAR models.
-
GE: Solid middle ground in price and quality.
-
Amana: Budget-friendly, but louder and less feature-rich.
-
-
Features
-
WiFi & Smart Control: Add $50–$100.
-
Inverter Compressor: $100–$200 extra, but quieter and more efficient.
-
Heat Pump Add-On: Adds $300–$600 to the base unit price.
-
-
Energy Efficiency
-
ENERGY STAR models may cost $100 more upfront but save $20–$40/year in electricity.
-
Over 5 years, that’s $100–$200 in savings.
-
📌 According to Energy Star, efficient models typically pay for themselves in 2–3 years.
🧰 Step 2: Wall Sleeve Costs
🏠 What is a Wall Sleeve?
A wall sleeve is the frame that supports and houses the AC unit. It ensures stability, seals against the elements, and allows for easy replacement of the unit in the future.
Jake assumed the AC came with a sleeve—it didn’t.
💵 Typical Sleeve Prices
-
Standard Steel Sleeve (24"): $100–$200
-
Insulated Premium Sleeve: $150–$250
-
Universal Sleeves (fit multiple brands): $180–$300
Jake spent $200 on an insulated sleeve to cut down on noise and drafts.
📌 Home Depot recommends insulated sleeves for bedrooms or offices where noise and energy loss are a concern.
🔧 Step 3: DIY Installation Costs
Jake decided to install his AC himself—saving money but investing a full weekend.
🛠 Tools & Materials List
-
Reciprocating saw or circular saw: $50–$150
-
Drill + masonry bits: $40–$100
-
Level & tape measure: $20–$40
-
Insulation foam & weatherstripping: $20–$40
-
Exterior caulk: $10
-
Safety gear (gloves, goggles, dust mask): $20–$50
💰 Total DIY Extras
If you already own basic tools: $100–$150
If starting from scratch: $200–$300
Jake already had a drill and level, but had to buy a saw for $100.
📌 Family Handyman notes that proper tools are essential for cutting clean, safe openings in drywall and siding.
👷 Step 4: Hiring a Professional
Not everyone is comfortable cutting into an exterior wall. Jake priced out pro installation before deciding on DIY.
📊 Typical Professional Labor Costs
-
Standard Install (wood siding): $300–$600
-
Complex Install (brick, stone, or wiring work): $700–$1,200
Jake’s quote: $750 for his brick-wall office.
Pros usually include:
-
Wall sleeve installation
-
Proper sealing & insulation
-
Electrical safety check
-
Cleanup & warranty support
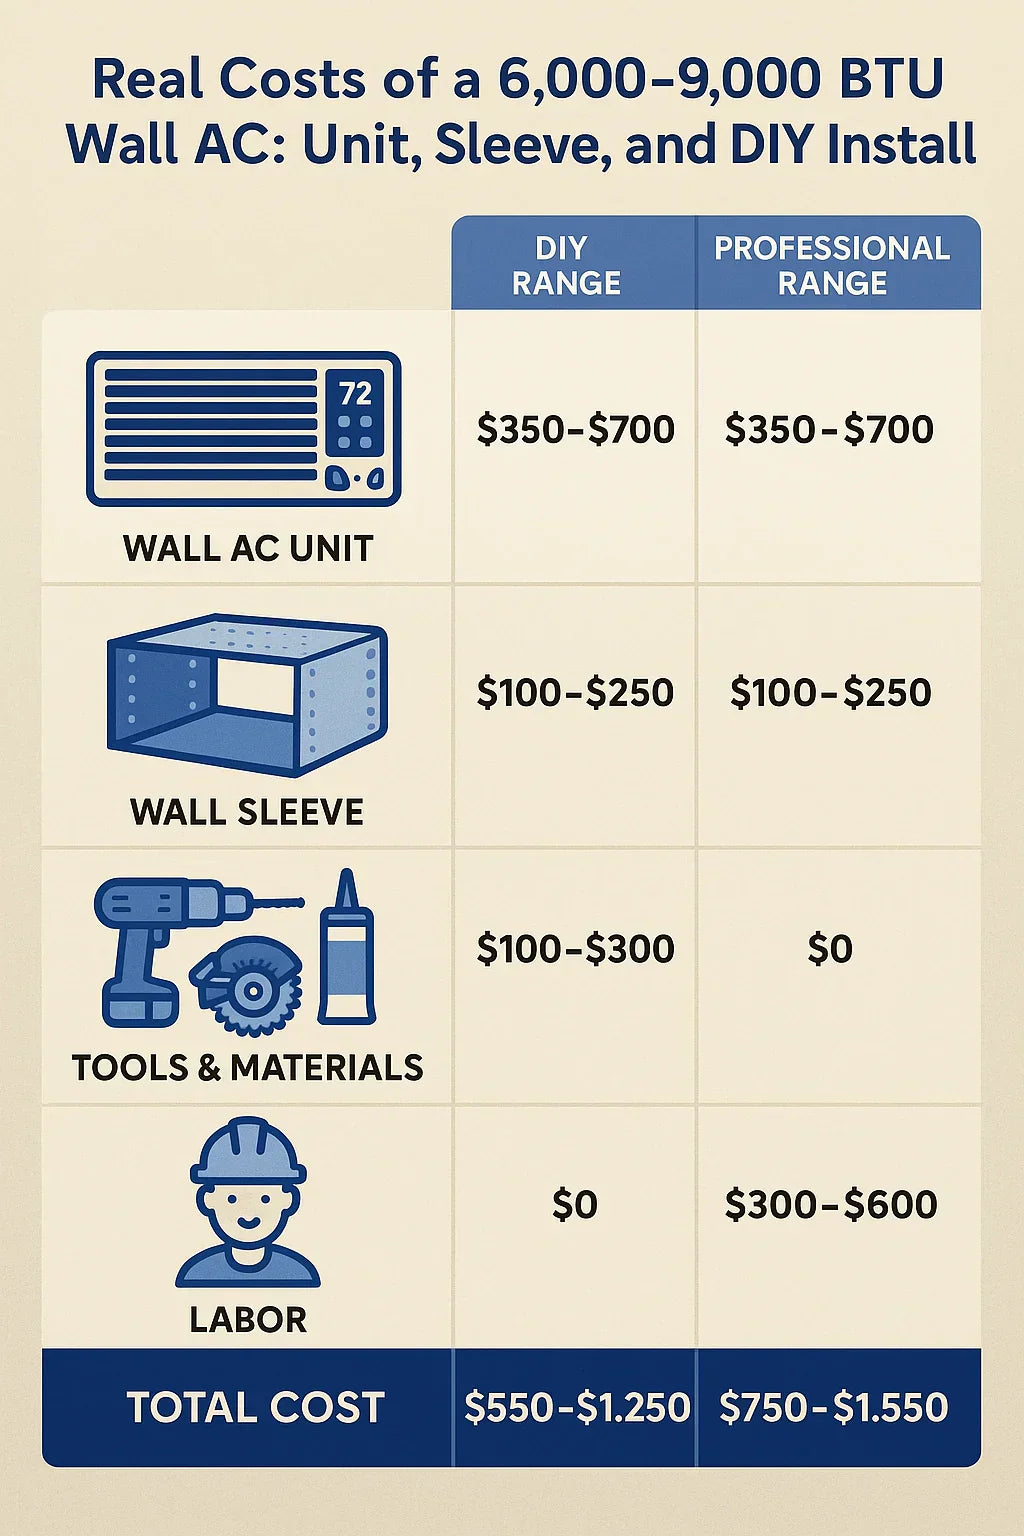
📊 Full Cost Breakdown
| Item | DIY Range | Professional Range |
|---|---|---|
| AC Unit | $350–$700 | $350–$700 |
| Wall Sleeve | $100–$250 | $100–$250 |
| Tools/Materials | $100–$300 | $0 (pro provides) |
| Labor | $0 | $300–$600 |
| Total | $550–$1,250 | $750–$1,550 |
Jake’s final DIY cost: $850
Pro quote: $1,200
Savings: ~$350, but required time, tools, and confidence.
🏡 Long-Term Costs
⚡ Energy Use
Jake’s 8,000 BTU unit (850 watts/hour):
-
Summer (8 hrs/day × 90 days) = 612 kWh
-
At $0.15/kWh = ~$92 per summer
🧼 Maintenance
-
Filters: $20–$40/year
-
Caulk & foam refresh: $15/year
-
Optional pro tune-up every 2 years: ~$100
📌 U.S. DOE recommends annual maintenance to extend a wall AC’s lifespan by 2–3 years.
🛑 Hidden Costs to Watch For
Jake was surprised by some extra expenses:
-
Electrical Upgrades: If your outlet can’t handle the load, rewiring may cost $100–$300.
-
Finishing Work: Drywall patching, exterior siding touch-up, or painting can add $50–$150.
-
Permits: Some HOAs or cities require approval; fees range $25–$100.
🏡 Jake’s Real-World Example
Scenario: 8,000 BTU LG unit for his office
-
AC Unit: $550
-
Wall Sleeve: $200
-
Tools & Supplies: $100
-
Labor: $0 (DIY)
-
First Summer Energy Bill: ~$92
Grand Total: ~$942
If Jake had hired a pro: ~$1,300–$1,400
Jake: “DIY saved me $400, but it was a sweaty weekend. If you’re not handy, hiring a pro is worth the peace of mind.”
✅ Jake’s Budgeting Checklist
-
AC unit ($350–$700)
-
Wall sleeve ($100–$250)
-
DIY tools/supplies ($100–$300) OR Pro labor ($300–$600)
-
Energy costs (~$90–$120 per summer)
-
Annual maintenance budget ($20–$50)
-
Contingency for hidden costs ($50–$200)
🏁 Conclusion
Jake’s lesson: A 6,000–9,000 BTU wall AC isn’t just the unit price. With the wall sleeve, tools, and installation, the real cost usually falls between $750 and $1,500.
-
DIY: Cheaper, but requires tools and a weekend of effort.
-
Pro Install: More expensive, but faster, safer, and hassle-free.
Either way, budgeting upfront prevents the “surprise costs” Jake faced—and ensures you stay cool without overheating your wallet.
In the next topic we will know more about: Is a 6,000–9,000 BTU Wall AC Big Enough for Your Room? Sizing Tips for Jake’s Home


