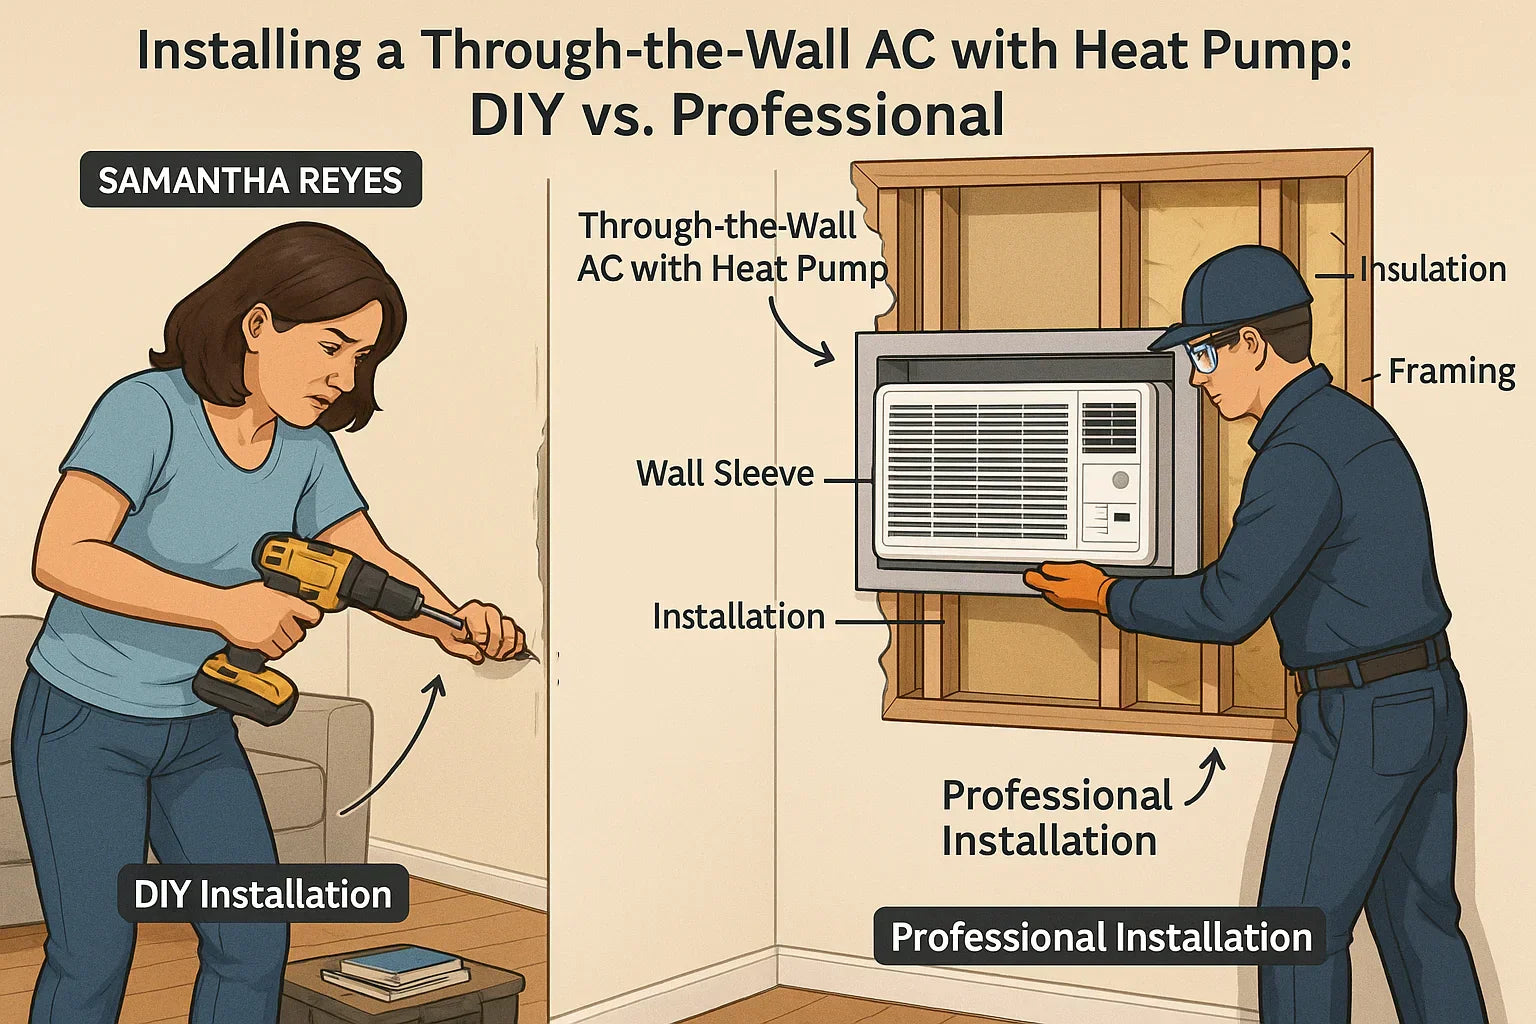
If you’re eyeing a sleek, year-round comfort solution like a through-the-wall air conditioner with a built-in heat pump, the big question is: Can you install it yourself—or is it better to call a professional?
The appeal of DIY is clear—save money, install on your schedule, and avoid contractor delays. But wall units are a different beast than portable or window systems. Cutting into your wall is a serious commitment.
This guide breaks down:
-
🔧 What it really takes to install one yourself
-
🧱 Step-by-step overview of cutting the wall and mounting the sleeve
-
⚡ What to know about electrical hookups
-
⚖️ When it’s smarter to bring in a pro
-
💰 Cost comparisons and code compliance
-
🔗 Includes 6+ verified resources
🧊 What Is a Through-the-Wall AC with Heat Pump?
These are permanently installed HVAC systems mounted into an exterior wall. They cool and heat a single room or zone using a heat pump, pulling heat from inside (cooling mode) or outside (heating mode).
Common units:
-
9,000 to 12,000 BTUs
-
208/230V power
-
Require a wall sleeve and direct wiring
Unlike portable or window ACs, these:
-
Are quieter
-
Have no visible cords or hoses
-
Provide heating AND cooling
-
Require a wall cutout + power supply
🧰 Tools & Skills You’ll Need to DIY It
Installing one yourself requires basic construction and electrical knowledge.
🧰 Tools:
-
Circular saw or oscillating multi-tool
-
Drill with masonry bit (for stucco or brick)
-
Screwdrivers and nut drivers
-
Stud finder
-
Level
-
Utility knife
-
Reciprocating saw (for tougher cuts)
-
Caulk gun and weatherproof sealant
🔧 Skills:
-
Comfort with power tools
-
Basic carpentry (framing, shimming, anchoring)
-
Ability to turn off and wire a 230V circuit
-
Attention to local building codes
📘 If you’ve done light renovations before (like mounting a TV or swapping an outlet), you're on the right track—but this job is more involved.
🧱 Step-by-Step DIY Overview
✅ Step 1: Choose the Right Location
-
Exterior wall (not load-bearing, ideally)
-
Avoid plumbing or electrical paths
-
Leave clearance for the unit outside
-
Make sure there’s an electrical path nearby
✅ Step 2: Install the Wall Sleeve
Most units (like GE, Amana, Friedrich) require a universal wall sleeve (sold separately or as a bundle).
-
Mark a cutout using the sleeve’s dimensions
-
Cut drywall on the inside first
-
Cut exterior cladding (siding, stucco, brick) using proper blade
-
Insert the sleeve level and shim if needed
-
Seal all gaps with expanding foam or caulk
-
Screw or anchor the sleeve to studs
💡 Tip: Use a sleeve with rear drainage support and rust-proof coating.
✅ Step 3: Slide In and Secure the AC/Heat Pump Unit
-
Remove rear grille and any packaging
-
Slide unit into the sleeve
-
Secure per manufacturer instructions (typically 2–4 screws)
-
Attach grille, filter, and front panel
-
Test for vibration or looseness
⚡ Step 4: Electrical Hookup (The Tricky Part)
Most heat pump wall units run on 208/230V and require:
-
Dedicated double-pole breaker (15–20A)
-
Properly sized wiring (usually 12 or 10 gauge)
-
GFCI protection (depending on local code)
-
Hardwired connection or plug (some models allow both)
Not comfortable with this part? Call a licensed electrician. Mistakes here can be dangerous or void your warranty.
🔗 National Electrical Code (NEC) Overview
🛠️ Key Installation Challenges (and How to Overcome Them)
| Challenge | Solution |
|---|---|
| Cutting through stucco or brick | Use masonry blade or call a contractor for just this step |
| Sleeve not level | Use shims and level before anchoring |
| Water leaks | Always slope sleeve slightly downward and seal rear edge |
| Condensate drainage issues | Use a sleeve with built-in drainage path |
| Circuit issues | Upgrade breaker box or run new circuit from panel |
💡 Don’t forget to pull a permit if required by your municipality. Some towns require inspection for any 230V appliance hookup.
🔗 Find Local Code Requirements – ICC PublicACCESS
📋 When to Call a Pro Instead
You should consider professional help if:
-
You’ve never cut into a wall before
-
You don’t feel confident wiring a 230V circuit
-
Your wall is brick, concrete, or load-bearing
-
You’re dealing with mold, asbestos, or existing insulation issues
-
Your local codes are strict and require inspection
What a Pro Offers:
-
Safer electrical installation
-
Precision wall cutting with less risk of damage
-
Access to sleeves, trim kits, and weatherproofing tools
-
Code-compliant, warrantied work
📞 Expect to pay $700–$1,200 for full install labor (sleeve, wall cut, wiring).
💰 DIY vs. Professional Install: Cost Breakdown
| Item | DIY Cost | Pro Install Cost |
|---|---|---|
| AC/Heat Pump Unit | $800 – $1,200 | Same |
| Wall Sleeve Kit | $100 – $150 | Included |
| Electrical (DIY or electrician) | $0 – $500 | $300 – $600 |
| Tools (if not owned) | $100 – $250 | N/A |
| Labor | Free | $400 – $700 |
| Total | $1,000–$2,100 | $1,600–$2,500 |
🧯 Safety Considerations
-
Always turn off power at the panel before working
-
Wear gloves, goggles, and a dust mask while cutting
-
Use a GFCI circuit if your model requires it
-
Secure all wires in approved conduit or junction boxes
-
Seal and weatherproof your wall cutout thoroughly
🌎 Energy Efficiency & Tax Credit Notes
ENERGY STAR®-rated through-the-wall heat pump units may qualify for:
-
Federal tax credit (25C) up to $2,000
-
State and utility rebates
-
Efficiency score increases on home appraisals
🔗 DSIREUSA.org – Find Local Rebates
🔗 IRS Form 5695 for Energy Credits
🔄 Summary: DIY vs. Pro — Which Is Right for You?
| Scenario | Go DIY | Call a Pro |
|---|---|---|
| Cutting drywall only | ✅ | |
| Brick/stucco exterior | ⚠️ | ✅ |
| Confident with power tools | ✅ | |
| Need new 230V circuit | ⚠️ | ✅ |
| Want peace of mind | ✅ | |
| On a budget | ✅ |
If you’re comfortable with cutting, measuring, leveling, and following instructions, DIY is a totally reasonable option. Just plan carefully, take your time, and call an electrician if needed.
In the next topic we will read about: Can You Expand the MRCOOL 4-Zone System Later? Futureproofing Your Install


