From prep to performance: your step-by-step walkthrough of upgrading to a modern, eco-friendly R-32 air conditioning system.
🧭 Introduction: Why Knowing the Process Matters
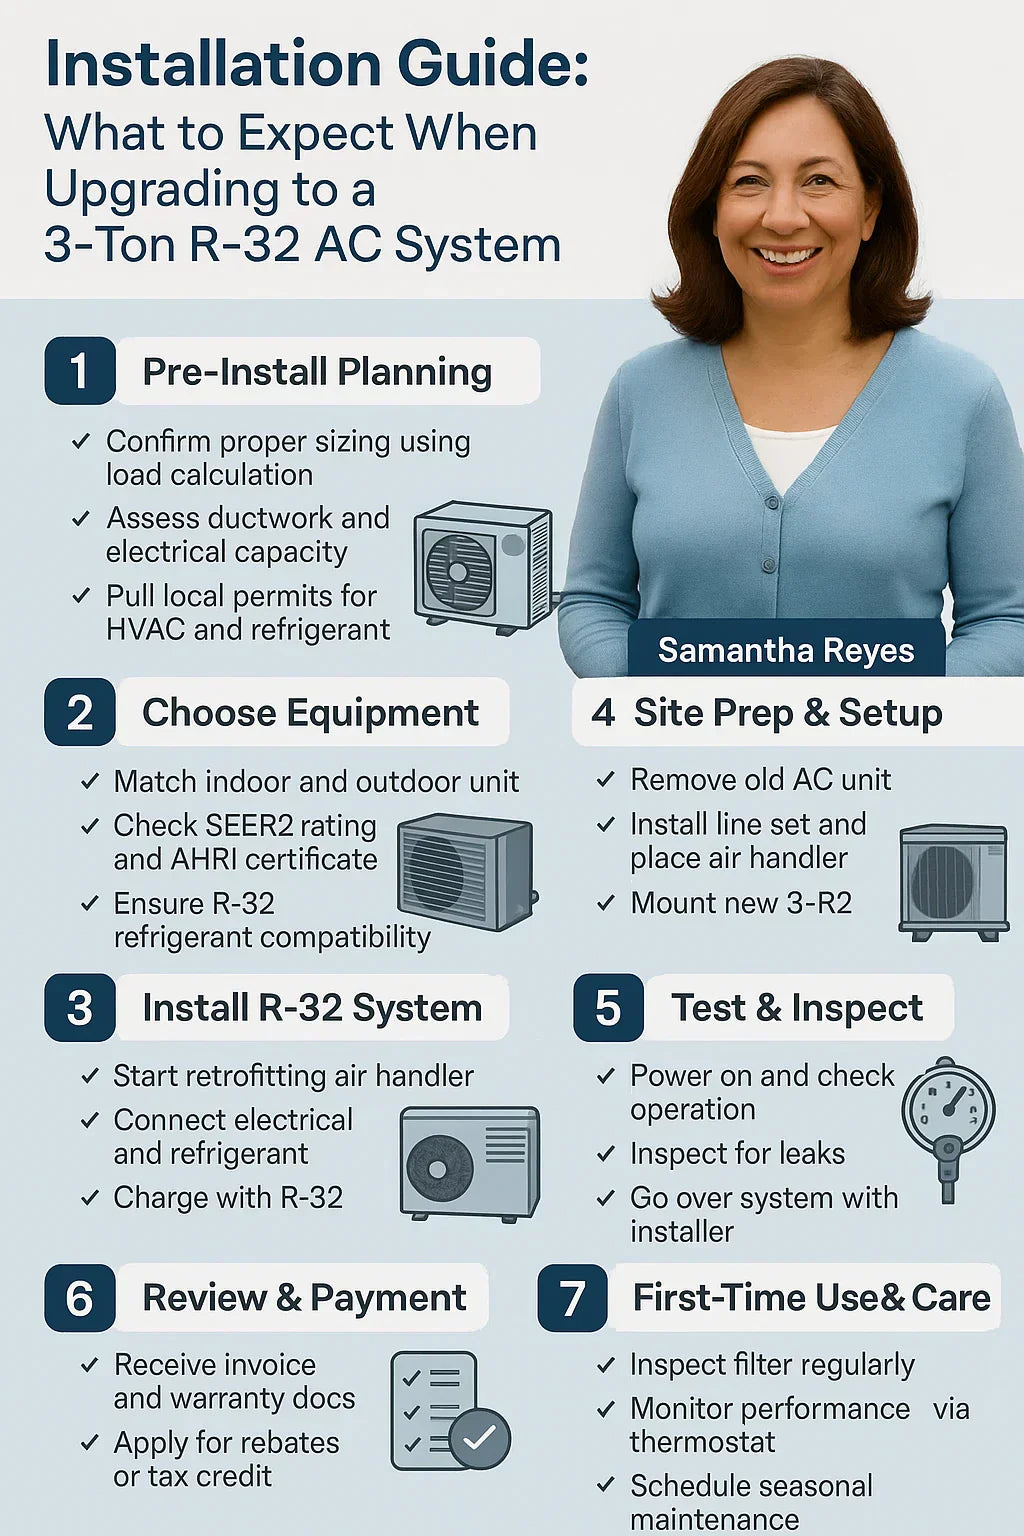
If you’re like Samantha Reyes—smart, detail-oriented, and ready to invest in long-term home comfort—upgrading to a 3-ton R-32 air conditioner might already be on your radar. But knowing what to expect from the installation process is key to avoiding surprises and getting the most out of your system.
This guide covers everything: from pre-installation planning and refrigerant handling rules to technician certification, project timeline, and cost-saving tips.
🛠️ Step 1: Pre-Installation Planning
✅ Site Evaluation
Before anything is installed, a licensed HVAC contractor will assess:
-
Square footage and layout (to confirm 3-ton sizing)
-
Existing ductwork condition and airflow (CFM)
-
Electrical panel capacity
-
Space for the air handler and outdoor unit
📐 Load Calculation (Manual J)
A proper Manual J calculation determines the exact cooling load required for your space, factoring in:
-
Windows, insulation, orientation
-
Home size and room volume
-
Local climate zone
Skipping this step can lead to oversized or undersized systems, which cost more and perform worse.
🔗 Use tools like CoolCalc to run a basic load estimate or ask your installer for their Manual J report.
🧊 Step 2: Choosing Your R-32 Equipment
A 3-ton R-32 split system consists of:
-
Outdoor condenser with R-32 refrigerant
-
Indoor air handler (with matching coil and TXV)
-
Thermostat (optional Wi-Fi model recommended)
-
Line set and insulation
🔍 Key Specs to Look For
| Component | Must-Have Features |
|---|---|
| Outdoor Unit | 36,000 BTU/hr, SEER2 ≥ 15.2, R-32-only |
| Air Handler | Variable-speed ECM blower, R-32-rated coil |
| TXV | R-32-compatible thermal expansion valve |
| Certification | AHRI-matched indoor/outdoor combination |
📎 Confirm compatibility at AHRI Directory.
⚖️ Step 3: Permits and Code Compliance
📋 Local Permits
Most municipalities require HVAC permits for refrigerant replacement and new AC installation. Your installer should:
-
Pull the permit
-
Schedule final inspection
-
Follow local code for disconnects, clearances, and refrigerant lines
⚠️ R-32-Specific Requirements
R-32 is classified as A2L (mildly flammable). Local codes may include:
-
Proper ventilation for indoor units
-
Labeling of refrigerant lines and service panels
-
Fire-rated line set insulation
🔗 Review ASHRAE safety guidelines for A2L refrigerants
📦 Step 4: Installation Day — What to Expect
Installation of a 3-ton R-32 system usually takes 1 full day (6–10 hours) for a retrofit, or 2 days for new ductwork or major upgrades.
👷♂️ What Happens On-Site
-
Remove old equipment and recover R-410A (if applicable)
-
Install new outdoor condenser and secure to concrete pad
-
Mount new air handler in attic, closet, or crawl space
-
Run refrigerant lines and drain piping
-
Evacuate air/moisture from the system (vacuum process)
-
Charge the system with R-32 refrigerant
-
Test system for leaks and functionality
-
Calibrate thermostat and airflow
-
Cleanup and final walk-through
📎 For a visual breakdown, see Carrier’s HVAC Installation Guide
🧯 Step 5: R-32 Refrigerant Handling
R-32 requires special equipment and training:
-
Tools must be R-32 compatible (including gauges, scales, and recovery systems)
-
Technicians must follow EPA Section 608 and A2L safety procedures
Always confirm that your installer is certified to work with R-32 systems.
🔗 Learn about certification requirements from EPA’s Refrigerant Safety page
🔧 Step 6: Post-Installation Review
🗂️ What to Expect from Your Installer
Before they leave, you should receive:
-
AHRI certificate (for rebates/tax credits)
-
Warranty registration paperwork
-
Thermostat tutorial
-
Maintenance checklist
-
Permit closure confirmation
📎 Use Energy Star’s HVAC checklist to make sure nothing is missed.
💵 Cost Breakdown: What Will a 3-Ton R-32 Install Cost?
| Item | Cost Range |
|---|---|
| 3-ton R-32 outdoor unit | $2,800–$3,500 |
| R-32 compatible air handler | $1,200–$2,000 |
| Thermostat (Wi-Fi) | $100–$300 |
| Installation labor | $2,500–$4,000 |
| Total Installed Cost | $6,500–$9,000 |
💸 How Samantha Saved Money on Her Installation
Home: 1,700 sq. ft. in Charlotte, NC
System: Goodman 3-ton R-32, 16 SEER2, Wi-Fi thermostat
Install Cost: $8,200
Rebates Received:
-
$2,000 federal tax credit (IRA 25C)
-
$500 utility rebate
-
$250 manufacturer discount
Final Net Cost: $5,450
📎 Estimate your own rebate with Rewiring America’s IRA Calculator
🧼 Step 7: First-Time Use and Maintenance Tips
🌬️ After Installation
-
Let the system run for 24–48 hours to stabilize performance
-
Check filter monthly for the first 3 months
-
Monitor energy usage via smart thermostat
🛠️ Seasonal Maintenance
-
Replace filters every 1–3 months
-
Schedule professional checkup every spring
-
Clean air handler coils and outdoor fins annually
⚠️ Mistakes to Avoid
🚫 Don’t skip the Manual J load calculation
🚫 Don’t mismatch indoor and outdoor units
🚫 Don’t use non-certified R-32 installers
🚫 Don’t overlook permits—it may void warranties or rebates
🚫 Don’t wait to register your product for warranty
✅ Final Checklist: Ready for Your R-32 Upgrade?
-
Verified home needs a 3-ton system via load calc
-
Selected SEER2-rated R-32 split system
-
Confirmed AHRI match and tax credit eligibility
-
Hired R-32 certified installer
-
Applied for permits and rebates
-
Scheduled spring maintenance
If you’ve checked these boxes, you’re on the path to efficient, affordable cooling for the next 15+ years.
In the next topic we will kow more about: Troubleshooting Common R-32 AC System Issues (and When to Call a Pro)


