Installation Guide: How Mike Installed His State ProLine 50-Gallon Water Heater (Step-by-Step)
🏠 1. Mike’s Story: From Cold Showers to Confidence
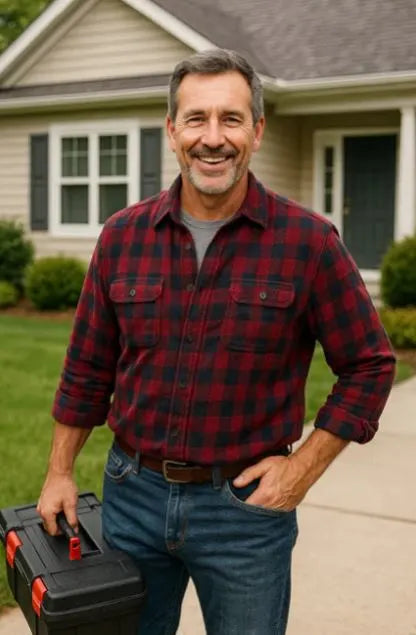
Mike Sanders still remembers the final day his old 40-gallon water heater quit.
It started with a lukewarm shower, ended with icy water halfway through dishwashing, and confirmed what he already knew: after 12 years, his water heater had reached its end.
Rather than waiting for a costly emergency install, Mike took matters into his own hands. A seasoned DIYer with a knack for home projects, he researched models and landed on the State ProLine 50-Gallon Electric Water Heater — known for efficiency, durability, and an easy-to-follow installation process.
“I’d helped a neighbour with a heater once, but this time it was my turn. I wanted to understand every part of my own setup,” Mike explained.
He turned this replacement into a learning opportunity. Below, you’ll find the same 20-step process he used — complete with safety precautions, tips, and efficiency tricks for a professional-grade installation.
🧭 2. Planning the Installation: Laying the Groundwork
Before touching a wrench, Mike knew that preparation would make or break the project.
📏 Measure Your Space
The first thing he did was measure his utility closet. The State ProLine Tall model stands about 61 inches tall and 20–22 inches wide. He ensured:
-
2 feet of clearance on all sides.
-
A drain pan that fits beneath it.
-
Enough headroom for connecting pipes and removing the anode rod later.
⚡ Electrical Requirements
Electric models require:
-
A dedicated 240V line.
-
A 30-amp double-pole breaker.
-
10-gauge copper wire rated for 30A.
His previous unit used the same circuit, but Mike double-checked connections for corrosion or frayed insulation.
💧 Plumbing Layout
He noted where the:
-
Cold water inlet (right side)
-
Hot water outlet (left side)
-
T&P relief valve
-
Drain valve
...were located. He also drew a quick plumbing diagram for reference during reassembly.
👉 NFPA’s Home Electrical Safety Guide helped Mike confirm his wiring setup was up to code.
🛒 3. Tools & Materials Checklist
To avoid frustrating mid-project runs to the hardware store, Mike laid everything out in advance.
🧰 Essential Tools
-
Adjustable wrench & channel locks
-
Screwdriver set
-
Pipe wrench
-
Tubing cutter
-
Wire stripper/cutter
-
Multimeter (to test power)
-
Level
-
Bucket and hose
-
Shop vacuum (for water cleanup)
🧱 Materials
-
Teflon tape
-
Dielectric unions
-
Flexible water heater connectors (3/4”)
-
¾” PEX or copper pipe
-
Ball shutoff valve
-
Electrical conduit
-
Drain pan & 1” PVC drain line
-
Pipe insulation sleeves
-
Pipe dope (sealant)
⚠️ 4. Safety First: Setting Up a Safe Workspace
Water heaters involve electricity, high temperatures, and pressure — a mix that demands respect. Mike’s first step was always safety.
🔌 Power Off
He flipped off the 240V breaker labelled “WATER HEATER.” Then used a multimeter to verify zero voltage at the junction box.
💧 Turn Off the Water
He closed the cold-water inlet valve feeding the tank, preventing backflow.
🔥 Drain Safely
Connected a garden hose to the drain valve, ran it to a floor drain, and opened a hot faucet upstairs to relieve pressure.
It took about 20 minutes to empty.
🧯 Check Ventilation and Clearance
Even though his model was electric, Mike ensured airflow and kept all flammable items at least 3 feet away.
👉 OSHA’s Home Electrical Safety page has guidelines every DIYer should read before starting.
🧾 5. Removing the Old Unit
🪛 Disconnect the Wiring
After confirming power was off, Mike removed the cover plate and disconnected the wire nuts connecting the 240V line to the old heater.
🚰 Disconnect Plumbing
Using channel locks, he detached the hot and cold connectors and the T&P discharge line.
He noted thread orientation to make reinstallation easier.
🪣 Drain Completely
To remove stubborn sediment, he opened the drain valve fully and used compressed air to purge remaining water.
🧱 Move the Tank
Once drained, he and his son used a dolly to carefully roll the 100-pound tank out.
“Even empty, these things are heavier than they look,” Mike laughed.
🔧 6. Unboxing & Inspecting the New State ProLine
Mike unpacked the new heater and gave it a full inspection:
-
No dents or scratches
-
Factory-installed T&P valve is secure.
-
Drain valve intact
-
Manual and warranty card included
He then attached the metal drain pan, positioning the PVC drain line toward the floor drain.
Most local building codes require a drain pan for installations on upper floors or finished basements.
📐 7. Positioning and Levelling
Mike placed the tank in the drain pan, then used a level to ensure it was perfectly upright.
Why it matters:
-
Prevents internal stress on elements.
-
Ensures consistent heating.
-
Keeps the drain valve functional.
He used thin composite shims under the base until perfectly level. A quick check with the level confirmed it — dead straight.
🧵 8. Plumbing Hookup: Step-by-Step
This part is where patience pays off.
🚰 Cold Water Connection
He connected the cold-water inlet (right side) first:
-
Wrapped threads with Teflon tape.
-
Installed a dielectric nipple to prevent corrosion.
-
Connected a flexible stainless connector to the cold supply valve.
🌡️ Hot Water Outlet
On the left side, Mike attached another dielectric union and connected the hot outlet to his home’s hot water manifold using another flex line.
🧪 Check for Leaks
Before turning on the power, Mike opened both valves to fill the tank halfway, checking for leaks at each joint. Everything stayed dry.
👉 Energy.gov’s Water Heater Installation Guide recommends leak testing before wiring.
⚙️ 9. Wiring the Electrical Connection
The State ProLine 50-Gallon Electric Water Heater uses a standard 240V, 30A hookup.
⚡ Step 1: Remove Junction Box Cover
On top of the heater, he removed the cover plate to expose the terminals.
⚡ Step 2: Connect Wires
-
Fed the conduit through the knockout.
-
Connected black-to-black and red-to-red.
-
Secured the ground wire to the green grounding screw.
⚡ Step 3: Tighten and Test
After securing with wire nuts, he used a tug test to ensure tightness.
Finally, he replaced the cover and ensured wires were neatly tucked.
👉 NFPA’s Electrical Safety Standards provide clear residential wiring codes.
💦 10. Filling the Tank & Bleeding Air
Mike opened the cold water valve fully and left a hot faucet upstairs open.
He waited until water flowed steadily — no spitting or sputtering — indicating all air was expelled from the system.
“If you skip this step, you’ll burn out your elements instantly,” Mike warned.
“Make sure that tank is 100% full before powering on.”
He double-checked that the tank was leak-free before proceeding.
🔥 11. Powering On and Testing Heat
Now came the exciting part.
🔌 Step 1: Turn On the Breaker
He flipped the 30A breaker back on.
🌡️ Step 2: Monitor Heating Cycle
The top element kicked in first, heating the upper section before the lower element activated.
After about 40 minutes, the water from the nearest faucet reached 120°F — perfect.
Mike verified consistency at multiple faucets.
🧠 12. Setting the Thermostat
Mike adjusted both thermostats for optimal comfort.
⚙️ How to Adjust
-
Turn off the breaker.
-
Remove access panels and insulation.
-
Use a small flathead screwdriver to set both thermostats to 120°F.
-
Replace insulation and covers.
-
Restore power.
He also marked his preferred setting inside the panel door for easy reference.
💧 13. Testing the Temperature & Pressure Relief Valve
This valve prevents dangerous overpressure by releasing excess water.
🧪 Test Procedure
-
Placed a bucket under the discharge pipe.
-
Lifted the lever for 5 seconds.
-
Verified water flow, then confirmed it reseated tightly with no drip.
A leaking or corroded T&P valve should always be replaced immediately.
🧣 14. Insulating Pipes and Tank for Efficiency
Mike wanted to get every efficiency gain possible.
He wrapped the first 3 feet of both hot and cold lines with foam insulation sleeves, securing them with tape.
He also added a water heater blanket rated for electric units.
🌡️ Results
-
Reduced standby heat loss by ~10%.
-
Quieter operation.
-
More stable water temperatures during cold nights.
🔄 15. Testing for Leaks and Function
He ran hot water in multiple locations, ensuring:
-
No leaks under or behind the tank.
-
No dripping from the T&P discharge pipe.
-
Steady heating cycles.
Then he monitored the next few hours — no breaker trips, no performance drops.
“That first full day of steady hot water felt like victory,” Mike said.
🧾 16. Labeling & Documentation
Organisation makes future maintenance painless.
Mike labelled:
-
Circuit breaker: “WATER HEATER – 240V”
-
Shutoff valve: “Cold Inlet”
-
Installation date & serial number on the tank with a waterproof marker.
He also registered the product warranty online with State Water Heaters for peace of mind.
🧼 17. Maintenance Schedule After Installation
To keep things running smoothly, Mike built a yearly checklist.
| Task | Frequency | Description |
|---|---|---|
| Drain 2–3 gallons | Every 6 months | Flush out sediment |
| Test T&P valve | Every 6 months | Ensure it releases correctly |
| Inspect anode rod | Every 2 years | Replace if corroded |
| Check thermostats | Annually | Verify consistent temps |
| Tighten fittings | Annually | Check for leaks |
👉 Energy.gov’s Maintenance Tips provide detailed how-tos.
🧱 18. Common Mistakes to Avoid
Mike studied plenty of tutorials — and the mistakes of others — before starting.
❌ Powering On an Empty Tank
Instantly burns out elements.
❌ Skipping Dielectric Unions
Causes corrosion and premature leaks.
❌ Overtightening Plastic Fittings
Can crack threads and cause slow leaks.
❌ Neglecting the Drain Pan
Flood risk if the tank leaks in the future.
❌ Ignoring Electrical Codes
Improper wiring can trip breakers or create shock hazards.
👉 The International Code Council (ICC) explains national installation codes.
💵 19. Cost Breakdown: DIY vs. Pro Install
| Installation Type | Estimated Cost | Notes |
|---|---|---|
| DIY (Mike’s method) | $950–$1,200 | Materials + tools |
| Professional | $1,500–$1,900 | Labor + permits + haul-away |
| Hybrid option | $1,300 | Hire a pro for wiring, DIY plumbing |
Mike saved about $600 doing it himself — and gained confidence for future home upgrades.
⚙️ 20. Troubleshooting After Installation
Even with a perfect setup, Mike stayed alert for early warning signs:
-
No hot water? Check breaker, thermostat, or element continuity.
-
Low pressure? Ensure air is fully bled from lines.
-
Leaking T&P valve? Replace the valve or lower the temperature.
-
Noise? Drain sediment every few months.
💬 21. Mike’s Final Thoughts: “Don’t Rush, Do It Right”
“The hardest part was having patience. Every step mattered — from levelling the tank to checking those fittings twice. But when you do it right, you get years of trouble-free service.”
Mike’s family immediately noticed the difference: quieter operation, steady water temperature, and lower monthly utility costs.
His installation wasn’t just a success — it was an upgrade in comfort, confidence, and efficiency.
🧩 Conclusion: Your Home, Your Hands
Installing your own water heater can seem intimidating at first, but as Mike’s project shows, it’s entirely doable with the right plan and patience.
The State ProLine 50-Gallon Electric Water Heater makes it easier with user-friendly connections, accessible thermostats, and an efficiency-focused design.
Follow this guide, prioritise safety, and take your time — and you’ll enjoy reliable, abundant hot water for years to come.


