👋 Introduction: The Homeowner’s Dilemma
I’m Mike, and like many homeowners, I’ve faced the classic HVAC question:
“Do I try to install this myself, or should I call in the pros?”
When I bought the MRCOOL Advantage 9,000 BTU mini split, I had two clear options: save money with a DIY installation or pay more for professional peace of mind. Being the kind of guy who enjoys tackling projects around the house (and who doesn’t mind saving a few bucks), I decided to give the DIY route a shot.
This article is my story—what I learned, where I struggled, and ultimately, whether I’d recommend DIY or pro installation for the MRCOOL Advantage series.
🧰 What DIY Installation Involves
The MRCOOL Advantage isn’t part of their fully “DIY” lineup (like the MRCOOL DIY Series with pre-charged lines), so installation requires a bit more technical know-how. Here’s what the process looked like for me.
What Comes in the Box
-
Indoor wall-mounted air handler
-
Outdoor condenser
-
Line set (for refrigerant)
-
Remote control and manuals
-
Wall bracket
Tools I Needed
-
Power drill with hole saw (to run the line set through the wall)
-
Level (for mounting the indoor unit properly)
-
Screwdrivers and socket set
-
Vacuum pump and manifold gauge (to remove air/moisture from the lines)
-
Electrical tools (wire stripper, voltage tester, conduit bender)
-
Torque wrench (for tightening flare nuts to the correct specs)
Skills Required
-
Basic carpentry (mounting brackets, drilling holes through walls)
-
Electrical wiring knowledge (240V circuits, breakers, and grounding)
-
HVAC-specific tasks (evacuating and sealing refrigerant lines)
👉 Bottom line: This is not a plug-and-play system. It requires comfort with tools and at least some technical know-how.
⏱️ Time Estimate for DIY
-
Planning & measuring: 2 hours
-
Indoor unit installation: 2 hours
-
Outdoor condenser placement: 1–2 hours
-
Running line set & connections: 2–3 hours
-
Vacuuming & leak check: 1–2 hours
-
Electrical hookup: 2 hours
For me, the entire project stretched into a weekend job.
Compare that to a professional installer, who could do it in half a day.
💵 The Cost Difference: DIY vs. Pro
DIY Cost Breakdown (my numbers):
-
MRCOOL Advantage 9k unit: $750
-
Tools I didn’t already own (vacuum pump, torque wrench): $200
-
Electrical supplies (wire, breaker, conduit): $75
-
Miscellaneous (sealant, brackets, drill bit): $50
Total DIY cost: ~$1,075
Pro Installation Estimate:
-
MRCOOL Advantage 9k unit: $750
-
Professional labor & materials: $1,200–$1,800 (based on local quotes)
Total Pro cost: $1,950–$2,550
👉 Savings with DIY: $800–$1,500
But remember: those savings come with more responsibility.
⚡ Safety and Code Compliance
Here’s where things get serious. Working with 240V electrical circuits and refrigerant lines isn’t something to take lightly.
Electrical Risks
-
Always turn off the breaker before starting.
-
Double-check voltage with a tester.
-
Follow NEC (National Electrical Code) guidelines for wiring and grounding.
Refrigerant Handling
-
Advantage line sets are not pre-charged.
-
You need to evacuate air and moisture with a vacuum pump.
-
A poor connection = leaks, wasted refrigerant, or damage to the compressor.
Building Codes & Permits
Some municipalities require a permit for mini split installs. Check before starting. If you skip this and have an issue later, it could void insurance claims.
👉 For me, the hardest part was ensuring compliance. It made me realize why pros charge what they do—it’s not just labor, it’s liability and expertise.
🔧 What Mike Learned Doing It Himself
Here’s the honest truth about what went smoothly and what didn’t:
✅ Easier Than Expected
-
Mounting the indoor unit: As long as you measure twice and use a level, it’s straightforward.
-
Placing the outdoor condenser: A concrete pad made setup easier.
⚠️ Harder Than Expected
-
Running the line set: Drilling a clean 3" hole through an exterior wall was nerve-racking.
-
Vacuuming the system: Without experience, it’s tricky to know if you’ve done it right.
-
Electrical work: Even with some DIY background, wiring into my breaker box was intimidating.
🎓 Lessons Learned
-
Preparation is everything—watching MRCOOL’s official install videos helped a lot.
-
Don’t rush the vacuuming/leak test step. That’s the heart of the system.
-
A helper makes the job smoother—especially for mounting heavy units.
👨🔧 When It Makes Sense to Hire a Pro
After doing it myself, here’s when I’d recommend calling in a pro instead:
-
Multi-zone systems: More complexity = more risk.
-
Tricky layouts: If the indoor unit isn’t near an exterior wall.
-
Electrical uncertainty: If you’ve never worked with 240V circuits, skip it.
-
Warranty coverage: Some warranties only hold up with pro installs.
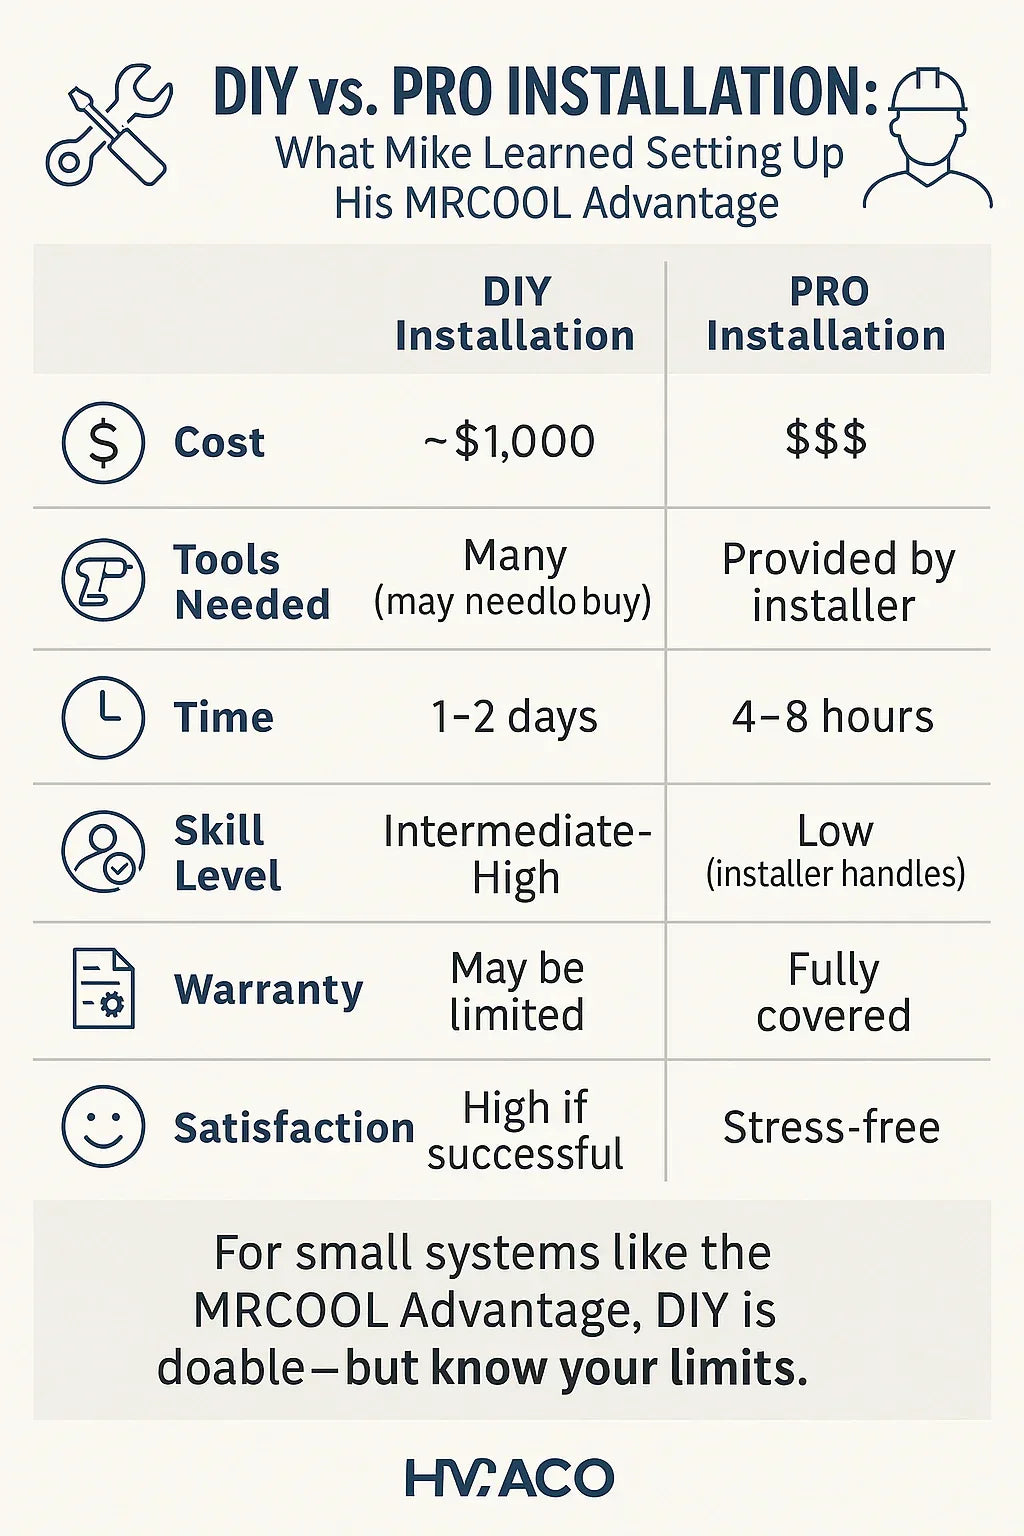
📝 DIY vs. Pro: Side-by-Side Comparison
| Factor | DIY Installation | Pro Installation |
|---|---|---|
| Cost | ~$1,000–$1,200 | ~$2,000–$2,500 |
| Tools Needed | Drill, vacuum pump, torque wrench | Provided by installer |
| Time | 1–2 full days | 4–8 hours |
| Skill Level | Intermediate–Advanced DIY | None (installer does all) |
| Warranty | May be limited without pro install | Fully valid |
| Peace of Mind | Confidence if successful | Guaranteed performance |
💡 Mike’s Final Takeaway
After going through it, here’s my honest advice:
-
If you’re handy, patient, and willing to learn, DIYing the MRCOOL Advantage is doable and rewarding.
-
If you value speed, convenience, and warranty coverage, hire a pro—it’ll cost more, but you’ll sleep better at night.
For me, the MRCOOL Advantage 9k was a manageable DIY project—but it taught me a lot about respecting HVAC professionals.
Would I do it again? For a small single-zone system, yes. For a whole-house install? I’d hire a pro.
🔗 Verified Resources for Installation Guidance
In the next topic we will know more about: How to Maintain Your MRCOOL Advantage 9k Mini Split: Filters, Coils & Seasonal Care


