🌬 Introduction
Jake is a hands‑on homeowner. He loves tackling projects himself—saving money, learning new skills, and getting that sense of accomplishment. But when it comes to installing a 6,000–9,000 BTU through‑the‑wall air conditioner, even Jake has to ask: “Should I do this myself, or call in a pro?”
In this guide, we’ll cover:
-
What makes these smaller wall ACs unique
-
When a DIY install makes sense
-
When it’s better (and safer) to hire a professional
-
Cost breakdowns, tool lists, and maintenance tips
By the end, you’ll know exactly whether DIY or pro installation is the right choice for your home.
📏 What Makes 6,000–9,000 BTU Wall ACs Different?
Through‑the‑wall air conditioners in this range are popular for bedrooms, small living rooms, and home offices (typically 150–400 square feet). They hit a sweet spot: compact enough for a DIY project, but still powerful enough to require careful installation.
Key differences compared to larger systems:
-
Weight & size: Usually 60–90 lbs—manageable for two people to lift.
-
Voltage: Most 6k–9k BTU units run on standard 115/120V outlets; larger ones may need 230V.
-
Sleeve compatibility: A wall sleeve is mandatory, ensuring support and proper airflow.
-
Cooling focus: Best for single rooms, not entire apartments.
📌 According to Energy Star, choosing the right size AC is critical for both efficiency and comfort.
🧰 DIY Installation: Jake’s How-To Guide
Jake knows that a through‑the‑wall AC is more than just “sliding a box into a hole.” It requires precision, patience, and the right tools.
✅ Tools & Materials Checklist
Before starting, Jake lays out everything he’ll need:
-
Drill with masonry and wood bits
-
Jigsaw or reciprocating saw
-
Stud finder
-
Level & measuring tape
-
Safety gear (goggles, gloves, dust mask)
-
Wall sleeve (sized to unit)
-
Mounting hardware
-
Weatherproof caulk & insulation strips
Jake always double‑checks the manufacturer’s installation guide first—because each model has its quirks.
🛠 Step-by-Step DIY Overview
1. 📍 Choose the Location
-
Pick a spot near an electrical outlet.
-
Avoid load‑bearing studs, plumbing, or wiring.
-
Exterior wall required (not an interior partition).
-
Use a stud finder to avoid damaging structure.
2. 📐 Measure & Cut the Opening
-
Follow the AC’s template dimensions.
-
Cut slightly smaller than sleeve size, then adjust.
-
Jake always measures twice before cutting once.
3. 🧱 Install the Wall Sleeve
-
Slide sleeve into the cutout.
-
Ensure a slight outward tilt (~¼ inch) for water drainage.
-
Seal perimeter with caulk to prevent air leaks.
4. 🧩 Slide in the AC Unit
-
Carefully lift and slide into sleeve.
-
Secure with mounting brackets.
-
Check alignment with a level.
5. ⚡ Connect & Test
-
Plug into outlet (120V usually sufficient).
-
Run on cooling mode for 15 minutes.
-
Check condensation drainage outside.
⚠️ DIY Risks Jake Watches For
Even for someone handy like Jake, there are pitfalls:
-
Wall integrity: Cutting into load‑bearing walls weakens structure.
-
Moisture issues: Poor sealing can cause mold and water damage.
-
Electrical overload: Old outlets may not handle the current.
-
Warranty voids: Some brands require professional install for coverage.
The Family Handyman emphasizes that improper DIY installs can cost more long‑term than a pro job.
👷 Hiring a Professional: When It’s Worth It
Jake is honest with himself: sometimes, it’s smarter to call a pro.
📌 Situations Where a Pro Is Recommended
-
First-time installs (cutting a brand‑new hole).
-
Older homes with questionable wiring or asbestos.
-
Electrical upgrades (adding a 230V line).
-
Code compliance in cities requiring permits.
-
Warranty protection (many brands enforce this).
Pros not only install safely, but also ensure your AC runs at max efficiency—which saves money over time (This Old House).
💵 Cost Comparison: DIY vs. Professional Install
Jake loves numbers—so here’s how the costs break down.
DIY Installation
-
Wall sleeve: $100–$200
-
Tools & materials: $75–$150
-
AC unit (6k–9k BTU): $450–$700
-
Total: $625–$1,050
Professional Installation
-
Labor: $400–$800
-
Materials (included or extra): $100–$200
-
AC unit: $450–$700
-
Total: $950–$1,600
➡️ DIY can save $300–$500—but only if done correctly. Otherwise, mistakes can cost hundreds in repairs.
🌡 Jake’s Rule of Thumb
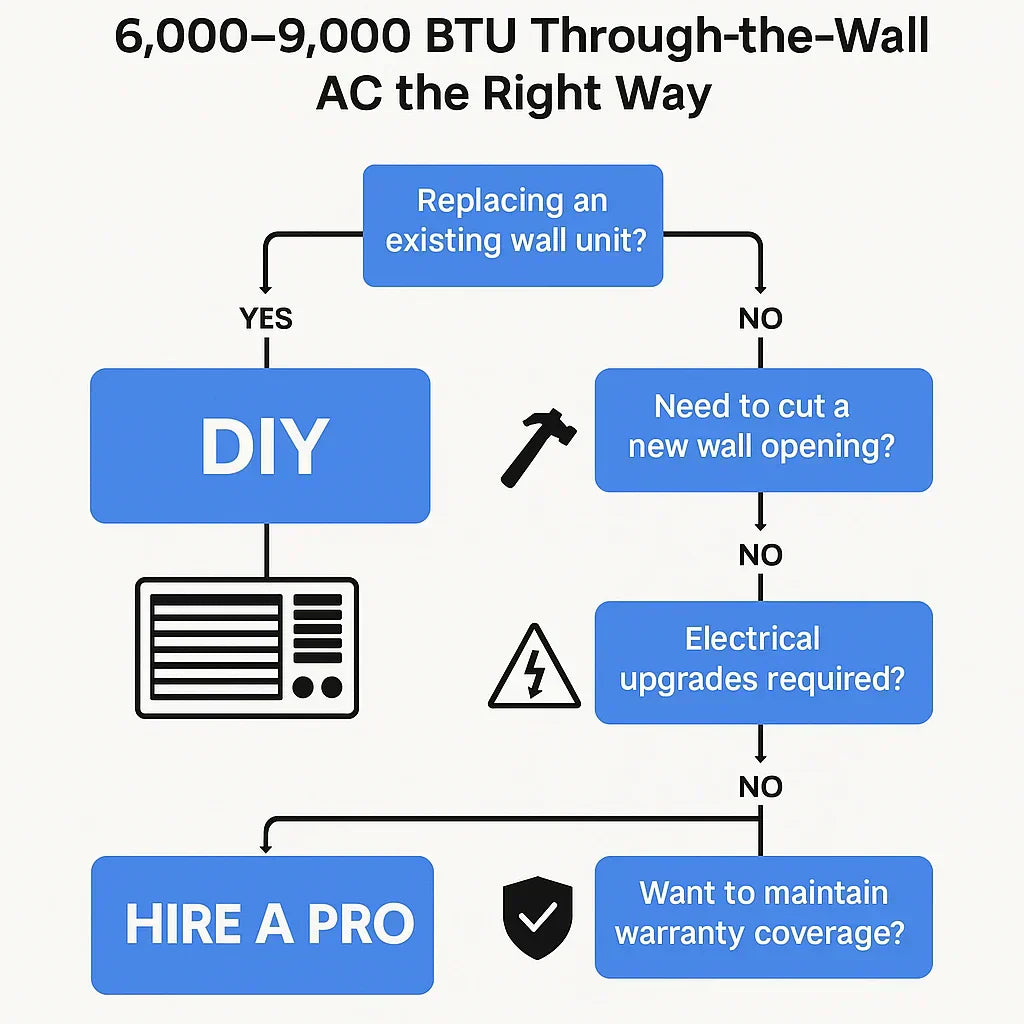
Jake uses this decision framework:
| Situation | DIY ✅ | Pro 👷 |
|---|---|---|
| Replacing an existing wall unit | ✔ | |
| Cutting a brand-new hole | ✔ | |
| Already has correct sleeve | ✔ | |
| Unsure about wiring or voltage | ✔ | |
| Wants warranty intact | ✔ |
🔧 Maintenance Tips After Installation
Whether DIY or pro installed, Jake keeps his AC running smoothly with seasonal care:
-
Monthly: Clean or replace the filter.
-
Every season: Inspect sleeve caulking for gaps.
-
Annually: Check unit tilt for proper drainage.
-
As needed: Vacuum condenser coils and check for unusual noise.
Jake also sets his thermostat to 24–25 °C instead of blasting it at 18 °C—keeping costs low and comfort high.
📚 External Resources for Further Reading
✅ Conclusion
Jake’s final verdict:
-
DIY makes sense if you’re swapping out an existing unit in a pre‑installed sleeve and you’re confident with tools.
-
Hire a pro if this is your first installation, if electrical upgrades are needed, or if warranty coverage matters.
By weighing cost, risk, and skill level, you’ll make the right choice—and keep your 6,000–9,000 BTU wall AC running cool and efficient for years.
In the next topic we will know more about: Wall Sleeve 101: Why Your Through-the-Wall AC Won’t Work Without It


