👋 Introduction: When the Cool Air Stopped
Let me set the scene. It was the middle of July, one of those sticky days where you break a sweat just grabbing the mail. I came inside, expecting my Goodman 3 Ton 14.5 SEER2 R-32 system to be humming along, keeping the house cool and comfortable.
Instead? Warm air.
My thermostat said “Cooling,” but the house felt like a sauna. If you’ve ever been there, you know the frustration — and the panic: Is this going to cost me thousands?
That afternoon, I walked through a step-by-step troubleshooting process. I’ll share exactly what I did, what worked, and when I realized it was time to call in a pro. This guide is for every homeowner who wants to feel more confident when their system stops cooling.
🏡 1. The Day My System Stopped Cooling
Here’s how it happened:
-
Thermostat set to 74°F.
-
Return vent was blowing warm air.
-
Outdoor condenser was running, but not pushing much heat.
-
Utility closet air handler sounded weaker than usual.
I could’ve immediately called my HVAC tech, but I’ve learned over the years that a lot of problems have simple fixes homeowners can handle. So I rolled up my sleeves and got to work.
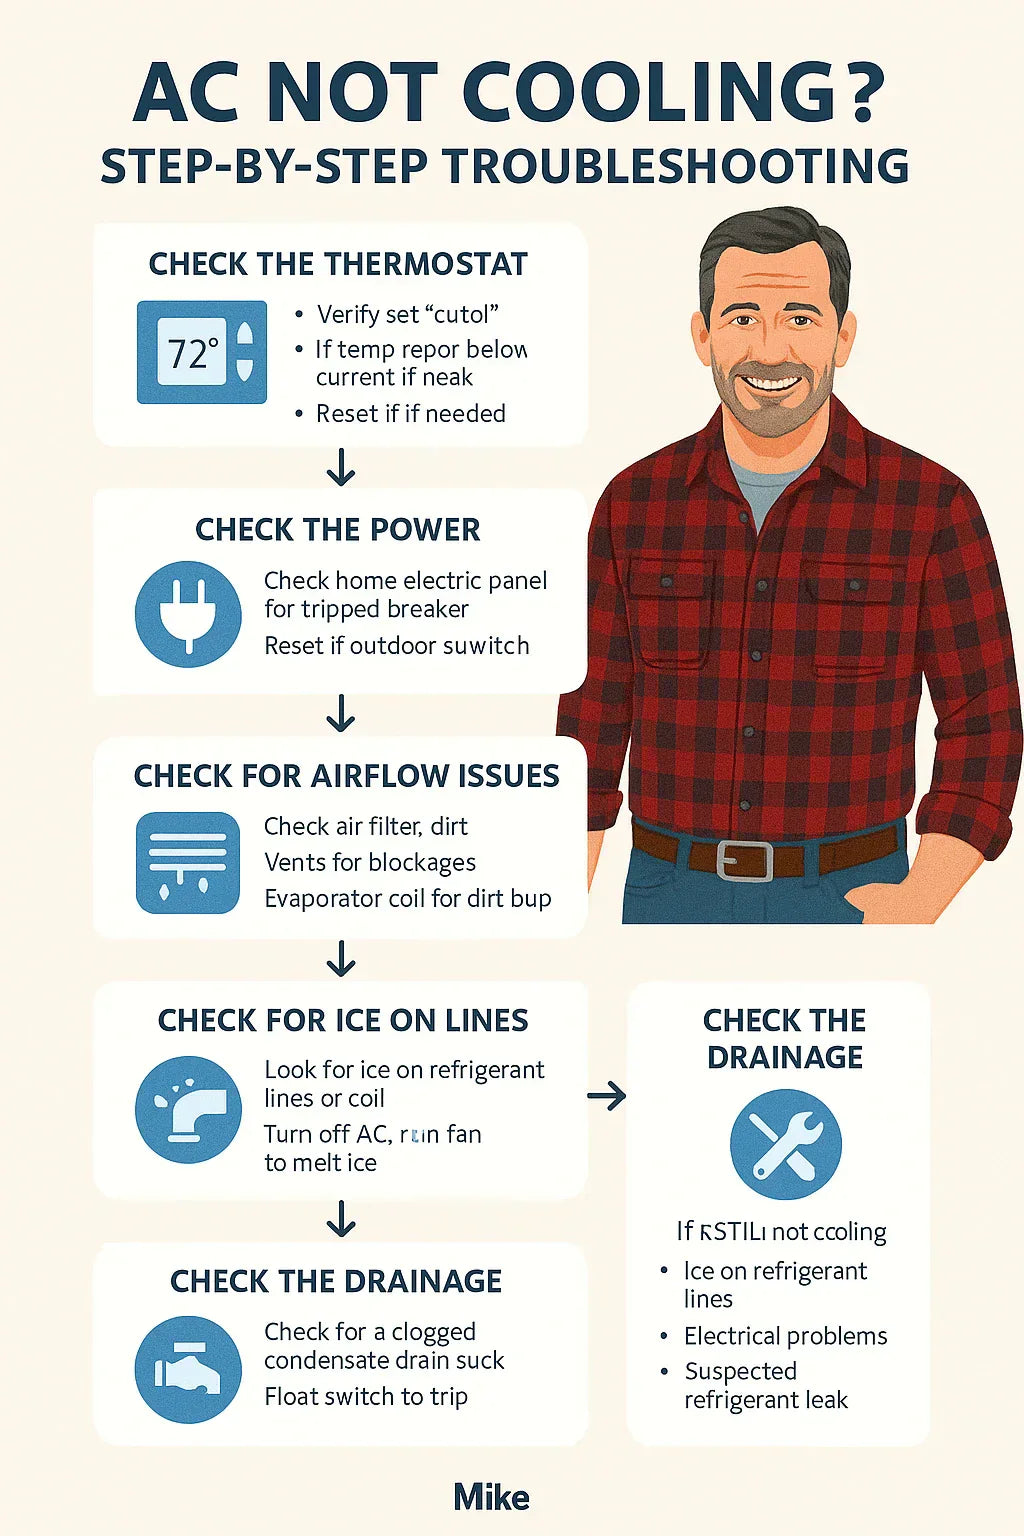
🔌 2. Step 1: Check the Basics First
This might sound obvious, but it’s where I start every time.
✅ Thermostat Settings
-
Mode set to Cool (not Heat or Fan).
-
Fan set to Auto, not On (On runs the fan nonstop but doesn’t always cool).
-
Batteries fresh (I once spent half a day troubleshooting only to realize the thermostat batteries were dead).
✅ Breakers & Power
-
Checked my breaker panel: no tripped breaker, but I flipped it off and back on to reset.
-
Verified the outdoor disconnect switch was in place.
✅ Air Filter
-
Pulled out the filter. It looked like a dust bunny had eaten it. No wonder airflow was weak!
-
Replaced with a fresh pleated filter.
Result: The air got cooler but still wasn’t quite right. Time to dig deeper.
🌬️ 3. Step 2: Airflow Issues
Weak or no cooling often comes down to airflow problems.
🚪 Blocked Vents
-
Walked room to room.
-
Found two supply vents blocked by furniture. Cleared them.
🌀 Dirty Coils
-
Looked inside my air handler. The evaporator coil had a thin layer of dust.
-
Gave it a gentle cleaning with coil cleaner spray from the hardware store.
🔧 Duct Leaks
-
Felt around ducts for escaping air.
-
Found one loose connection in the attic. Sealed with mastic.
After improving airflow, the system started cooling a little better — but still not enough.
❄️ 4. Step 3: Ice on Refrigerant Lines
Next stop: the copper refrigerant lines running from my outdoor condenser.
-
Surprise: frost was forming on the suction line.
-
This usually means low refrigerant or restricted airflow.
Mike’s Trick:
I shut off the cooling mode but left the fan running for two hours. This melted the ice safely (never chip ice off — you’ll damage the lines).
When I restarted, cooling improved briefly — but still not enough. That meant I needed to check further.
⚡ 5. Step 4: Electrical or Thermostat Problems
Sometimes it’s not the refrigerant at all — it’s the electrical components.
Thermostat Double-Check
-
Re-calibrated the thermostat.
-
Verified the wiring was snug.
Outdoor Unit Sounds
-
Listened carefully:
-
A healthy condenser hums.
-
A buzzing but not starting = bad capacitor.
-
A clicking relay = possible contactor issue.
-
Mine was humming along, but I noticed a faint buzzing. That had me wondering if the capacitor was weakening.
💦 6. Step 5: Condensate Drain & Safety Switches
Another sneaky culprit is the condensate drain. If it clogs, the safety float switch can shut down the cooling.
-
Checked the drain line: sure enough, it was gurgling.
-
Used a wet/dry vacuum outside at the drain outlet — sucked out sludge and algae.
-
Poured a cup of vinegar down the line to disinfect.
Once the drain cleared, my system fired back up stronger. Cooling was improved — but still not perfect.
🧯 7. Step 6: Refrigerant (R-32) Concerns
At this point, I suspected refrigerant levels.
Signs of Low Refrigerant:
-
Ice on lines.
-
Weak cooling even with good airflow.
-
Hissing or bubbling near lines.
Since my Goodman system uses R-32 refrigerant, I knew this was not a DIY job. R-32 is more efficient and eco-friendly, but it requires licensed handling due to its mildly flammable classification (ASHRAE – Refrigerant Safety).
I called my HVAC pro to check charge levels and inspect for leaks. Sure enough, there was a small leak at one of the line fittings I hadn’t tightened enough during installation.
🛠️ 8. Tools & Simple Fixes Mike Used
Here’s what I had on hand that made troubleshooting easier:
-
Multimeter: To check for power at the disconnect and breaker.
-
Thermometer: Compared return vs supply temps (should be 18–22°F difference).
-
Wet/Dry Vac: Cleared the condensate drain.
-
Coil Cleaner: Safe spray for evaporator and condenser coils.
These tools helped me eliminate simple issues before calling a pro.
🚨 9. When to Call a Pro
I’ll be honest — some fixes are beyond homeowners. Here’s when I call a professional right away:
-
Compressor won’t start (likely capacitor, contactor, or worse).
-
Repeated breaker trips (possible short).
-
Refrigerant leaks or low charge (must be handled by licensed tech).
-
System still blowing warm air after airflow and filter fixes.
For me, calling a pro for the refrigerant issue was the right move. It saved me from damaging the compressor by running low on charge.
✅ 10. What I Learned From the Experience
Here are my big takeaways:
-
Start with the simple stuff. Thermostat, breakers, filters — 50% of the time, that’s the fix.
-
Airflow matters. Don’t underestimate blocked vents, dirty coils, or duct leaks.
-
Drain lines cause hidden shutdowns. A clogged drain can trick you into thinking your whole AC failed.
-
Know your limits. R-32 refrigerant is not a DIY project — call a pro for charging or leaks.
-
Preventive maintenance pays off. Most of this could’ve been avoided if I had cleaned coils and cleared drains earlier.
The good news? After my pro topped up refrigerant and re-sealed the connection, my Goodman system was back to keeping the house cool — and my wallet didn’t take as big of a hit as I feared.
📚 External Resources
🏁 Conclusion: Don’t Panic, Troubleshoot Smart
When your AC stops cooling, it’s easy to imagine the worst — a dead compressor, a massive bill, sweltering nights. But the truth is, many issues are simple and fixable: dirty filters, blocked vents, tripped breakers, or a clogged drain.
By following a logical troubleshooting process, I saved myself time, money, and stress. And when it turned out to be refrigerant-related, I knew exactly when to hand it over to the pros.
The key? Don’t panic, don’t ignore the problem, and don’t be afraid to learn.
Because at the end of the day, keeping cool isn’t just about having a Goodman system — it’s about knowing how to keep it running right.
In the next topic we will know more about: R-32 vs. R-410A: Why Goodman Switched and What It Means for You


