here are few household headaches as frustrating as stepping into a cold shower because your water heater decided it was done. For me, the last straw was walking into my basement one morning and finding a puddle under my 12-year-old tank.
That’s when I decided it was time to replace it with a State ProLine 40-Gallon Gas Water Heater. And instead of calling in a pro, I took the project on myself.
This wasn’t my first DIY job, but I’ll be honest—it was a learning experience. In this guide, I’ll share not just the step-by-step installation process, but also the lessons I learned, the mistakes I almost made, and the shortcuts I wish I’d known earlier.
Whether you’re a homeowner curious about DIY or just want to understand what’s happening when a plumber installs your new tank, this walkthrough will give you everything you need.
🛠️ Why I Chose the 40-Gallon ProLine
The first decision I faced was size and fuel type. My old unit was a 40-gallon gas heater, and it had mostly kept up with our family of three. We rarely ran out of hot water unless we stacked showers and laundry back-to-back.
So sticking with a 40-gallon gas model made sense:
-
Right-sized for my family (3 people, 2 bathrooms).
-
Faster recovery rate than electric, which is key when multiple people shower in the morning.
-
Lower operating cost in my area, since natural gas is cheaper than electricity.
-
Compatible with my home’s existing venting and gas lines, making installation smoother.
🔗 DOE – Sizing a New Water Heater
📋 Tools & Materials Checklist
Before tackling a job like this, you need to be prepared. Nothing slows you down like realizing you’re missing the right wrench halfway through. Here’s what I had ready:
-
Pipe wrench & channel locks
-
Adjustable wrench
-
Tubing cutter
-
Screwdriver set
-
Teflon tape (plumber’s tape) & pipe joint compound
-
Flexible water supply connectors
-
Flexible gas connector (if allowed by local code)
-
New vent pipe & fittings (if replacing old corroded ones)
-
Bucket & garden hose (for draining old tank)
-
Leak detection solution (soapy water works fine)
-
Work gloves, flashlight, and a level
👉 Mike’s Tip: If you don’t already own a pipe wrench, buy or borrow one. Channel locks alone won’t cut it when loosening old corroded fittings.
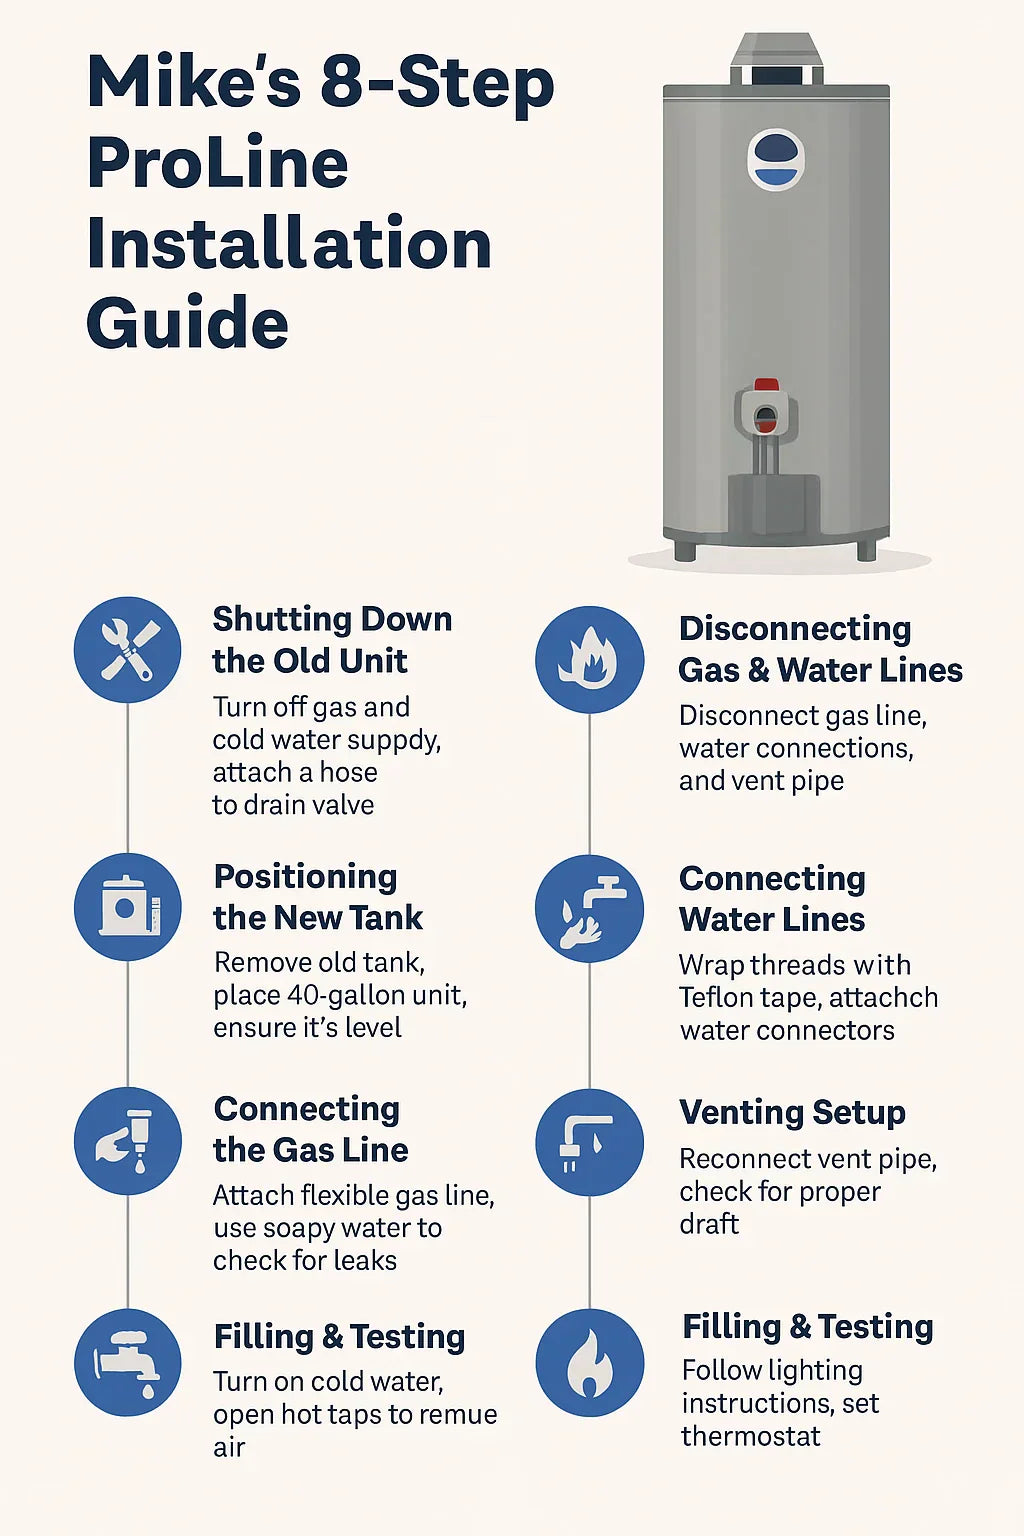
🚿 Step 1: Shutting Down the Old Unit
Safety first. Before touching anything, I did three things:
-
Turned off the gas at the shutoff valve near the heater.
-
Turned off the cold-water supply going into the tank.
-
Attached a hose to the drain valve and ran it outside to drain the tank.
Draining can take 20–40 minutes depending on how much sediment has built up. I opened a hot-water faucet upstairs to break the vacuum and speed things along.
👉 Lesson Learned: I forgot to open the pressure relief valve at first, which slowed down draining. Once I did, water flowed much faster.
🔗 Family Handyman – How to Drain a Water Heater
🔥 Step 2: Disconnecting Gas & Water Lines
With the tank drained, it was time to disconnect.
-
I used two wrenches to carefully disconnect the gas line—one to hold steady, one to turn. This kept me from twisting the pipe and damaging threads.
-
Next, I loosened the water supply lines. Since I was planning to use flexible connectors for the new tank, I cut the old rigid copper lines with a tubing cutter.
-
Finally, I detached the vent pipe. Mine was in decent shape, but I decided to replace it anyway for peace of mind.
👉 Lesson Learned: Old vent pipes can be sharp and brittle. Wear gloves—my buddy didn’t, and he walked away with a nasty cut once doing the same job.
🏗️ Step 3: Removing the Old Tank & Positioning the New One
Once everything was disconnected, I slid the old tank out of its spot. These things are heavy—even drained, a 40-gallon tank can weigh 100+ pounds. I had a friend help me get it out.
Then came the new ProLine. I checked the manual for clearance requirements and set it in place with a level.
👉 Lesson Learned: Don’t assume the new tank has identical dimensions to the old one. My ProLine was slightly taller, and I had to adjust the venting angle.
🚰 Step 4: Connecting Water Lines
For the new water connections:
-
I wrapped the threads with Teflon tape and a dab of pipe joint compound.
-
Attached flexible connectors for hot and cold lines.
-
Tightened with an adjustable wrench—snug, but not gorilla-tight.
👉 Lesson Learned: Flexible connectors are worth every penny. They make aligning old pipes with the new tank simple, especially in older homes.
🔗 Home Depot – How to Install a Water Heater
🔥 Step 5: Connecting the Gas Line
Reconnecting the gas line made me the most nervous—it’s not something you want to mess up.
-
I attached the flexible gas connector, sealing threaded joints with pipe compound.
-
Once connected, I turned on the gas and used soapy water to test for leaks. (If bubbles form, you’ve got a leak.)
👉 Lesson Learned: Always, always test with soapy water before lighting the pilot. I caught a tiny leak at one joint and had to redo it.
🌬️ Step 6: Venting Setup
Proper venting is critical for gas water heaters.
-
I reattached the vent pipe, making sure it sloped upward toward the chimney.
-
Used sheet-metal screws to secure joints.
-
Once the unit was running, I tested draft with a smoke stick to confirm gases were being vented properly.
👉 Lesson Learned: Don’t cut corners here. Poor venting can cause dangerous carbon monoxide buildup. If in doubt, get this step inspected.
🔗 EPA – Carbon Monoxide Safety
💦 Step 7: Filling the Tank & Purging Air
Before lighting the burner, I filled the tank:
-
Opened the cold water supply.
-
Cracked open hot water faucets around the house to let air escape.
-
Once water flowed smoothly, I closed the faucets.
👉 Lesson Learned: Don’t light the burner until the tank is full. Firing up an empty tank can damage it instantly.
🔥 Step 8: Lighting the Pilot & Firing It Up
With water in the tank and leaks checked, I followed the ProLine’s lighting instructions printed on the tank:
-
Set the control knob to “Pilot.”
-
Pressed down while lighting with the built-in igniter.
-
Held for 30–60 seconds until the flame stayed lit.
-
Turned the knob to “On” and set the thermostat to 120°F.
Within minutes, I could hear the burner kick in.
👉 Lesson Learned: Be patient with the pilot—it sometimes takes a few tries for the flame to stabilize.
🧰 Mike’s Extra DIY Tips
-
Plan a whole day—my install took 6 hours start to finish.
-
Have help—tanks are heavy and awkward to maneuver.
-
Use unions on gas lines—they make future replacements much easier.
-
Flush the tank yearly to prevent sediment buildup (learned the hard way with my old one).
🔗 How Long Do Water Heaters Last?
📊 DIY vs. Hiring a Pro: Cost Breakdown
| Factor | DIY (Mike’s Cost) | Pro Installation |
|---|---|---|
| Equipment (40-gal tank) | $700 | $700 |
| Extra materials (connectors, tape, vent) | $80 | Included |
| Labor | $0 | $500–$800 |
| Total | ~$780 | $1,200–$1,600 |
👉 Mike’s Take: I saved around $500–$700 by doing it myself. But if gas lines or venting feel intimidating, a pro is worth every penny for safety and peace of mind.
🔗 Forbes – Water Heater Installation Costs
✅ Final Verdict: What I Learned
Replacing my old tank with the State ProLine 40-Gallon Gas Water Heater was one of the most satisfying DIY jobs I’ve done. It wasn’t easy, but it was doable.
Here are my biggest takeaways:
-
Preparation is everything. Have the right tools and materials before you start.
-
Safety first. Double-check gas and venting connections.
-
DIY saves money—but only if you’re confident. Otherwise, hire a pro.
Most importantly? There’s nothing like that first long, hot shower after the new tank is up and running. Worth every bit of effort.
In the next topic we will know more about: Maintenance Checklist: Keeping Your 40-Gallon Gas Water Heater Running Smooth


