When it comes to installing a GE through-the-wall air conditioner, most homeowners focus on the big-ticket item: the AC unit itself. But as Mike — a practical, budget-conscious DIYer — knows, the small details often carry big value. One of those “small” items is the GE Wall Sleeve Trim Kit (RAK27).
While the kit itself isn’t expensive compared to the AC, installation cost can vary depending on whether you do it yourself or hire a pro. In this guide, we’ll break down the real costs of installing the RAK27 trim kit — including tools, labor, hidden expenses, and long-term value — so you can make the best decision for your budget.
👋 Mike’s Budget Question
When Mike ordered his GE through-the-wall AC, he was surprised at the add-on costs.
“The unit itself cost over $700, and then I saw another $100-plus for the trim kit. On top of that, the installer wanted $200 just to put it in! I had to ask myself: do I really need to pay a pro, or can I handle this myself?”
That’s the same question many homeowners face. The answer depends on time, tools, and confidence.
📦 Cost of the GE Wall Sleeve Trim Kit (RAK27)
The trim kit itself is fairly affordable compared to the AC unit.
-
Average Price Range: $100–$150
This base price doesn’t change whether you DIY or hire a pro. The real difference comes from installation costs.
🛠️ DIY Installation Costs
For a handy homeowner like Mike, DIY installation is very possible. Here’s what it costs:
Tools You’ll Need:
-
Screwdriver set: $10–$20
-
Level: $10–$15
-
Caulking gun: $5–$10
-
Exterior-grade caulk: $5–$8
-
Drill (if mounting screws require it): $30–$70 (if you don’t already own one)
Total Extra Tool Cost: $20–$50 (most homeowners already have these in their garage).
Time Required:
-
1–2 hours for a careful DIY install.
Risks:
-
If you misalign the kit, you may end up with gaps.
-
Poor sealing can lead to water leaks or drafts.
Mike’s Experience:
“The first time I did this, I rushed the caulking job. A week later, a rainstorm proved me wrong — I had to recaulk the whole frame. Lesson learned: take your time.”
DIY Cost Estimate:
-
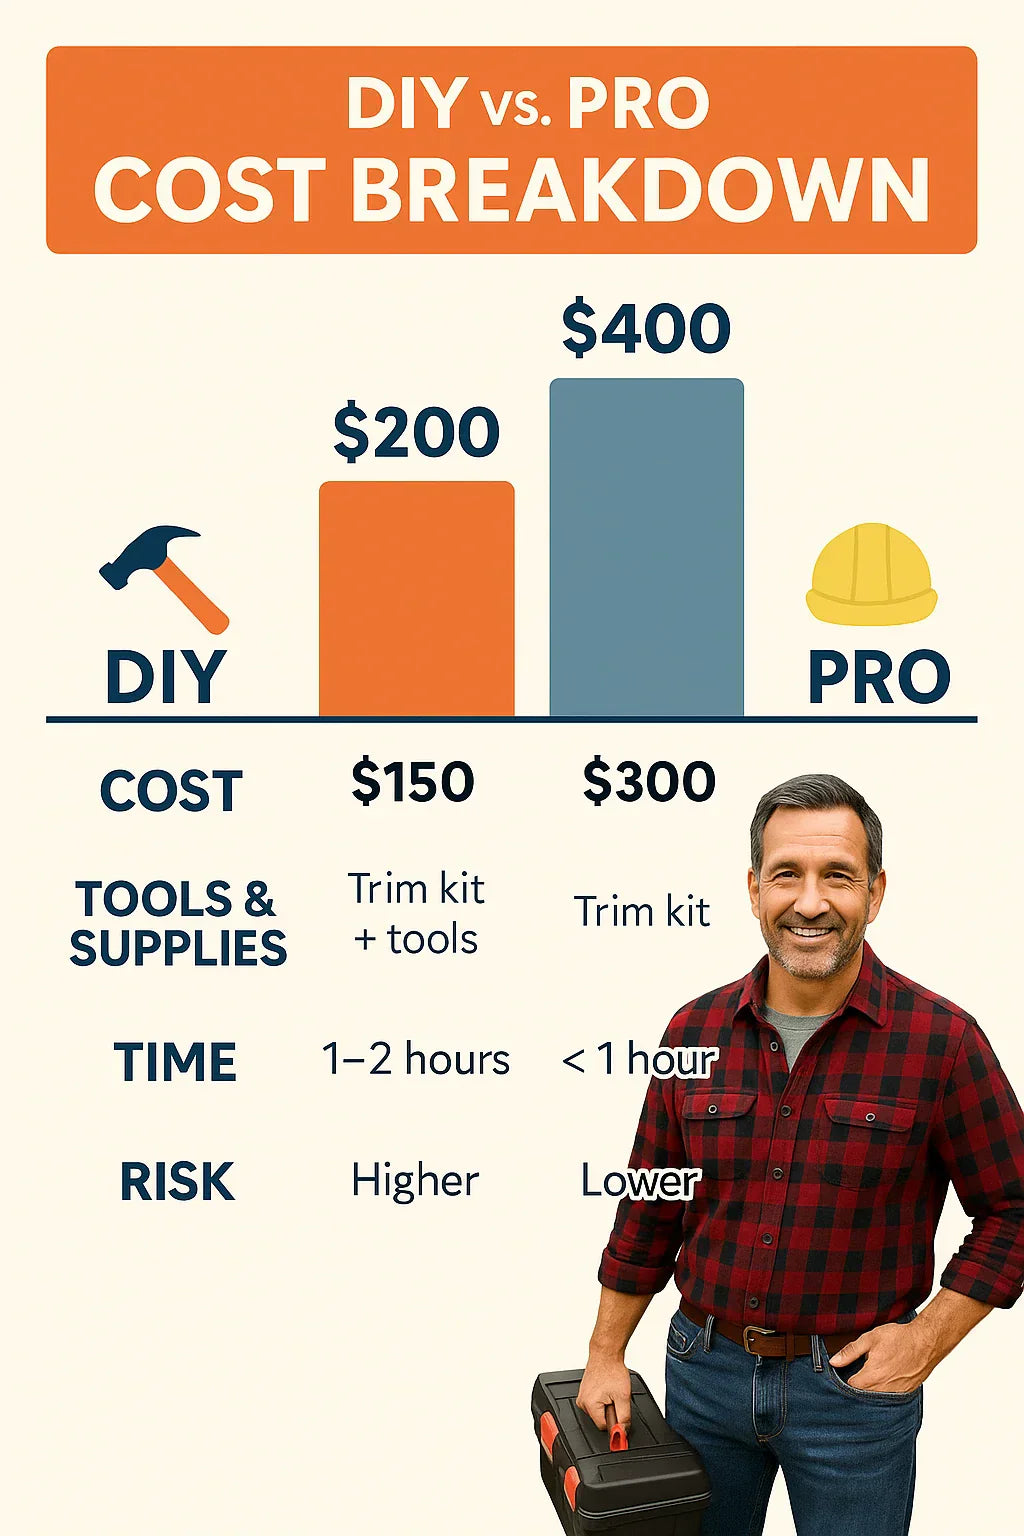
$120–$200 total (kit + tools/supplies).
🔗 Reference: Family Handyman – Installing a Through-the-Wall AC
👷 Professional Installation Costs
If you’d rather have peace of mind, hiring a pro is an option.
Typical Pricing:
-
Handyman or HVAC tech: $100–$250 labor.
-
If bundled with AC installation: $200–$400 total (labor + trim kit install).
Benefits of Hiring a Pro:
-
Job takes 30–60 minutes.
-
Guaranteed fit and seal.
-
May protect manufacturer warranty.
-
No risk of mistakes.
Mike’s Observation:
“The pro I hired once did in 45 minutes what took me almost two hours. But I paid double the cost of the kit itself. For me, it comes down to how much my time is worth.”
Pro Cost Estimate:
-
$200–$400 total (kit + labor).
🔗 Reference: HVAC Installation Costs
💡 Hidden Costs Homeowners Forget
Sometimes, the cheapest option isn’t actually the least expensive in the long run.
If You DIY and Make Mistakes:
-
Poor sealing → higher energy bills (+$10–$20/month).
-
Water leaks → mold or drywall damage ($500+ repair).
-
Pest entry → extermination costs ($200+).
If You Hire a Pro:
-
Higher upfront expense, but usually no hidden costs later.
Mike’s Take:
“I saved money upfront going DIY, but when I botched the caulking, I paid more in repairs. If you’re confident, go DIY. If not, hire it out.”
🔗 Reference: Bob Vila – Weatherproofing Windows and Doors
📊 DIY vs. Pro Cost Comparison
| Factor | DIY | Professional |
|---|---|---|
| Upfront Cost | $120–$200 (kit + tools) | $200–$400 (kit + labor) |
| Time Investment | 1–2 hours | 30–60 minutes |
| Risk of Mistakes | Higher | Lower |
| Hidden Costs | Possible (repairs, energy waste) | Minimal |
| Long-Term Value | Depends on skill | Strong |
🏠 Long-Term Value: Energy Efficiency Pays Off
The U.S. Department of Energy estimates that air leaks account for 25–40% of heating and cooling costs . A properly sealed trim kit can save hundreds of dollars over the life of the AC.
-
DIY done well = long-term savings.
-
DIY done poorly = higher bills, repairs.
-
Pro install = consistent performance, minimal risk.
🔗 Reference: DOE – Air Sealing Basics
🌎 Environmental Impact of Proper Installation
It’s not just about money — sealing your AC properly has environmental benefits too:
-
Reduced energy waste → smaller carbon footprint.
-
Less strain on your AC → longer lifespan, fewer appliances in landfills.
-
Better indoor air quality → reduced mold and moisture issues.
🔗 Reference: ENERGY STAR – Room AC Installation Guide
✅ Conclusion: Mike’s Takeaway
At the end of the day, the GE RAK27 Wall Sleeve Trim Kit is a small investment with a big impact.
-
DIY Installation: $120–$200 total. Best for homeowners who are careful, patient, and already own the tools.
-
Pro Installation: $200–$400 total. Best for those who value speed, precision, and peace of mind.
Mike’s Bottom Line:
“If you’ve got the tools and patience, DIY is the way to go. But if you’re not confident sealing edges, pay the pro. Either way, the RAK27 pays for itself in energy savings and comfort.”
In the next topic we will know more about: Weatherproofing Your Through-the-Wall AC: How the Trim Kit Helps


