Key Takeaways
-
Use support brackets: They take the load off the window frame.
-
Secure the sashes: Lower and lock them to keep the unit stable.
-
Tilt it right: A ¼–½" outward slope drains water outside.
-
Seal tight: Foam or weather-strip blocks heat, bugs, and high bills.
-
Check the frame: Fix any rot before installing the unit..
Why Good Bracing Matters
 A window AC may look small, but even a “compact” model can weigh 45 – 80 lb—about the same as a fifth-grader carrying a full backpack. If that weight presses on a weak sill or wobbly sash, the glass can shatter or the unit can tumble onto the driveway. In this guide you’ll learn how to brace, level, and seal a window-mounted air conditioner so it cools efficiently without risking accidents or water damage. Along the way we’ll link to detailed how-tos from The Furnace Outlet so you can dive deeper whenever you need.
Need a bracket you can trust? Explore AC support brackets rated for safe, secure installs that protect your frame and reduce stress.
Understanding Weight & Stress on Your Window Frame
 Your window frame works like a little shelf. When the AC leans outward, gravity adds extra force to the sill and the lower sash. Old wood may already have hidden rot; aluminum tracks can bend under load. Start every project with a quick health check—probe wood with a screwdriver for soft spots and look for hairline cracks in vinyl or metal. If anything feels weak, add a pressure-treated wood brace under the sill or choose a wall-sleeve unit instead
The blog “Window vs Wall AC: Installation Surface Requirements & Mounting Tips Explained” breaks down these load paths with photos of real installs
Choosing the Right Support Bracket
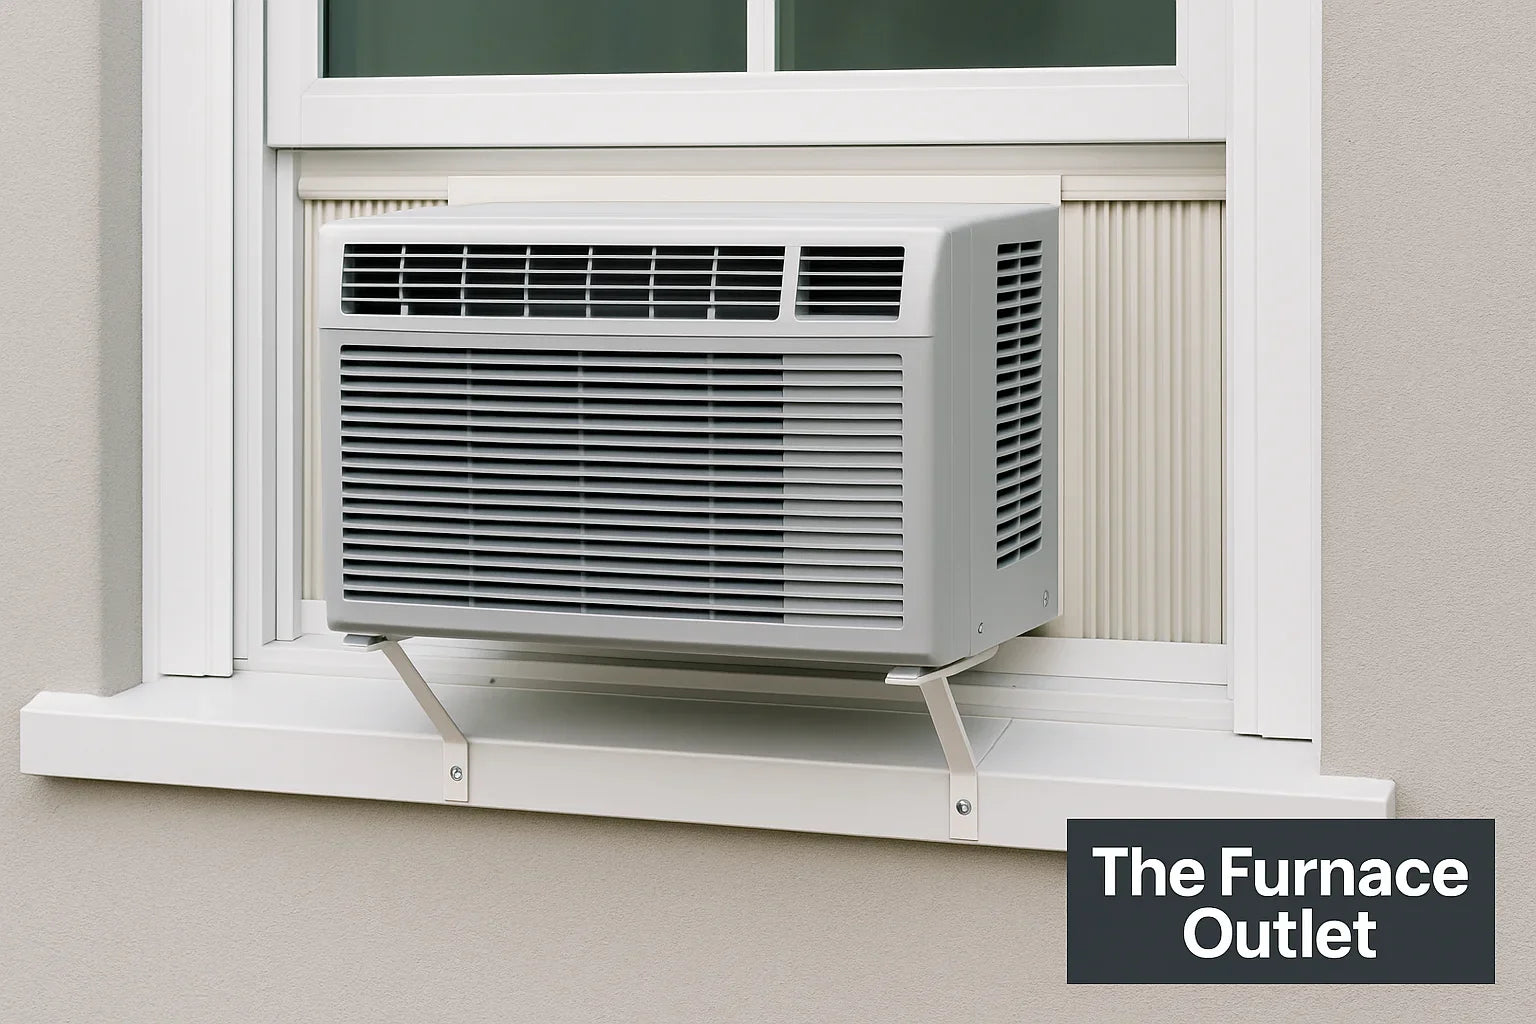
 Two bracket styles rule the market. L-brackets screw into the sill and arm under the chassis; adjustable “no-drill” brackets clamp inside and outside the wall. Pick a bracket rated for at least twice your unit’s weight for a safety factor. Stainless or zinc-plated steel lasts longest outdoors. The bracket should hold the unit slightly downward—about 1 ⁄ 8 in. per foot of depth—to direct condensate away.
Looking for a better fit this season? Check out top-rated window AC models for 2025 with quiet operation and modern features.
Securing the Window Sash for Safety
 Once the unit sits on its bracket, lower the sash until it presses firmly against the AC’s top flange. Use two 1 ½-in. sheet-metal screws through the upper sash rails into the side jambs. This prevents roommates—or kids— from accidentally lifting the sash and tipping the unit. Add a simple sliding sash lock for extra security. If you have horizontal-sliding windows, swap the lock for a steel bar wedged into the track. You can find more sash-locking tricks in “Smart Cooling for Sliding Windows: Your Guide to the Best AC Window Kits.”
Getting the Perfect Tilt: Drainage Made Simple
 Air conditioners pull gallons of water from humid summer air. That water needs a downhill path to the drip tray outside. Aim for a total tilt of ¼–½ in.—enough for drainage but not so much that the compressor vibrates. Lay a small torpedo level on the top of the unit; if the bubble touches the outer line, you’re good. Many brackets have pre-set angle slots, making this fool-proof. Remember: too much tilt shortens compressor life; too little leads to indoor leaks and mold-stained trim.
If your sill is questionable, consider through-the-wall ACs designed for solid installs—no frame stress, no tilt worries.
Sealing the Gaps: Foam, Weather-Strips & Energy Savings
 Accordion side panels block big openings, but tiny cracks still let in hot, dusty air. Fill gaps with closed-cell foam rope or peel-and-stick EPDM weather-strips. Press firmly so the adhesive bonds to a clean surface. A tight seal keeps insects out and can save 5–10 % on cooling costs. For a deeper dive into airflow losses—and why wall units beat window models in winter check “Window vs Wall AC Ventilation: Airflow, Sealing, and Energy Loss Compared.”
Inspecting & Reinforcing Old Window Frames
 Historic homes often hide soft sills under layers of paint. If your screwdriver sinks in more than ⅛ in., cut out the rot and patch with epoxy or replace the damaged board. Metal windows may need a short length of angle iron screwed to the sill to spread the load. Always paint raw wood and seal screw heads with exterior-grade caulk to stop water intrusion.
Want no gaps, no leaks, and total control? A DIY mini-split system offers ultra-efficient cooling without window sealing headaches.
Step-by-Step Installation Checklist (Quick Reference)

-
Measure the window opening; compare to the unit’s sleeve.
-
Inspect & repair sill, jambs, and sash.
-
Mount bracket and verify outward tilt.
-
Lift AC onto bracket with a helper; center it.
-
Lower sash onto top flange; lock sash screws.
-
Extend side panels; fasten with provided screws.
-
Seal gaps with foam/weather-strip.
-
Plug into a grounded, dedicated 15-A circuit.
Long-Term Care & Seasonal Maintenance Tips
v Each autumn, wipe dust from coils and filters; this keeps airflow high and energy use low. In freezing climates, remove the unit and store it indoors or cover it with a breathable AC cover to stop drafts. Wall units can stay put year-round but still need an annual cleaning.
Seal it like a pro—get weather-strips, foam rope, and install tools to finish the job right and prevent costly leaks.
Frequently Asked Questions
Q1. Do I really need a bracket if the sill looks strong?
Yes. Brackets transfer most of the weight to the house framing, not the sash, preventing warping and accidental drops.
Q2. How much tilt is safe?
A total drop of ¼–½ inch toward the outside is enough for drainage without stressing the compressor.
Q3. What if my window opens sideways?
Use a sliding-window install kit with vertical support bars and security brackets.
Q4. Can I plug the AC into an extension cord?
No. Window units need a dedicated outlet to avoid overheating cords and tripping breakers.
Q5. Where can I find more DIY HVAC tips?
Explore the full HVAC Tips library at The Furnace Outlet for step-by-step guides and product advice.