Key Takeaways
-
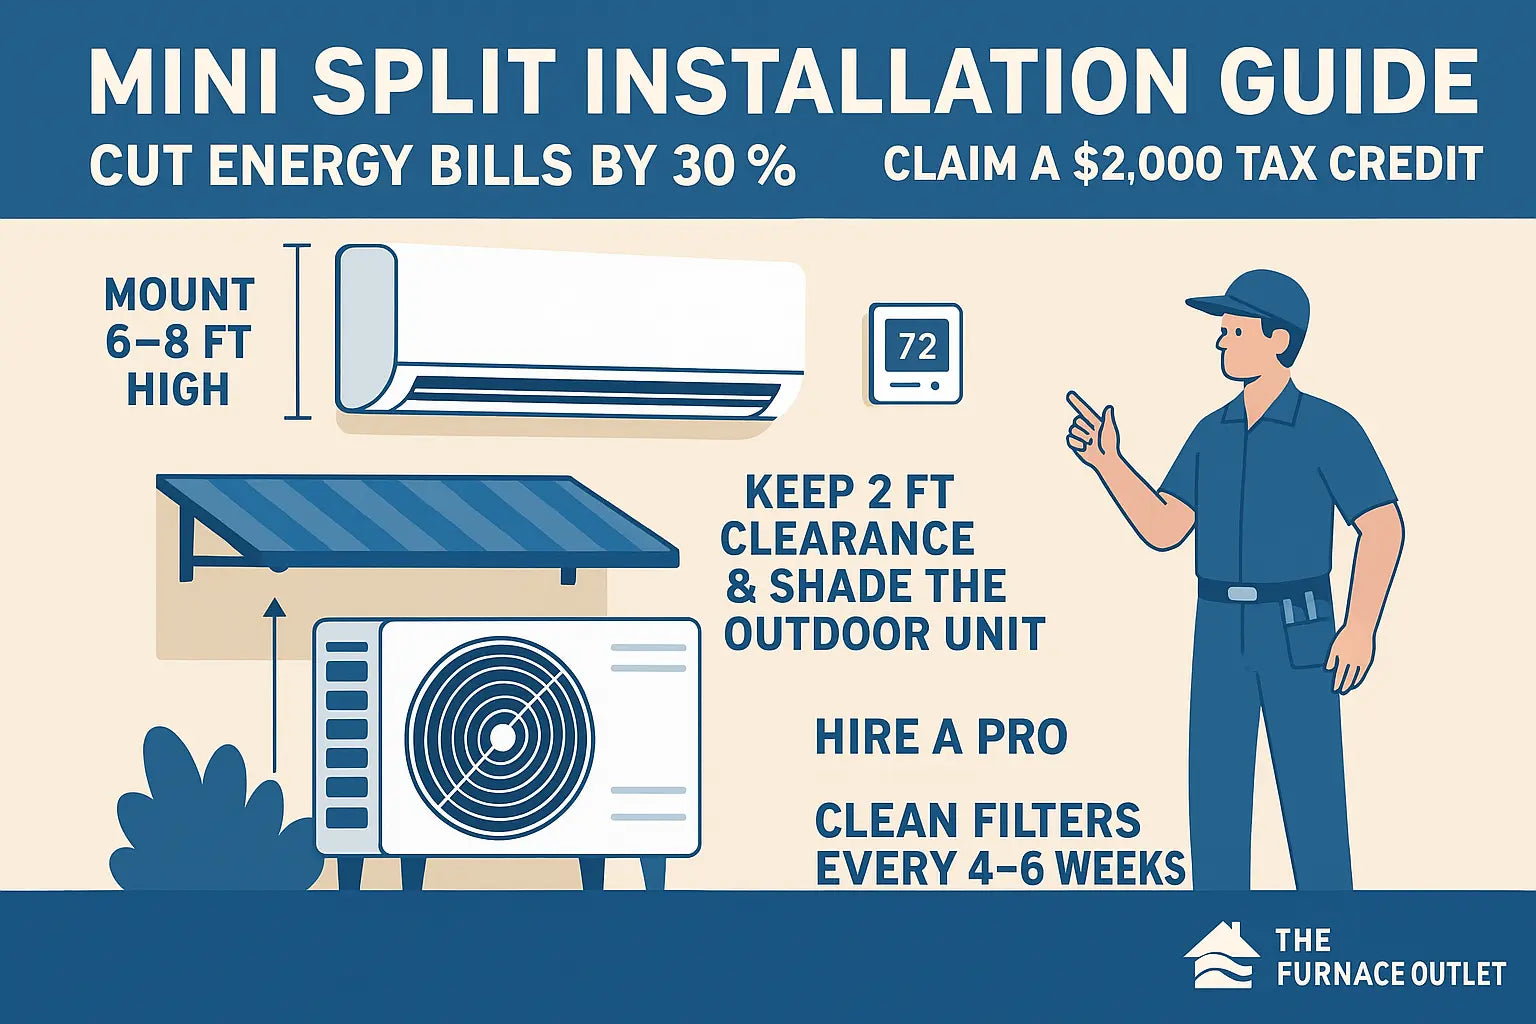
Saves up to 30% energy – no duct leaks.
-
Mount 6–8 ft high – for best airflow.
-
Keep 2 ft clearance – and shade the outdoor unit.
-
Hire a pro – DIY may void warranties.
-
Clean filters every 4–6 weeks – more often with pets.
-
Get 30% tax credit (up to $2,000/year) – valid through 2032.
Why Mini-Split Installation Matters

On top of savings, mini-splits align with 2025 trends: generous federal heat-pump credits, state-level rebates, and a nationwide push to cut carbon from space conditioning. By the end, you’ll understand the full installation roadmap and avoid common pitfalls that drain comfort and money.
Shop mini-splits now and start saving today.
The Common Concerns Homeowners Face

-
“Will the unit look bulky on my wall?”
Modern cassettes are as slim as a bookshelf, and low-profile lineset covers can be painted to match siding. -
“Can I ruin the system by drilling wrong?”
A slightly downward 2–3 in the hole keeps condensate flowing out, not back in. -
“Is the wiring dangerous?”
Minisplits draw 15–25 A; a dedicated breaker and correctly sized disconnect box prevent overloads.
These issues matter because a sagging air handler, a kinked copper line, or mismatched circuit can slash efficiency and void warranties. Later sections show how to handle each step safely—even if you hire a professional, knowing the checklist helps you spot shortcuts before they cost you.
Need extra peace of mind? Browse our Safeguard Your Mini-Split: Simple Steps, Big Savings article for a maintenance cheat-sheet you can print.
Mini-Split Basics in Plain English

-
Indoor “head” – Blows room air across cold (or warm) coils.
-
Outdoor condenser – Moves heat outside in summer and pulls heat in during winter.
-
Line set – Two copper pipes wrapped with electrical wire and a tiny drain hose.
When the thermostat senses a temperature change, an inverter compressor in the outdoor unit speeds up or slows down. Instead of snapping on and off like old-school AC, it sips exactly the energy needed, which is why units with SEER2 ≥ 20 often cost $300 less per year to run compared with 14-SEER central air. For deeper efficiency math, see Mini-Split Efficiency in 2025.
Claim up to $2,000 in heat-pump credits with qualifying models.
Preparing the Perfect Spot Indoors

Bracket anchoring: A fully charged 12 k BTU head weighs 40–50 lb. Hit two studs or use steel toggle bolts rated for 100 lb. Confirm level with a bubble gauge—the head must tilt no more than 1 ° to let condensate find the drain tray.
Penetration angle: Drill at a 3–5 ° downward pitch toward the outside. This tiny slope lets gravity carry away water droplets that form when humid air condenses on the cold coil.
Finally, pre-wrap the line set in closed-cell insulation and fish a pull string through the hole. These minutes now prevent wrestling copper later.
Use our sizing guide to avoid costly BTU mismatches before installation.
Setting Up the Outdoor Unit Safely

-
Clearance: 24 in around sides and 60 in above.
-
Elevation: Mount on a pad or brackets 4 in off the ground to keep snow, leaves, and puddles away.
-
Sun protection: Install on the north or east wall or add a louvered awning—lower cabinet temps prolong compressor life.
-
Noise courtesy: Direct the fan away from neighbor windows; most modern units hum at 50–55 dB (as quiet as a dishwasher).
Run the liquid line at the bottom and suction line on top inside the channel; this natural oil migration makes future service easier. If your climate drops below 0 °F, ask your installer for a crankcase heater option.
Wiring, Drainage, and Refrigerant Lines Explained

Line set flares: Tighten to manufacturer torque (e.g., 26 ft-lb for 3/8 in connectors). Over-torque distorts copper; under-torque leaks.
Vacuuming: Pull below 500 microns for 15 min and watch it hold for 10 min. Moisture or air left inside forms acids that chew the compressor.
Drain line: Loop a P-trap outside to block insects; terminate at least 6 in above grade. In freezing zones, route into a heated drain pan.
These “invisible” steps decide whether your system hums for 15 years or fails in two. If you want more sizing detail before ordering copper length, check our Mini-Split Sizing Guide 2025.
Single-Zone vs Multi-Zone Systems

|
Layout |
Best For |
Notes |
|
Single-zone |
One room, garages, ADUs |
Cheapest; indoor and outdoor units matched 1:1. |
|
Multi-zone (2–5 heads) |
Whole-home retrofits, multi-story houses |
Outdoor unit must handle 125 % of combined indoor BTUs for peak days. |
|
Heat-pump models |
Year-round climates |
Choose units with published COP ≥ 1.8 at 5 °F if you expect deep freezes. |
Why does sizing matter? Undersize and you’ll hear the fan race, oversize and the compressor short-cycles itself to death. Our article on Air-Source Heat Pumps explains matching load to climate in plain terms.
DIY vs Professional: A Side-By-Side Look

|
Aspect |
DIY |
Professional |
|
Skill needed |
Advanced (HVAC & electrical) |
Licensed, insured |
|
Tools |
Vacuum pump, micron gauge, flaring block |
All provided, calibrated |
|
Warranty |
Often void |
Fully honored |
|
Cost |
Save $800–$1,500 labor |
Higher upfront, lower risk |
|
Typical timeline |
Weekend |
Half-day |
DIY kits (e.g., pre-charged line sets) tempt handy owners, but remember U.S. EPA rules forbid unlicensed refrigerant handling. Even if you do the heavy lifting, paying a technician to vacuum and leak-check can preserve the 10-year parts guarantee.
Send a photo for a fast pro-level quote.
Frequently Asked Questions (FAQs)
Q 1. How often should I wash the indoor filter?
A clean filter every 4–6 weeks keeps airflow strong and energy use low.
Q 2. Do minisplits work in very cold states?
Yes. “Cold-climate” units maintain 80 % capacity at 5 °F; look for specs that list heating at –13 °F.
Q 3. Can I extend the factory line set?
Only if the model’s manual lists additional refrigerant weight per foot; exceeding total length without topping up charge will starve the compressor.
Q 4. What incentives are available in the U.S.?
Through 2032, the Energy Efficient Home Improvement Credit refunds 30 % of qualified heat-pump costs up to $2,000 each year.
Q 5. Where can I learn routine care tips?
Visit our HVAC Tips hub for bite-sized checklists and videos you can follow with common tools.


