When planning a 3-zone ductless mini split system, where you place each indoor unit makes a huge difference in comfort, airflow, aesthetics, and energy efficiency. Jake—like many DIY-minded homeowners—wants to know: What’s the best placement option for each room in my house?
In this guide, we’ll explore the three primary types of indoor unit mounting options (wall, ceiling, and floor), explain when and where to use each, and walk through real-world placement strategies for bedrooms, kitchens, living rooms, and more.
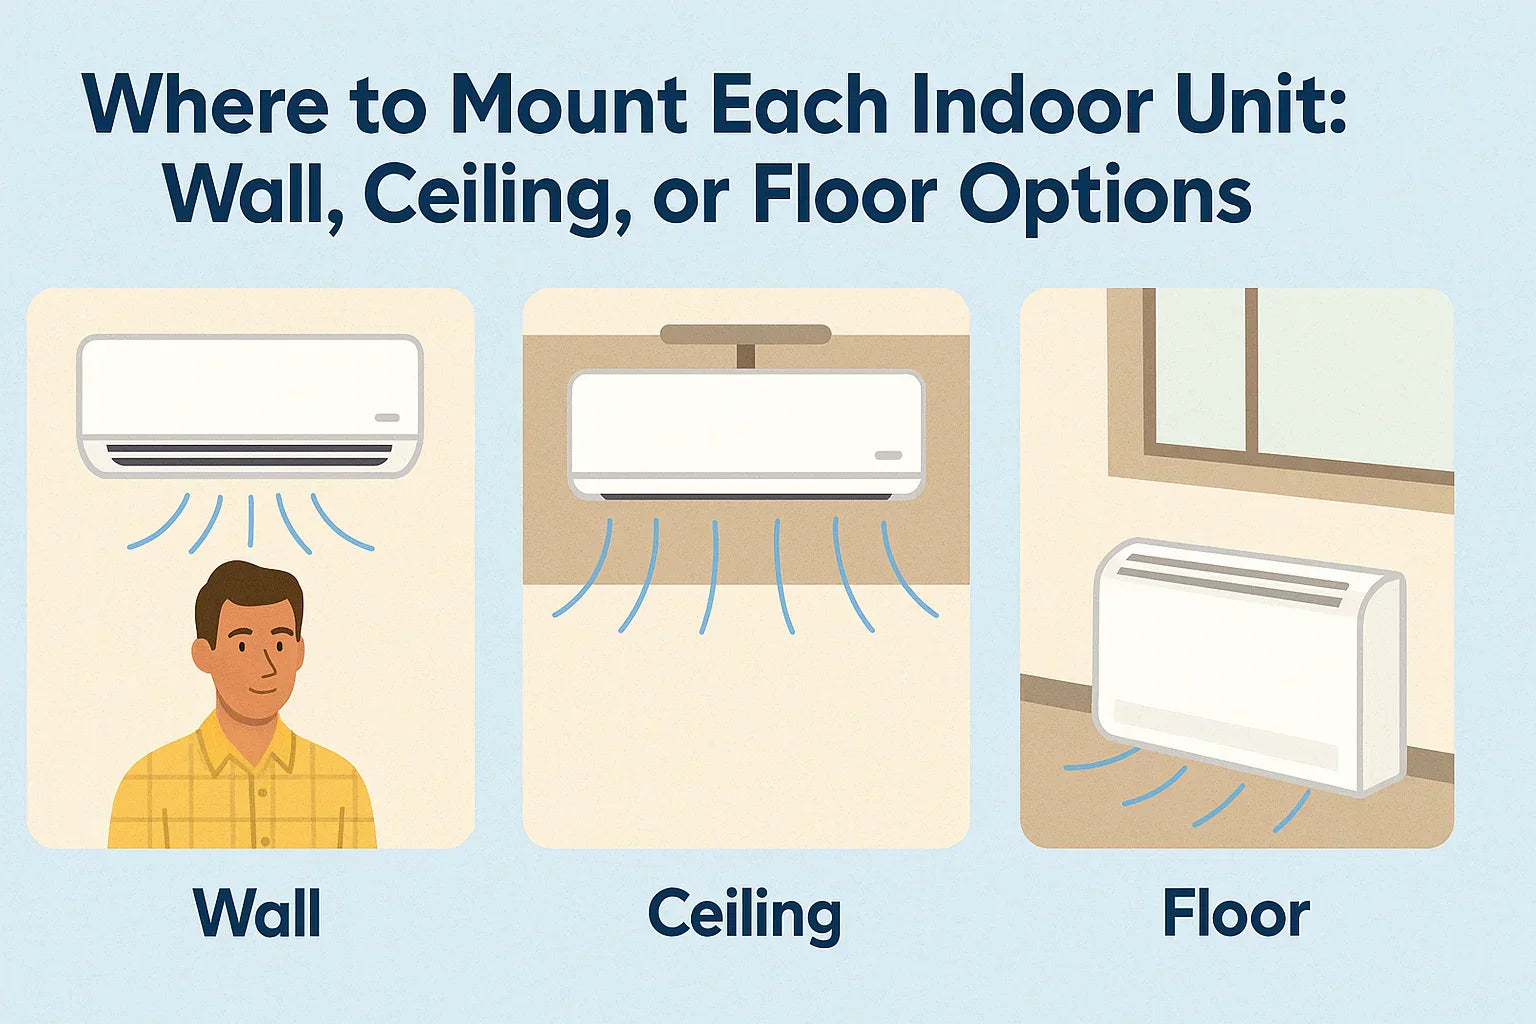
🧱 Wall-Mounted Units: The Standard Choice
✅ Best for:
-
Bedrooms
-
Offices
-
Living rooms
-
Hallways
🔧 Pros:
-
Easy installation (ideal for DIYers)
-
Widely available in various sizes
-
Positioned high on the wall for optimal airflow
-
More affordable than ceiling or floor units
⚠️ Cons:
-
Visible on the wall (may not suit all aesthetics)
-
Not ideal for low-ceiling rooms or rooms with limited wall space
🔄 Airflow Tip:
Place at least 6–8 inches from the ceiling and avoid mounting over large furniture that blocks airflow.
🔗 Learn more:
🧭 Ceiling Cassettes: Sleek & Discreet
✅ Best for:
-
Open-concept kitchens
-
Living/dining combos
-
High-end renovations
-
Large rooms
🔧 Pros:
-
Flush-mounted appearance
-
360-degree airflow
-
Doesn’t take up wall or floor space
-
Great for even temperature distribution
⚠️ Cons:
-
Requires ceiling access (attic or crawl space)
-
Higher installation cost
-
May be overkill for small rooms
🔄 Placement Tip:
Install near the center of the room or between zones for maximum circulation.
🔗 Learn more:
🧶 Floor-Mounted Units: Low-Profile Power
✅ Best for:
-
Rooms with sloped ceilings or knee walls
-
Older homes with minimal wall space
-
Sunrooms and converted garages
-
Where baseboard heat was previously installed
🔧 Pros:
-
Blends well in traditional room setups
-
Easier to service than ceiling units
-
Strong low-level heat delivery (great for winter)
⚠️ Cons:
-
Airflow can be blocked by furniture
-
May collect dust or be prone to obstruction
-
Often more expensive than wall units
🔄 Positioning Tip:
Keep at least 6 inches of clearance from the floor and 12–18 inches from surrounding objects.
🔗 Learn more:
🗂️ How to Choose for Each Room
| Room | Best Option | Reason |
|---|---|---|
| Bedroom | Wall-mounted | Quiet, directional airflow at head height |
| Living Room | Ceiling cassette | Balanced airflow across large open space |
| Kitchen | Ceiling or wall | Keeps unit out of splash zones; ceiling preferred for air circulation |
| Office | Wall-mounted | Efficient, low-noise, and direct control |
| Garage | Floor-mounted | Delivers low-level warmth and cool air directly where needed |
| Attic Room | Floor-mounted | Avoids ceiling slopes; fits below knee walls |
🧰 Mounting Height and Clearance Guidelines
| Mount Type | Height from Floor | Clearance Top | Clearance Sides |
|---|---|---|---|
| Wall-Mounted | 6–8 ft | 6 in | 6–12 in |
| Ceiling Cassette | Centered or 7–9 ft | 10–12 in above unit | Equal spacing |
| Floor-Mounted | 6–12 in | 6 in above | 6–12 in sides |
🎨 Aesthetic Considerations
-
Wall Units: Modern models offer slim, paintable options. Choose neutral colors or recessed alcoves.
-
Ceiling Units: Invisible once installed. Best in contemporary or minimalist designs.
-
Floor Units: Blend with radiator or baseboard heating look in older homes.
📦 Installation Notes for Jake
Wall-Mounted:
-
Use a mounting bracket secured to studs
-
Drill a 3" hole for line set and drain line
-
Consider condensate pump for basement installs
Ceiling Cassette:
-
Requires support between ceiling joists
-
Professional electrical and refrigerant routing
-
Condensate drain may need elevation
Floor-Mounted:
-
Ensure level installation surface
-
Consider waterproofing in sunrooms or basements
💸 Cost Comparison
| Type | Equipment Cost | Install Cost (Pro) | Best For |
|---|---|---|---|
| Wall-Mounted | $800–$1,500 | $500–$1,200/unit | Budget-friendly, DIY setups |
| Ceiling Cassette | $1,500–$2,500 | $1,200–$2,000/unit | Premium homes, large common areas |
| Floor-Mounted | $1,200–$2,000 | $800–$1,500/unit | Older homes, baseboard replacements |
🧠 Expert Tips Jake Should Remember
-
Always consider sunlight exposure when choosing placement.
-
Never mount above high shelves or under beams.
-
Avoid mounting in hallways unless it's a frequently occupied zone.
-
Each zone should be calibrated separately if possible.
In the next topic we will know more about: Maintenance Checklist for Your 3-Zone Mini Split (Jake Edition)


