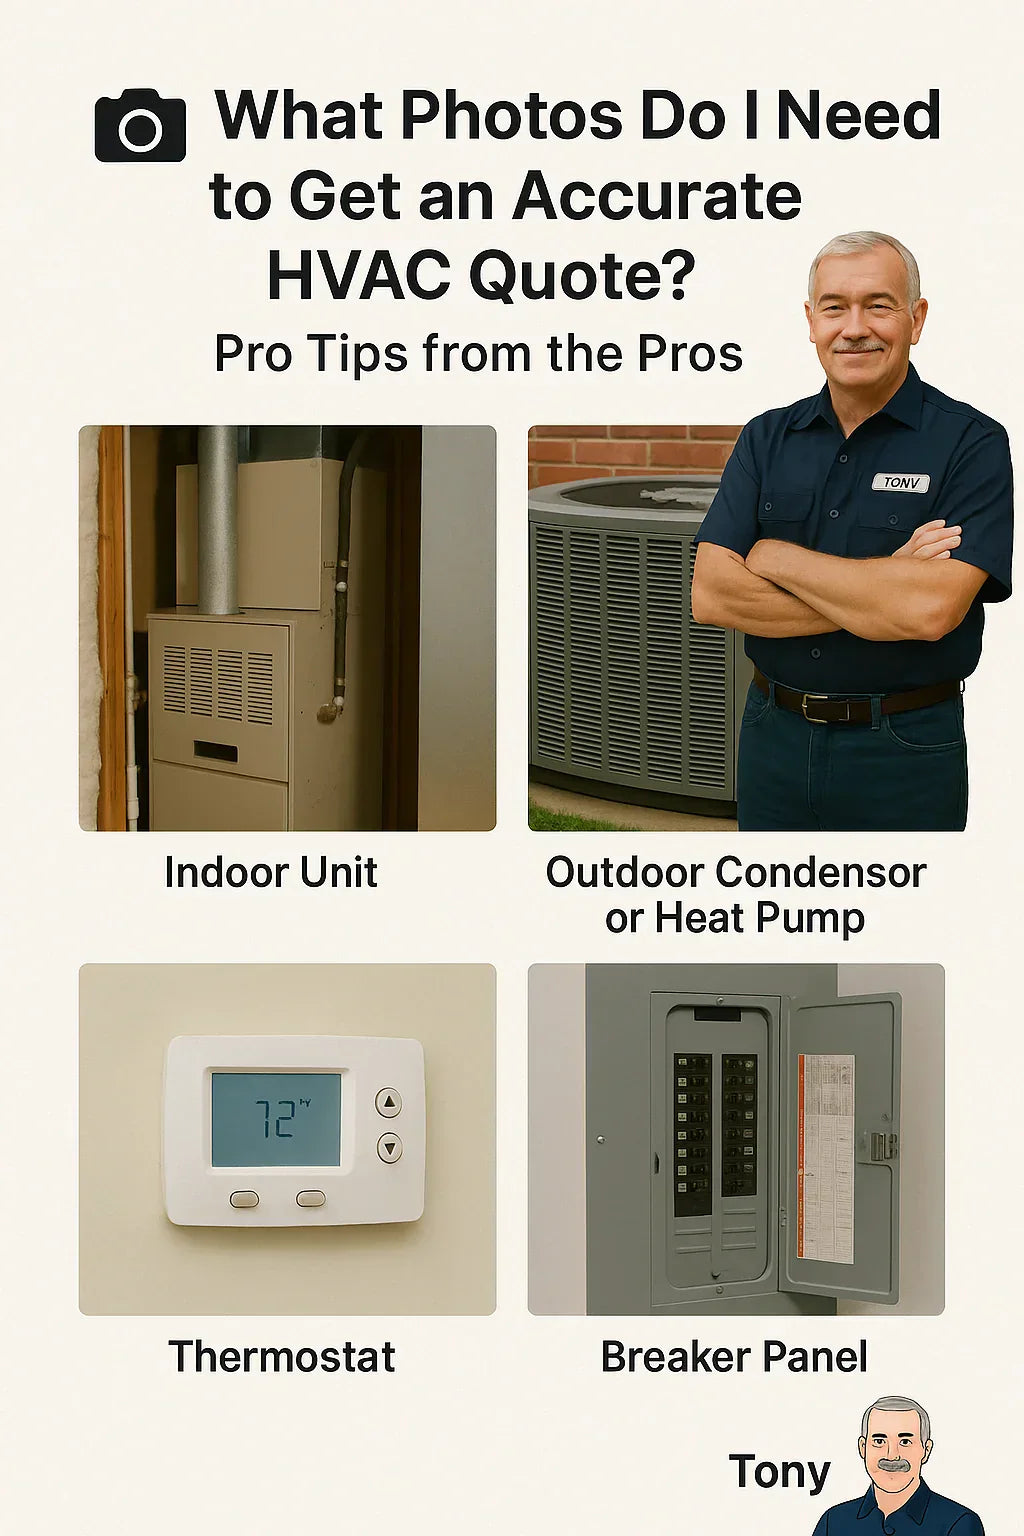
If you’re using The Furnace Outlet’s Quote by Photo tool to get an HVAC estimate, the most important thing you can do is submit the right photos. Clear, complete images help ensure your quote is fast, accurate, and tailored to your home's needs—not a generic guess.
In this guide, we’ll walk you through exactly what photos to take, how to take them, and how to avoid common mistakes. If you're like Tony, a detail-oriented homeowner who values clarity and wants the job done right the first time, this is your photo game plan.
🔍 Why Photos Matter in HVAC Quotes
HVAC systems are highly specific to your home's layout, size, and existing infrastructure. Your photos provide crucial clues:
-
What type of system is currently installed?
-
How much space is available for replacement equipment?
-
Are there special install considerations (e.g., venting, ducting, electrical)?
Without these visuals, an HVAC quote becomes a best-guess. With them, it becomes a reliable estimate.
Verified Source: Heat & Cool’s remote quoting tool emphasizes that photo clarity directly affects quote turnaround and precision.
📷 The 6 Essential Photos You Should Always Include
1. 🏠 Indoor Unit (Furnace or Air Handler)
-
What to capture:
-
A wide shot of the front of the unit
-
A close-up of the nameplate (model/serial number)
-
Any surrounding vent pipes, ducting, or drain lines
-
2. ❄️ Outdoor Condenser or Heat Pump
-
What to capture:
-
A wide shot showing the location relative to your home
-
A close-up of the equipment label or nameplate
-
Clearance around the unit (fencing, landscaping, wall clearance)
-
3. 🛍️ Thermostat Wall Location
-
What to capture:
-
The thermostat on the wall (screen on if digital)
-
Any additional wiring or zones nearby
-
4. 🛠️ Breaker Panel
-
What to capture:
-
The entire electrical panel (door open)
-
Focus on breakers labeled "AC," "Furnace," or "Air Handler"
-
5. 🛏️ Ductwork and Vents
-
What to capture:
-
Any exposed ductwork (in attic, basement, or closet)
-
Key connections, joints, and return vents
-
6. 🏡 Optional: Home Exterior Shot
-
Why it helps:
-
Gives context for where equipment is located
-
Useful for venting, condenser placement, and clearance planning
-
➕ Optional But Recommended Photos for More Precision
These aren’t required, but including them can fine-tune your quote even further:
-
Filter or return grille size photo
-
Measuring tape next to furnace for height/width context
-
Wiring at the thermostat (if considering a smart upgrade)
-
Photos of any unusually warm/cold rooms
-
Attic access or crawlspace if HVAC connects there
Pro Tip: Take 2–3 extra shots of any area you're unsure about. More is better than not enough.
🎭 What a Good Photo Looks Like
Photos don’t need to be professional, but they should be clear, bright, and complete. Here's how to get it right:
Do:
-
Use natural lighting or a phone flash
-
Stand back for a full view, then zoom in on tags or wires
-
Use a clean camera lens (wipe before shooting!)
Avoid:
-
Blurry or cropped images
-
Shadows covering key info
-
Cutting off labels or parts of the equipment
Example:
Good: Full shot of air handler, label clearly readable, connections visible
Bad: Side view only, blurry tag, lighting too dark to verify wires
External Reference: Energy Star’s label guide helps identify where brand/model info lives on most HVAC equipment.
❌ Common Mistakes That Delay Your Quote
Mistakes lead to back-and-forth and possible delays. Avoid these pitfalls:
-
❌ Only sending one or two photos
-
❌ Missing the outdoor unit entirely
-
❌ Cropping out the model tag
-
❌ Sending only screenshots or compressed images
-
❌ Not labeling which photo is what
If you’re ever unsure, take one wide photo and one close-up per unit. Include context.
🧑💼 Pro Tips from Real HVAC Review Techs
Here’s what the people reviewing your photos want you to know:
-
"Include model and serial numbers every time."
-
"We don’t need 30 photos, just the right 6 or 7."
-
"Use a sticky note to point to problems or unusual setups."
-
"Avoid zooming in too close—let us crop it later."
-
"We’d rather have extra than have to chase down details."
📂 How to Submit Photos for Best Results
Upload Method:
Use The Furnace Outlet's Quote by Photo form
Format:
-
JPEG or PNG
-
Max size: 10MB per photo (if submitting many, compress first)
Submission Tips:
-
Include your home's square footage and number of floors
-
Mention desired outcomes: upgrade, replacement, energy savings, etc.
-
Add notes if needed: "furnace in basement," "attic crawlspace only access"
External Link: HVAC.com Photo Quote Expectations confirms that context plus photos = better quoting.
🎨 Visual Reference Gallery (For Page Embedding or PDF Download)
If building this out further, include labeled images like:
-
"Good Furnace Photo" (full shot + label close-up)
-
"Outdoor Unit Clearance Example"
-
"What NOT to send" image collage
✅ Conclusion: Better Photos = Better Quotes
The Quote by Photo tool puts you in control—but only if you give your quote techs the info they need. With a few clear, well-angled photos, you can:
-
Speed up your estimate
-
Get more accurate equipment recommendations
-
Avoid installation surprises later
So grab your phone, open your utility closet, and channel your inner Tony: sharp, thorough, and HVAC-smart.
In the next topic we will know more about: No Sales Visit? No Problem. Why the 'Photo Quote' Is Changing HVAC Shopping


