👩 Samantha’s Introduction
When I bought my 15,000 BTU through‑the‑wall air conditioner, I thought the hardest part would be cutting the hole in the wall. But the real game‑changer turned out to be something less glamorous: the wall sleeve.
At first, I wondered: “Do I really need this metal box?” After all, my old sleeve looked fine. But after digging into reviews, manuals, and talking with pros, I realized that the sleeve isn’t just an accessory — it’s the foundation of your AC system.
In this guide, I’ll share everything I learned about choosing the right wall sleeve for a 15,000 BTU unit. If you’re about to install (or replace) one, this will save you headaches, money, and maybe even a few sleepless nights.
🛠️ 1. What Is a Wall Sleeve & Why It Matters
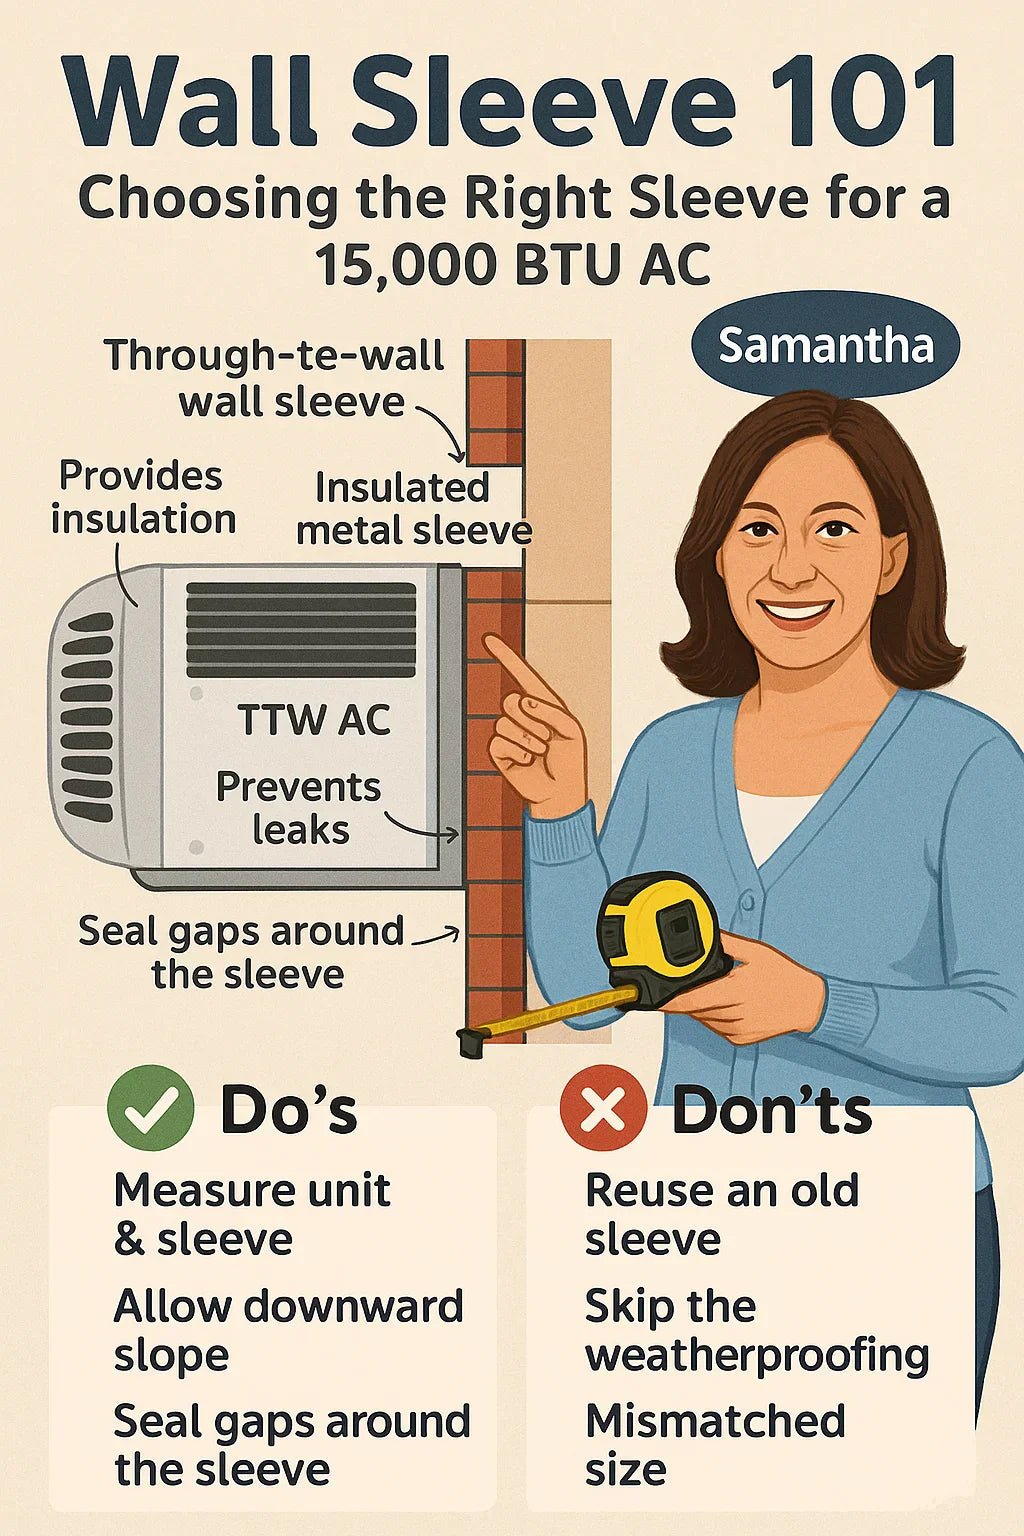
A wall sleeve is a metal or heavy‑duty frame that:
-
Holds your through‑the‑wall AC in place.
-
Protects the inside of your wall from moisture, vibration, and pests.
-
Ensures proper airflow and drainage.
-
Prevents air leaks that reduce efficiency.
-
Is often required by manufacturers for warranty coverage.
💡 Samantha’s takeaway: Think of the sleeve as the foundation of your through‑the‑wall AC. Without it, even the best unit won’t work efficiently or last long.
🔗 Wall sleeves are a must for durability and weatherproofing.
📏 2. Sizing for a 15,000 BTU Unit
Getting the dimensions right is critical.
Typical Dimensions
Most 15,000 BTU TTW units require:
-
Width: 24–26 inches
-
Height: 15–17 inches
-
Depth: 16–20 inches
Why Accuracy Matters
-
Too small: The AC won’t fit (or worse, you’ll force it and damage the sleeve).
-
Too large: Creates gaps that cause air leaks and water intrusion.
💡 Samantha’s tip: Measure both the AC and the sleeve before you buy. Some brands use slightly different standards.
🔗 Energy Star recommends double‑checking sleeve compatibility for efficient performance.
🏷️ 3. Types of Wall Sleeves
Not all sleeves are created equal. Here’s what I discovered:
🔹 Manufacturer‑Specific Sleeves
-
Perfect fit: Designed for a specific brand/model.
-
Warranty‑friendly: Many manufacturers won’t honor warranties without their sleeve.
-
Cost: Usually $150–$300.
💡 Example: My Friedrich sleeve was pricey, but it came with features like built‑in insulation and pre‑sloped drainage.
🔹 Universal Sleeves
-
Flexibility: Fit multiple brands with standard sizes.
-
Availability: Easier to find in local hardware stores.
-
Trim kits: Sometimes needed for a snug fit.
-
Cost: Usually $100–$200.
💡 Samantha’s lesson: If you’re replacing an older unit, a universal sleeve can save money — just make sure your AC fits snugly.
🔗 The Furnace Outlet’s Wall Sleeve Guide covers when to choose universal vs manufacturer‑specific.
🌦️ 4. Features to Look For
When shopping, I realized it’s not just about size. Look for these key features:
🧊 Insulation
-
Keeps conditioned air inside.
-
Reduces noise.
💧 Drainage Channels
-
Prevents condensation from entering your wall.
-
Look for sleeves that slope outward slightly.
🧱 Durable Construction
-
Powder‑coated steel resists rust.
-
Weather‑resistant finishes extend lifespan.
🪟 Rear Grille Compatibility
-
Protects against pests and debris.
-
Helps airflow efficiency.
💡 Samantha’s choice: I picked a sleeve with both insulation and a rear grille — it made my living room quieter and bug‑free.
🧰 5. Installation Tips from Samantha
Installing my sleeve was almost as much work as the AC itself. Here’s what I learned:
-
Use a level — if the sleeve isn’t straight, your AC won’t drain properly.
-
Slope it slightly outward — about 1/4 inch — so water flows outdoors.
-
Seal the gaps with weatherproof caulk and insulation foam.
-
Add flashing above the sleeve to direct rain away.
-
Install the rear grille for protection.
💡 Samantha’s story: My first attempt wasn’t sloped enough, and I had condensation dripping inside. Fixing it took an extra Saturday afternoon!
🛡️ 6. Common Mistakes to Avoid
I made a checklist after almost making a few of these mistakes myself:
-
❌ Reusing an old sleeve without checking compatibility.
-
❌ Forgetting to weatherproof, leading to drafts and water leaks.
-
❌ Installing it level instead of sloping outward.
-
❌ Not accounting for the electrical outlet location.
-
❌ Skipping the rear grille in areas with lots of bugs.
💡 Samantha’s warning: A poorly sealed sleeve can make your $900 AC feel like a $100 fan.
💰 7. Cost Breakdown
Here’s what you might expect to spend:
| Item | Price Range |
|---|---|
| Universal sleeve | $100–$200 |
| Manufacturer‑specific sleeve | $150–$300 |
| Rear grille | $40–$80 |
| Professional installation | $200–$500 |
💡 Samantha’s total: My Friedrich sleeve + grille + pro install cost about $450, but it’s been worth every penny.
✅ Samantha’s Takeaway
Choosing the right wall sleeve isn’t optional — it’s essential.
-
If you want maximum reliability and warranty protection → go with a manufacturer‑specific sleeve.
-
If you want flexibility and savings → choose a universal sleeve with a trim kit.
-
Always look for insulation, drainage, and durability.
-
And don’t forget to slope it outward and seal the edges.
💡 Samantha’s final thought: “The wall sleeve may not be the most exciting part of your AC, but it’s the unsung hero that keeps your system efficient, quiet, and safe.”
In the next topic we will know more about: How Much Does It Cost to Install a 15,000 BTU Through-the-Wall AC? Equipment, Labor & Extras


