A through-the-wall air conditioner can be a game changer for cooling a single room or an entire apartment without eating up window space. But once you’ve chosen your unit, you face the next big decision: Do you install it yourself or hire a professional?
Your choice impacts:
-
Upfront cost
-
Time investment
-
Unit performance
-
Energy efficiency
-
Lifespan of your AC
This guide will walk you through:
-
How through-the-wall AC installation works
-
A step-by-step DIY guide
-
What to expect from a professional installation
-
The real costs of each option
-
How to decide which path is right for you
By the end, you’ll have a clear plan to get your AC installed efficiently, safely, and without any expensive surprises.
2. Understanding Through-the-Wall AC Installation
Unlike window units, through-the-wall ACs are built into a permanent opening in your wall. This setup offers better insulation, noise control, and security, but it’s also a more involved installation.
Key differences from window ACs:
-
Permanent wall opening → requires cutting into drywall, siding, or masonry.
-
Wall sleeve required → holds the unit in place and prevents structural damage.
-
Weatherproofing is critical → prevents leaks, drafts, and pest intrusion.
-
Precise sizing → a wrong cut means costly wall repairs.
3. Tools & Materials Needed
For DIY Installation
Core tools:
-
Tape measure
-
Level
-
Stud finder
-
Drill & bits
-
Reciprocating or circular saw (with appropriate blade for wall type)
-
Screwdrivers (Phillips and flathead)
-
Caulk gun
Materials:
-
Wall sleeve (manufacturer recommended)
-
Weatherproof caulk & sealant
-
Insulation foam strips or spray
-
Anchors & screws
-
Safety gear (goggles, gloves, dust mask)
💡 Savvy tip: Renting specialty tools (like a core drill for brick walls) can be cheaper than buying them.
For Professional Installation
Pros bring all tools and materials, often including:
-
Heavy-duty saws and core drills
-
Industrial sealants
-
Electrical testing equipment
-
Safety harnesses for high-wall installs
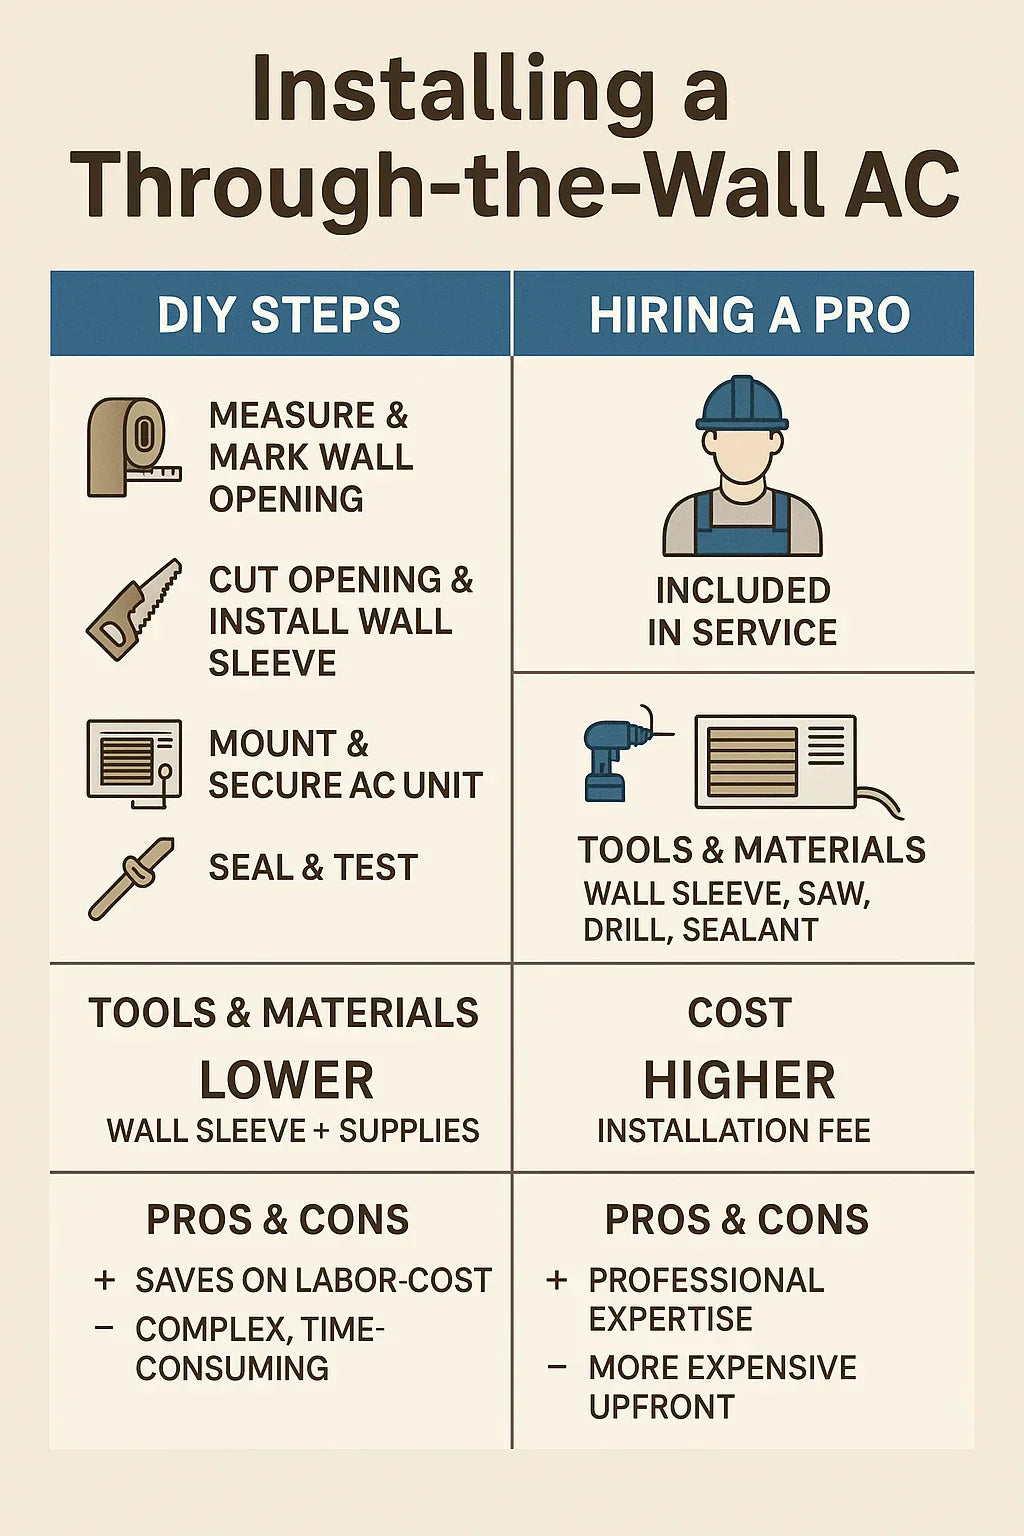
4. DIY Installation: Step-by-Step
Note: Always read your unit’s manual for specific measurements and instructions.
Step 1: Planning & Measuring
-
Identify the best location: near an electrical outlet, away from direct sun, not blocked by furniture.
-
Check that the wall is load-bearing or non-load-bearing. Load-bearing walls may require additional framing.
-
Measure your AC’s wall sleeve and mark the outline on the wall.
Step 2: Check for Studs, Wiring, & Pipes
-
Use a stud finder to locate studs.
-
Cut power to the area before checking for electrical lines.
-
Avoid cutting through plumbing or gas lines.
Step 3: Cutting the Opening
Drywall & wood siding:
-
Score the outline with a utility knife to reduce splintering.
-
Use a reciprocating saw to cut the opening.
Brick or masonry:
-
Drill pilot holes in each corner of the outline.
-
Use a core drill or masonry blade to cut the opening.
Step 4: Install the Wall Sleeve
-
Place the sleeve in the opening, ensuring it’s level.
-
Use shims if necessary for proper alignment.
-
Secure it with screws or anchors.
-
Apply insulation foam between sleeve and wall opening.
Step 5: Slide in the AC Unit
-
With a helper, slide the unit into the sleeve until it clicks or locks into place.
-
Secure according to manufacturer instructions.
Step 6: Seal & Weatherproof
-
Apply a bead of exterior-grade caulk around the sleeve’s outer edge.
-
Seal any gaps inside to prevent drafts.
Step 7: Test the Unit
-
Plug in and power on.
-
Check for proper airflow, cooling performance, and drainage.
-
Listen for rattling (could indicate loose installation).
5. Pros & Cons of DIY Installation
Pros:
-
Save $150–$500 in labor.
-
Install on your own schedule.
-
Learn valuable skills for future projects.
Cons:
-
Requires tools and physical labor.
-
Mistakes can damage the unit or your wall.
-
May void warranty if not installed per guidelines.
-
Not ideal for heavy masonry or complex electrical needs.
6. Hiring a Professional: What to Expect
Typical Process
-
Pre-install visit: Pro measures, checks wall type, confirms electrical readiness.
-
Cutting & framing: Done with specialized tools and safety precautions.
-
Wall sleeve installation: Professionally leveled and sealed.
-
Unit mounting: Safely positioned and anchored.
-
Electrical work: Ensures breaker compatibility and code compliance.
-
Testing & cleanup: Pro runs performance checks and cleans the work area.
7. Pros & Cons of Hiring a Pro
Pros:
-
Faster (often done in 2–3 hours).
-
High-quality finish.
-
Electrical and building code compliance.
-
Protects manufacturer warranty.
Cons:
-
$200–$800 additional cost.
-
Must work around pro’s schedule.
-
Less hands-on satisfaction for DIY enthusiasts.
8. Cost Comparison: DIY vs. Pro
| Item | DIY Cost Range | Pro Cost Range |
|---|---|---|
| Wall Sleeve | $50–$120 | Included |
| Tools & Materials | $40–$200 | Included |
| Unit Price (10k BTU) | $400–$650 | $400–$650 |
| Labor | $0 | $200–$800 |
| Total | $490–$970 | $600–$1,450 |
💡 Savvy note: DIY is most cost-effective for drywall/wood installs. For brick, paying a pro may actually be cheaper than renting heavy-duty tools.
9. Factors to Consider When Choosing
-
Skill Level: Comfort with power tools? Experience cutting walls?
-
Wall Material: Drywall is beginner-friendly; brick/masonry is pro territory.
-
Electrical Work: New circuits or voltage changes require a licensed electrician.
-
Time vs. Money: Do you value your time more than the cost savings?
-
Warranty Protection: Some warranties require pro installation.
10. Savvy’s Recommendation Framework
| Scenario | Recommended Approach |
|---|---|
| Standard drywall, existing outlet | DIY |
| Brick or concrete wall | Pro |
| Electrical upgrades needed | Pro |
| Comfortable with tools, free weekend | DIY |
| Want it done same day, no hassle | Pro |
11. Safety Tips for Either Approach
-
Always cut power before starting.
-
Wear protective gear, especially when cutting masonry.
-
Lift with your legs when moving the AC.
-
Avoid working alone if the unit is heavy.
12. Final Recommendations & Next Steps
If you’re Savvy with tools and dealing with a straightforward install, DIY can save you several hundred dollars. Just be sure to measure twice, cut once, and follow the manufacturer’s directions.
If your wall material is challenging, your electrical setup is outdated, or you value your weekend time, hiring a pro is worth every penny.
In the Next topic we will read more about: How Energy Efficient Are Through-the-Wall AC Units? Understanding EER, CEER & EnergyStar Ratings


