🏡 Why Preparation is the Real Key to a Smooth AC Installation
Hi friends — Samantha here again.
When I replaced my old central air unit with a brand-new 3-ton system, I thought the hard part would be choosing the model. It wasn’t.
The real challenge was getting ready for installation — making sure my home’s electrical, ductwork, and layout could handle the system, choosing the right installer, and avoiding the little mistakes that can cost you big later.
This guide is everything I wish I’d known before installation day — so your upgrade can be as smooth (and stress-free) as possible.
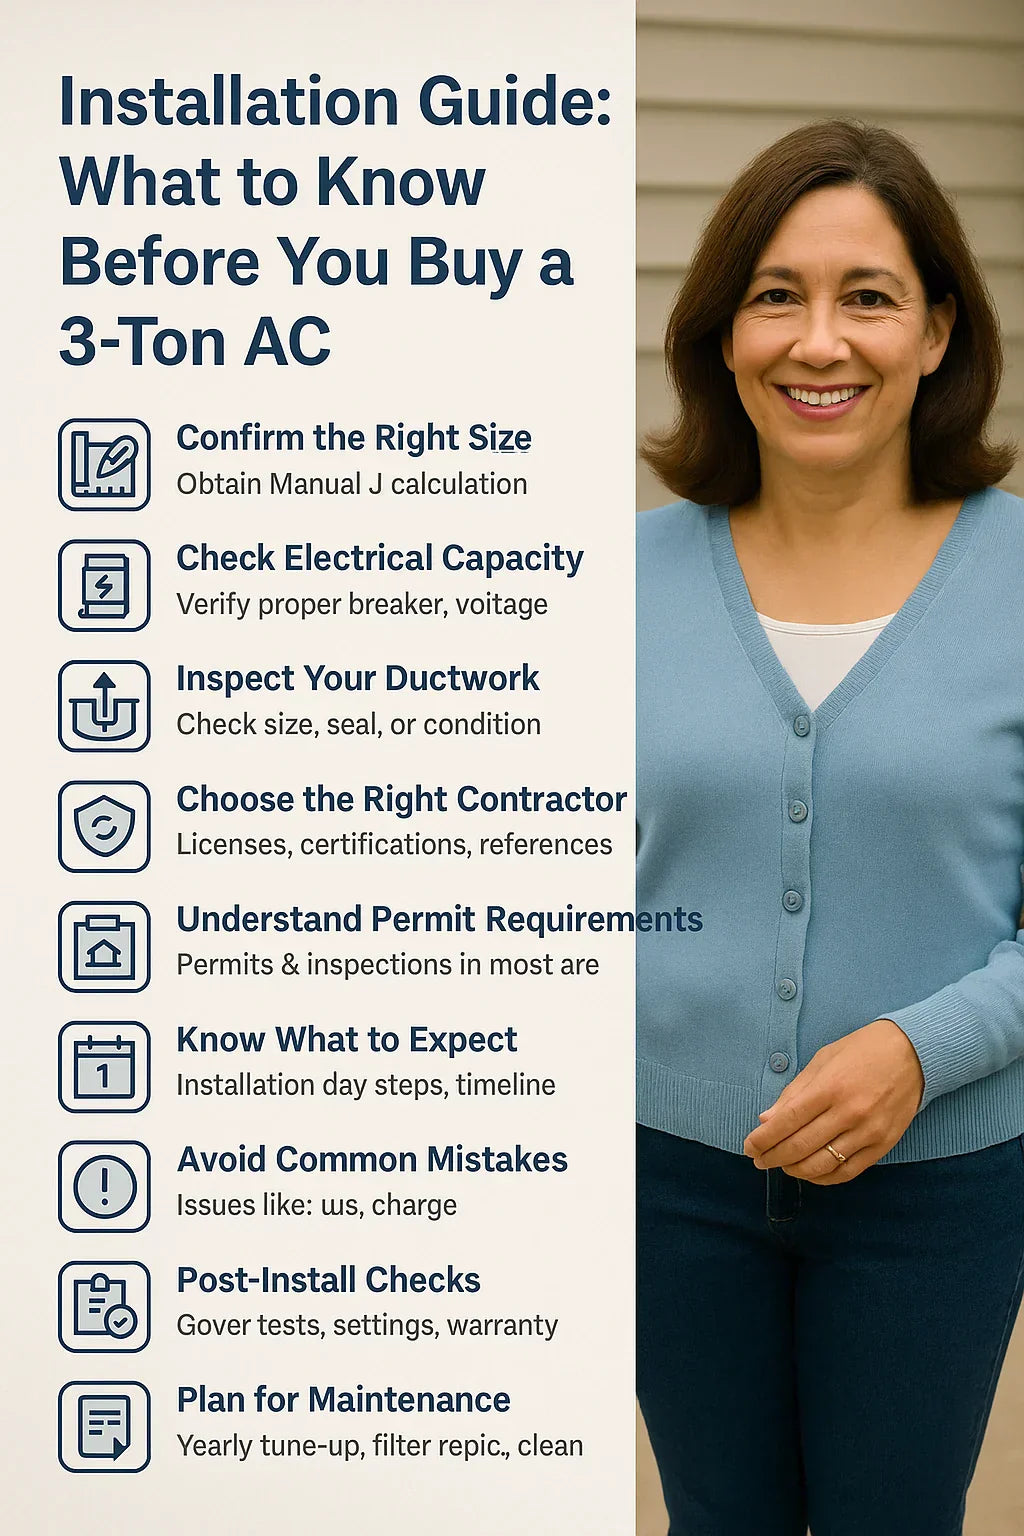
📏 Step 1: Confirm the Right Size for Your Home
A “3-ton” AC doesn’t weigh three tons — it delivers about 36,000 BTUs/hour of cooling. But size isn’t one-size-fits-all.
Get a Manual J Load Calculation
-
Performed by your HVAC contractor or energy auditor
-
Factors in square footage, insulation, window type, sun exposure, climate zone
-
Prevents undersizing (poor cooling) or oversizing (short cycling, humidity problems)
⚡ Step 2: Check Electrical Capacity
A 3-ton AC will need:
-
Dedicated 240V circuit
-
Correct breaker size (usually 25–40 amps, per manufacturer specs)
-
Adequate wire gauge
Tip: Have a licensed electrician inspect your panel — upgrading during installation can save a second service call later.
🌬 Step 3: Inspect and Size Your Ductwork
Why It Matters
If your ducts are undersized or leaky, even the best AC won’t deliver peak performance.
Checklist:
-
Measure supply & return duct sizes
-
Inspect for air leaks (look for dust streaks near joints)
-
Check insulation in unconditioned spaces
🛠 Step 4: Choose the Right Contractor
Don’t just take the first quote — the installer is as important as the unit.
What to Look For
-
Licensing & insurance in your state
-
NATE-certified technicians (NATE.com)
-
At least 3 recent references
-
Willingness to do a Manual J calculation
Red Flag: A contractor who sizes by “rule of thumb” (e.g., “1 ton per 500 sq ft”) without doing proper calculations.
📜 Step 5: Understand Permit & Inspection Requirements
Most municipalities require:
-
HVAC installation permit ($100–$500)
-
Inspection by a building official
-
Compliance with local energy codes
Why It Matters: Skipping this can void warranties and cause resale issues.
🧹 Step 6: Prepare Your Installation Site
Outdoor Unit Location
-
Level concrete or composite pad
-
At least 12–24 inches clearance around all sides
-
Away from dryer vents, shrubs, and roof runoff
-
Consider noise-sensitive areas (bedrooms, patios)
Indoor Unit Access
-
Clear path for installers
-
Move stored items away from furnace/air handler
📅 Step 7: Know What to Expect on Installation Day
Typical Timeline for a 3-Ton AC Replacement:
-
Morning: Old unit removal & site prep (1–2 hours)
-
Midday: Set new condenser & connect line sets (2–3 hours)
-
Afternoon: Install evaporator coil, wiring, thermostat, refrigerant charge (2–4 hours)
-
Final: System test & homeowner walkthrough (1 hour)
Tip: Plan to be home all day — installers may have questions about thermostat placement, duct access, or breaker panel.
🔍 Step 8: Avoid Common Installation Mistakes
-
Skipping Duct Sealing — wastes up to 30% of cooling energy (DOE Duct Efficiency Study).
-
Incorrect Refrigerant Charge — reduces efficiency & shortens compressor life.
-
Poor Airflow Balancing — leads to hot/cold spots in your home.
-
No Surge Protection — leaves your system vulnerable to power spikes.
🧾 Step 9: Post-Install Checks
Before your installer leaves:
-
Verify thermostat operation & settings
-
Check refrigerant pressure readings
-
Inspect that all panels & insulation are reinstalled
-
Ask for manufacturer registration (often required within 60 days for full warranty)
📉 Step 10: Plan for Maintenance
A 3-ton AC should last 15–20 years if maintained well.
Annual Tasks:
-
Professional inspection & tune-up
-
Replace/clean filters every 1–3 months
-
Keep outdoor coil clear of debris
-
Check refrigerant lines for insulation damage
🏠 Samantha’s Own Installation Story
When I installed my new 3-ton two-stage R-32 unit:
-
I had my panel upgraded to a 200A service in advance
-
My contractor sealed & slightly resized two return ducts
-
I cleared my attic space so techs could work faster
The result?
A one-day install with zero surprises, immediate comfort improvement, and a first-summer electric bill 15% lower than the year before.
📊 Pre-Installation Checklist (Printable)
✅ Manual J calculation complete
✅ Electrical service verified/upgraded
✅ Ducts inspected & sealed
✅ Contractor vetted & references checked
✅ Permit secured
✅ Outdoor site cleared & leveled
✅ Indoor access cleared
✅ Thermostat compatibility checked
In the next topic we will read about: How Efficient Are 3-Ton AC Systems? SEER2, EER, and Real-World Savings Explained


