🏠 Introduction: Why Preparation Matters
If you’re shopping for a new 80,000 BTU R-32 gas furnace, congratulations — you’re looking at one of the most efficient, eco-friendly heating options available today. These next-generation furnaces combine traditional gas reliability with R-32 refrigerant technology, giving you the best of both worlds: powerful heating and modern environmental performance.
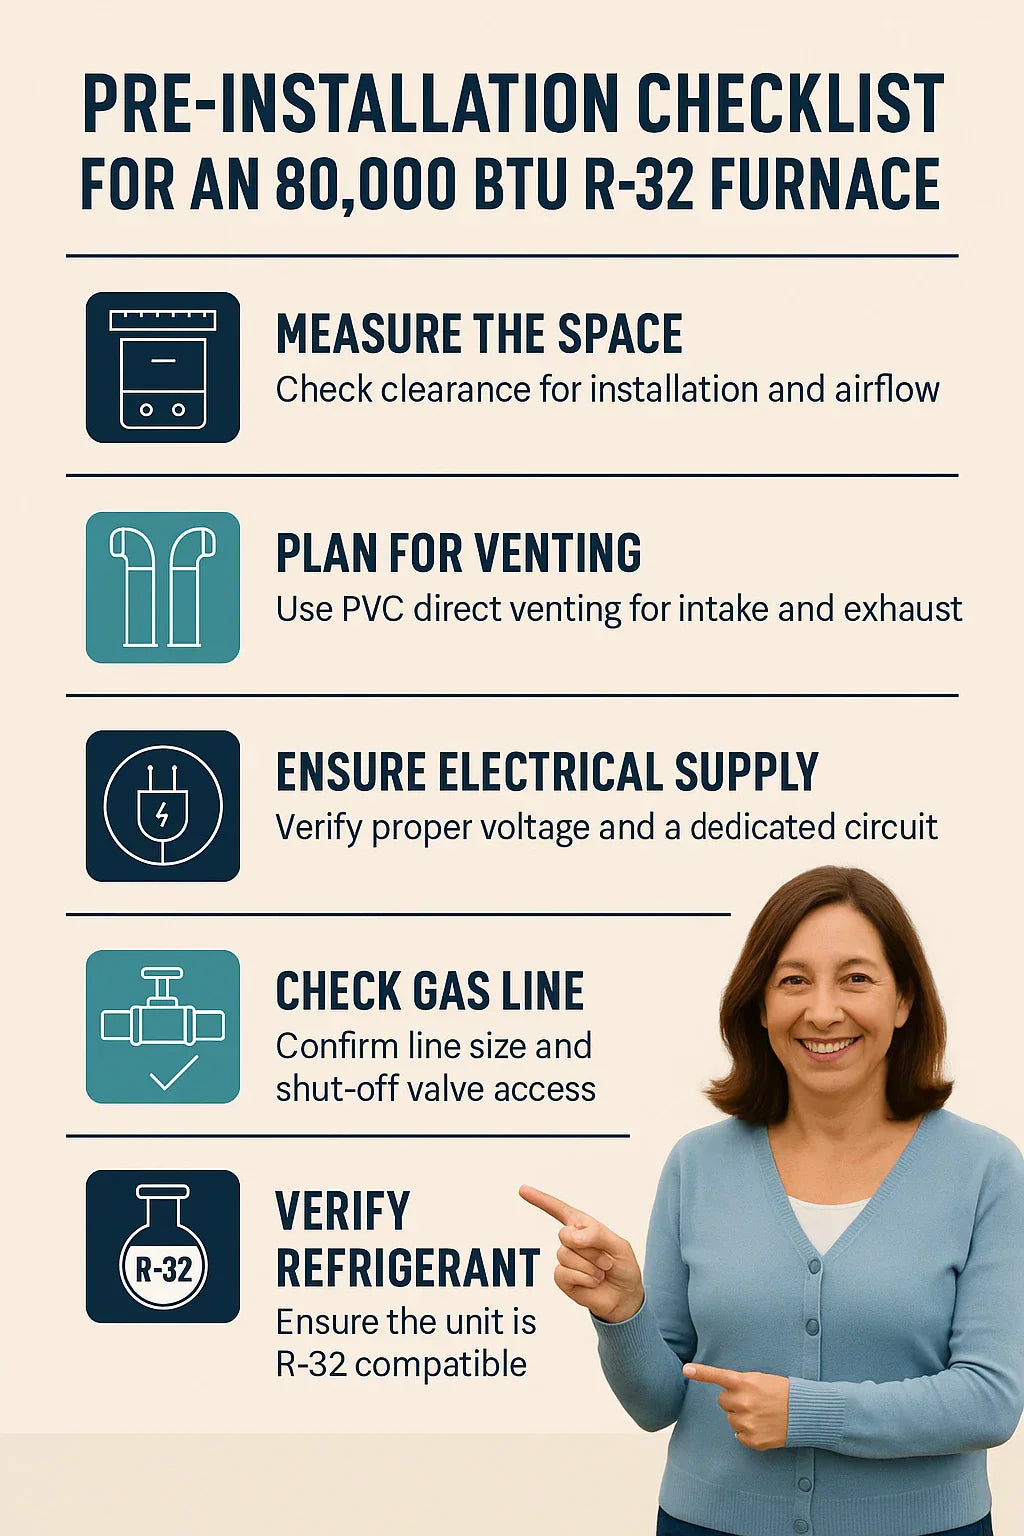
But before you buy, it’s critical to plan your installation the right way.
Even the most advanced furnace can perform poorly or violate code if installed incorrectly. Homeowners often underestimate factors like clearance space, venting, drain routing, and electrical load capacity.
As someone who recently replaced her old system with an R-32 model, I learned that measuring, prepping, and understanding requirements upfront can save days of stress later. Here’s everything I wish I had known before buying — in one clear, step-by-step guide.
📏 Step 1: Sizing Your Furnace Correctly
The first and most important decision is choosing the right BTU capacity.
A furnace that’s too small will run constantly and struggle to heat your home; one that’s too large will short-cycle, wasting energy and wearing out early.
For most homes, an 80,000 BTU furnace is the sweet spot — but it depends on your climate and square footage.
| Climate Zone | BTUs per sq ft | Ideal Home Size for 80k BTU Furnace |
|---|---|---|
| Cold (MN, WI, MI, ND) | 45–60 | 1,400–1,800 sq ft |
| Moderate (OH, VA, OR, PA) | 35–45 | 1,800–2,200 sq ft |
| Warm (TX, AZ, GA) | 25–35 | 2,200–2,800 sq ft |
A good rule of thumb:
Home square footage × BTUs per sq ft = total required BTUs.
Example: 2,000 sq ft × 40 BTU = 80,000 BTU
If you’re unsure, always have a contractor perform a Manual J Load Calculation for precise sizing.
🏡 Step 2: Assessing Space & Location Requirements
One of the biggest mistakes homeowners make is assuming any furnace will fit where the old one was.
Modern R-32 systems are more compact but have stricter clearance and venting standards.
📐 Typical Installation Types
-
Upflow configuration: draws air from the bottom, exhausts from the top (ideal for basements or closets)
-
Downflow configuration: draws air from the top, exhausts downward (great for attic or mobile home installations)
📏 Minimum Clearance Guidelines (Typical)
| Area | Minimum Clearance |
|---|---|
| Front (access panel) | 24" |
| Sides | 3" |
| Rear | 0–1" |
| Top | 6" |
🧰 Pro Tip: Keep 3–5 feet of open space in front for service access.
Install on a level, stable surface — concrete pad, metal base, or dedicated platform — and avoid placing it near moisture sources like laundry drains or sump pumps.
A poorly ventilated or cramped utility closet can cause overheating and limit airflow. For R-32 systems, proper airflow is especially important to maintain refrigerant efficiency.
🌬️ Step 3: Venting and Airflow Design
High-efficiency R-32 furnaces use PVC direct vent systems, meaning they both draw in combustion air and exhaust gases through sealed pipes.
⚙️ Key Venting Rules
-
Use Schedule 40 PVC, CPVC, or ABS piping.
-
Maintain ¼ inch per foot slope toward the furnace for condensate return.
-
Separate intake and exhaust by at least 12 inches horizontally to prevent re-circulation.
-
Limit pipe length to manufacturer specs (usually 40–100 ft equivalent).
Improper venting can lead to carbon monoxide buildup — a life-threatening risk.
If your home uses older metal venting, a conversion to PVC will likely be required for safety and code compliance.
⚡ Step 4: Electrical & Gas Line Preparation
Even gas furnaces depend on electricity for their blowers, igniters, and safety controls.
⚡ Electrical Setup
-
Most 80,000 BTU units require 120V, 15-amp dedicated circuit.
-
Include a service disconnect switch within 3 feet of the furnace.
-
If upgrading from an older unit, check wiring size and grounding.
🔥 Gas Line Setup
-
Verify gas pressure per manufacturer spec (typically 3.5"–10" W.C.).
-
Use a flexible stainless-steel connector with shut-off valve.
-
Pipe sizing: ½" or ¾" diameter depending on distance from main line.
⚠️ Gas line work should only be done by licensed professionals under your state’s plumbing or mechanical code.
💧 Step 5: Condensate Drainage Setup
Because high-efficiency furnaces extract so much heat, they also produce condensate (water) from the exhaust gases.
💦 Drain System Basics
-
Use PVC piping sloped ¼ inch per foot.
-
Include a P-trap and neutralizer to prevent odors and corrosion.
-
Direct condensate to a floor drain or condensate pump if gravity flow isn’t possible.
-
Avoid routing into sanitary vents or storm drains.
Hybrid R-32 systems produce additional condensate when cooling — so the drain line should be sized to handle both.
⚗️ Step 6: R-32 Refrigerant Compatibility
This is one of the most critical considerations for new buyers.
R-32 is a single-component refrigerant, while older systems used R-410A blends. Mixing components or coils designed for different refrigerants can cause catastrophic system failure.
✅ Always Check:
-
Furnace + coil + outdoor unit must all use R-32.
-
Confirm match through AHRI Certified Reference Numbers on equipment labels.
-
Never attempt to recharge or retrofit an R-410A coil with R-32.
| Component | R-410A Compatible? | R-32 Compatible? |
|---|---|---|
| Indoor Coil | ❌ | ✅ |
| Outdoor Condenser | ❌ | ✅ |
| TXV/Expansion Valve | ❌ | ✅ |
🧰 Step 7: Tools and Materials Homeowners Should Know
Even if you’re not installing the system yourself, it helps to understand what your technician will need.
Common Materials:
-
PVC pipe & fittings (venting)
-
Gas shut-off valve & flex connector
-
Condensate tubing & neutralizer
-
Electrical whip & disconnect box
-
Mounting brackets or furnace pad
-
Level, drill, PVC primer & cement
These aren’t “DIY install” items — they’re knowledge points that help you confirm your installer is using the right materials for an R-32 system.
👷 Step 8: Professional vs. DIY Installation
It’s tempting to try a partial install yourself, but R-32 systems introduce safety and certification layers you shouldn’t ignore.
| Task | Homeowner | Licensed Technician |
|---|---|---|
| Site prep & space planning | ✅ | ✅ |
| Duct & vent connection | ⚠️ (basic prep) | ✅ |
| Gas line & electrical hookup | ❌ | ✅ |
| Refrigerant charging or line testing | ❌ | ✅ |
| System startup calibration | ❌ | ✅ |
Why It Matters
R-32 is classified as A2L — mildly flammable but low-toxicity.
Only EPA 608-certified technicians can legally handle or charge the refrigerant. This ensures proper leak checks, correct torque specs, and full compliance with federal safety codes.
🧾 Step 9: Permits, Inspections & Local Codes
Before purchasing your furnace, check with your local building department. Many areas require:
-
Mechanical permit for installation
-
Gas piping and vent inspection
-
Electrical and condensate verification
Inspectors typically check:
-
Proper vent slope
-
Correct pipe material and terminations
-
Combustion air clearance
-
CO detector installation
Failing to secure a permit can void your warranty or insurance coverage — so never skip this step.
💰 Step 10: Cost Breakdown — What to Budget
🧮 Typical 80,000 BTU R-32 Furnace Costs
| Component | Average Price (USD) |
|---|---|
| Equipment (furnace only) | $1,200 – $2,000 |
| Installation labor | $1,500 – $3,000 |
| Venting & materials | $200 – $500 |
| Duct modifications | $300 – $800 |
| Total Installed Cost | $2,700 – $4,800 |
🎁 Potential Savings
-
Federal Tax Credit: 30% up to $600 (Inflation Reduction Act)
-
Local Utility Rebates: $100–$800 for high-efficiency systems
-
Manufacturer Rebates: Seasonal Goodman or Daikin promotions
🧩 Step 11: Post-Installation Checklist
Once installation is complete, walk through these steps with your contractor:
✅ Furnace starts and cycles properly
✅ Airflow from vents feels even
✅ Thermostat communicates correctly
✅ Flame color = steady blue (not yellow or flickering)
✅ No water pooling around base or drain
✅ Filters fit snugly and are accessible
✅ Warranty registration completed within 60 days
Take photos of your setup for reference — vent terminations, serial plates, and gas shut-offs. These help in case of warranty claims later.
🧠 Samantha’s Experience
“Before my installation, I assumed it was as easy as swapping out my old furnace. I didn’t realize how much venting, drainage, and clearance mattered for modern systems. My installer used my measurements and checklist to plan ahead — and the install went perfectly. No leaks, no call-backs, and it passed inspection the first time.” — Samantha Reyes
Planning early not only made the process stress-free, it also meant my furnace has run flawlessly from day one.
✅ Key Takeaways
-
Size first: Confirm your home’s BTU requirement before purchase.
-
Measure your space: Check clearance, airflow, and vent routing.
-
Use R-32-compatible components only.
-
Hire certified pros: Gas, electrical, and refrigerant work require licensing.
-
Register warranty and keep maintenance records.
The result? A quiet, efficient furnace that meets 2025 EPA standards and delivers comfort for years to come.
In the next topic we will know more about: Cost Breakdown — How Much Does an 80,000 BTU R-32 Gas Furnace Really Cost in 2025?


