📦 Unboxing & Pre-Install Prep
When my Amana J-Series 17,000 BTU PTAC with 5 kW Electric Heat finally arrived, the first thing I noticed was the sheer weight of it. PTAC units are commercial-grade machines designed for hotels, apartments, and condos—and they’re heavy. At just under 150 pounds, this isn’t something you casually slide into the wall alone.
Lesson #1: Get help. A friend or family member makes this job infinitely safer.
Tools You’ll Need
Before starting, I gathered:
-
Screwdrivers (Phillips & flathead)
-
Level
-
Power drill
-
Sealant (weather-resistant)
-
Foam insulation strips
-
Voltage tester
-
Tape measure
-
Socket wrench set
👉 Tip: Don’t wait until halfway through the install to realize you’re missing a sealant tube or voltage tester. Having everything ready upfront saved me hours.
Measuring the Opening
Amana PTACs are designed to slide into a standard 42" wide x 16" high wall sleeve, but I didn’t want to assume. I measured the existing sleeve in my condo twice—height, width, and depth.
Lesson #2: Trust but verify. PTACs are standard-sized, but wall sleeves can warp, settle, or be improperly installed. A ¼ inch gap can cause drafts, noise, or leaks.
🧱 Wall Sleeve & Clearance Requirements
The wall sleeve is the frame and barrier between indoors and outdoors. Mine was already in place, but I checked for:
-
Rust or damage
-
Proper slope for drainage
-
Outdoor clearance
Amana recommends:
-
8 inches minimum clearance outside for proper airflow
-
Avoiding placement near shrubs, decks, or fences that could bounce noise back
Samantha’s Tip
I added a rubber vibration pad under the exterior side of the sleeve. It wasn’t in the manual, but I read about it in a PTAC forum—it helps dampen vibration noise when the compressor kicks in.
⚡ Electrical Hookup & 5 kW Heater
Here’s where things got serious. PTAC units aren’t plug-and-play like a window AC. The Amana J-Series model requires:
-
230/208V dedicated line
-
Proper amperage (check your breaker)
-
Correctly wired receptacle inside the wall sleeve
My unit included a 5 kW electric heater, which provides about 17,000 BTUs of heat. That meant a 20-amp breaker and the correct PTAC cord kit.
Safety First
Before touching a wire, I:
-
Turned off the breaker.
-
Used my voltage tester to confirm no live current.
-
Reviewed the Amana wiring diagram (taped to the unit).
When to Call a Pro
I’m handy, but even I know my limits. Running new 230V wiring? That’s an electrician’s job. If you already have a PTAC circuit, you may be fine replacing like-for-like. But if not, budget for a professional install.
Lesson #3: Electricity isn’t a DIY playground.
🛠️ Sliding the Unit Into Place
With the electrical checked, it was time for the “fun” part: sliding the 150-pound unit into the wall sleeve.
Steps I Took:
-
Removed the front grille to reduce weight.
-
With a helper, carefully lifted and aligned the PTAC with the sleeve.
-
Slid it in until flush with the sleeve frame.
-
Secured it using the provided mounting brackets.
Sealing the Gaps
Even though the sleeve fit snugly, I ran foam insulation strips around the inside edge. Then, I applied a bead of weatherproof sealant along the outdoor trim.
Lesson #4: Air leaks = lost efficiency. PTACs already work harder than mini splits; don’t make it worse with gaps.
💧 Drainage & Condensation Management
All PTACs produce condensation. If you don’t manage it, you’ll end up with water damage or mold.
Amana PTAC sleeves are designed with:
-
A sloped bottom so water drains outdoors
-
Optional drain kits for direct connection
I checked that my sleeve had the right slope (a bubble level confirmed). I also cleared out some leaves that had blown into the outdoor end.
👉 Samantha’s Reminder: Add “check PTAC drain” to your seasonal maintenance list. A clogged drain pan is a recipe for disaster.
🔌 First Startup & Testing
Moment of truth: flipping the breaker back on.
Cooling Mode Test
-
Set thermostat to 68°F.
-
Compressor engaged after a few seconds.
-
Airflow was strong and cooled quickly.
Heating Mode Test
-
Switched to heat and waited.
-
Within a minute, the 5 kW heater kicked on, delivering warm air.
Checking Airflow & Sound
The unit was quieter than I expected, thanks to Amana’s sound-dampening design. But I did notice:
-
Slight draft near the top corner → fixed with another foam strip.
Lesson #5: First tests aren’t just about cooling. They’re about finding and fixing small installation flaws.
🧾 Samantha’s Lessons Learned
After living with the unit for a few weeks, here’s what I wish I’d known sooner:
-
It’s heavy—plan for at least 2 people.
-
Measure twice, buy once. Don’t assume your sleeve fits.
-
Seal everything. Drafts add noise and waste energy.
-
Check power requirements early. My condo had the right circuit, but not everyone does.
-
Test both cooling & heating. You don’t want surprises mid-winter.
📊 DIY vs. Pro: What Makes Sense?
Here’s how I broke it down:
| Task | DIY-Friendly? | Notes |
|---|---|---|
| Unboxing & moving unit | ❌ (needs 2+) | Heavy, awkward |
| Wall sleeve prep & sealing | ✅ | Basic tools |
| Electrical hookup | ⚠️ | Only if line already exists |
| Drainage setup | ✅ | Simple slope check |
| Startup & testing | ✅ | Just follow manual |
DIY Cost: $0 (if circuit already exists)
Pro Install Cost: $300–$700 (electrician + labor)
For me, DIY made sense since I had the electrical ready. But if I had to run new wiring, I would’ve gladly paid a pro.
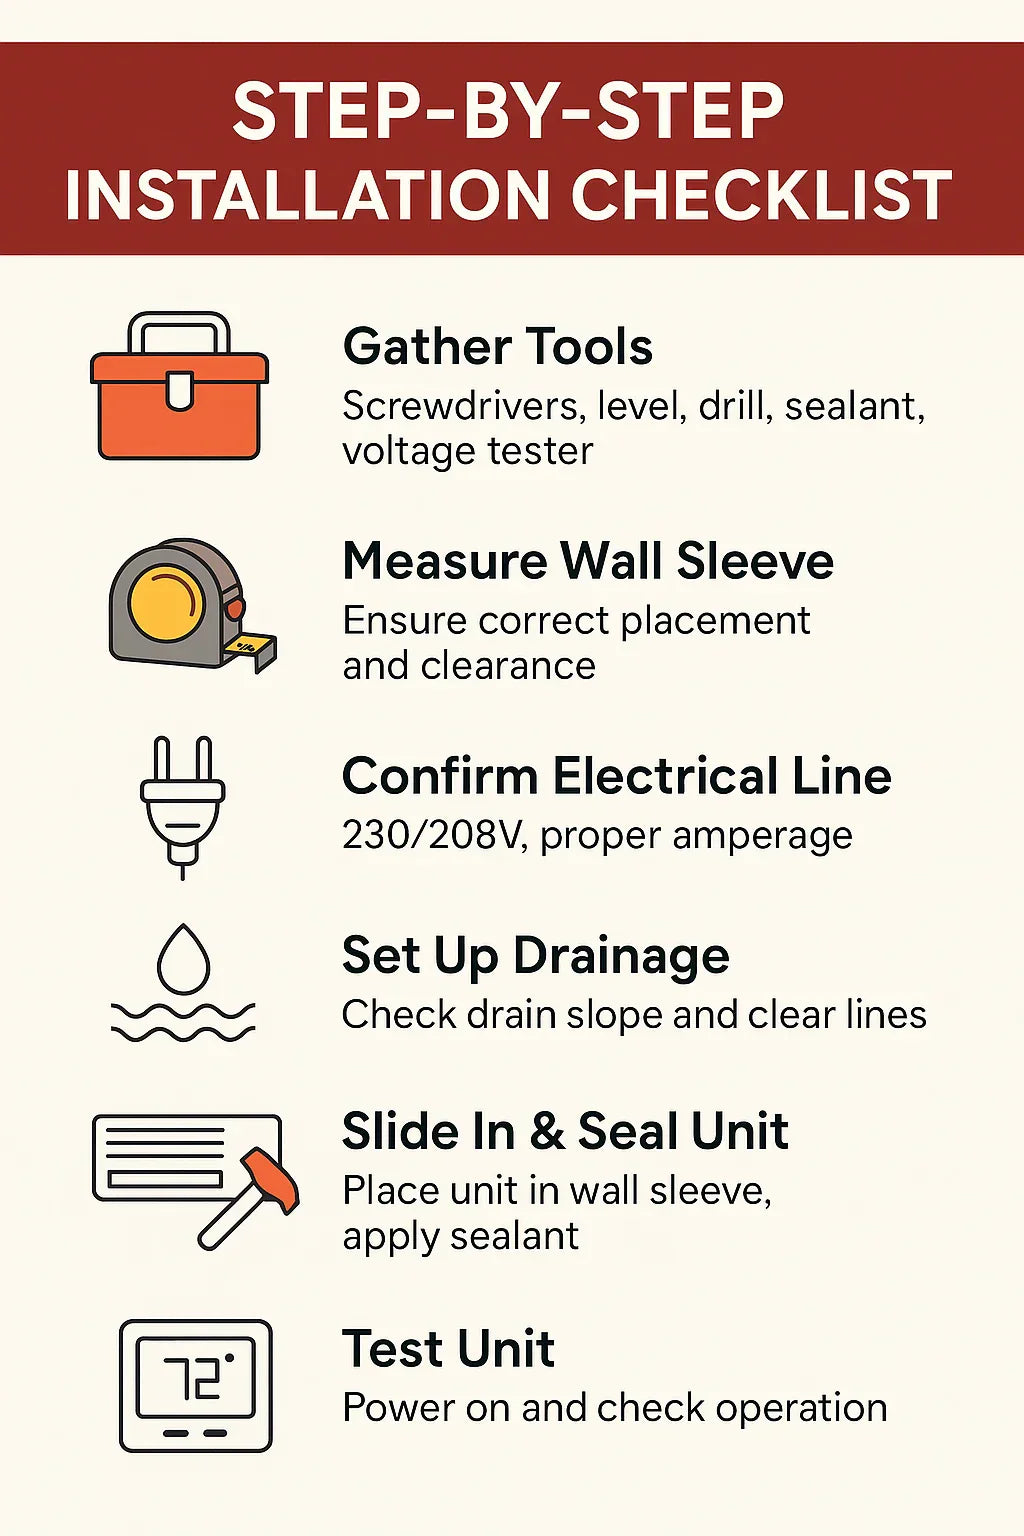
✅ Installation Checklist (Quick Recap)
✔️ Tools gathered
✔️ Wall sleeve measured & inspected
✔️ Electrical line confirmed (230/208V, proper amperage)
✔️ Drain slope checked
✔️ Unit slid in & sealed
✔️ First startup tested (cooling + heating)
🔗 Verified Resources
📝 Final Thoughts
Installing the Amana J-Series 17,000 BTU PTAC wasn’t exactly a Sunday stroll, but it was manageable with planning, the right tools, and a little patience.
The biggest takeaways?
-
Plan for weight.
-
Respect electricity.
-
Seal everything.
-
Test thoroughly.
If you’re like me—DIY-minded but cautious—this project can be both doable and rewarding. And the payoff? Quiet, efficient comfort that makes the effort worth it.
In the next topic we will know more about: Maintenance Checklist: Filters, Drains & Seasonal Care for Your Amana PTAC


