When I unboxed my Amana 11,500 BTU Through-the-Wall AC/Heat Pump (PBH113J35CC), I felt a mix of excitement and intimidation. I’d chosen it for its balance of cooling and heating power, but once the shiny new unit sat in my living room, one question loomed large: how hard is it really to install a through-the-wall AC?
The truth? It’s absolutely a project a handy DIYer can handle—but only if you plan ahead. I made mistakes, learned a few lessons the hard way, and leaned on a pro for one step. In this guide, I’ll share everything I discovered so you can install yours with confidence.
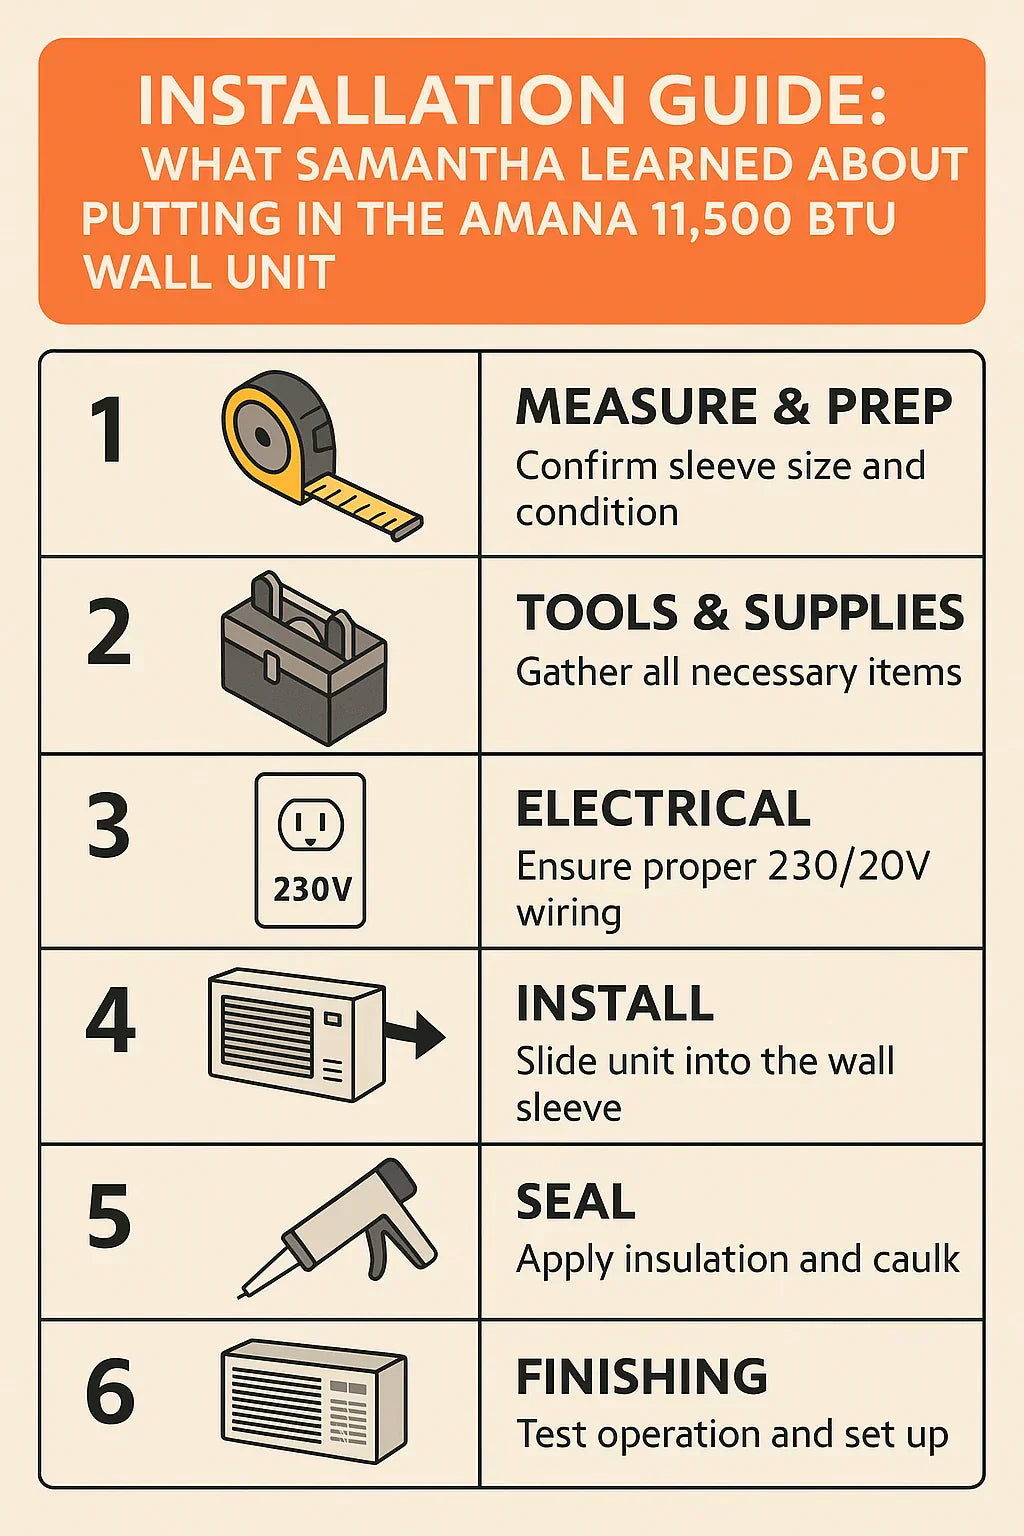
📐 Step 1: Measuring & Prepping the Wall Sleeve
The very first step is making sure your new Amana will fit into your existing wall sleeve—or deciding if you need a new one.
Why the Sleeve Matters
A wall sleeve is the permanent metal housing installed in your wall that supports the AC/heat pump. It keeps the weather out, helps with insulation, and ensures your unit runs quietly.
The Amana 11,500 BTU is designed for a 26-inch sleeve. If you already have one from a previous Amana, GE, or similar unit, you might be in luck.
Samantha’s First Mistake
When I first measured my old sleeve, I only checked the outside face—26" exactly. But once I measured the inside, I found it was slightly warped and rusted. The unit slid in, but not snugly. It rattled until I replaced the sleeve with a brand-new Amana WS900E sleeve, which made all the difference.
👉 Lesson learned: Measure the inside dimensions, check depth, and inspect for rust or gaps before assuming you can reuse an old sleeve.
🧰 Step 2: Tools & Supplies Checklist
Here’s what I needed for the job:
-
Tape measure
-
Level
-
Power drill/driver
-
Phillips screwdriver
-
Utility knife
-
Caulk gun + exterior-grade silicone caulk
-
Foam insulation strips or gasket kit
-
Weatherstripping
-
Gloves (for handling sheet metal)
-
A second pair of hands to lift the unit
Electrical Requirement
This Amana runs on 230/208V power. That’s not a standard wall outlet—so unless your space is already wired for it, you’ll need a licensed electrician to install one.
👉 I had to bring in a pro for this part, and honestly, I’m glad I did. Safety first.
🔌 Step 3: Electrical Setup
This was the one part of the project I didn’t touch myself. The Amana 11,500 BTU draws serious power, and connecting it to the wrong circuit could be dangerous.
-
I called an electrician to confirm my outlet was properly wired and grounded.
-
It cost about $250 for a dedicated 230V line, but now I know the setup is safe.
👉 Tip: Don’t DIY electrical if you’re not 100% confident. The cost of a pro is worth the peace of mind.
🧱 Step 4: Installing the Unit in the Sleeve
With the sleeve in place and the electrical work handled, it was time for the fun part: getting the Amana into the wall.
Tips for Sliding It In
-
Use two people. This unit weighs around 110 lbs—awkward, not impossible, but easier with help.
-
Protect the fins. Don’t push directly on the aluminum coils or fins—they bend easily.
-
Check alignment. The unit should slide in smoothly without forcing.
Samantha’s Second Mistake
The first time I slid it in, I forgot to level the sleeve. The Amana leaned slightly downward indoors, which caused water to drip inside instead of out. I had to pull it out and shim the sleeve so it tilted slightly downward outside.
👉 Lesson learned: Always use a level and ensure the sleeve tilts outward so condensation drains outdoors.
🌦️ Step 5: Sealing & Weatherproofing
This step might not seem glamorous, but it’s the difference between an efficient, quiet system and one that wastes energy.
Here’s what I did:
-
Foam Insulation Strips: I placed them around the edges of the unit to block drafts.
-
Exterior Caulking: I sealed the outdoor flange with silicone caulk to prevent rain and wind leaks.
-
Drain Check: I made sure the rear drain hole wasn’t blocked so condensation could escape.
👉 The Energy Star installation guide stresses sealing for efficiency—leaks can increase energy use by 10–20%.
Samantha’s Third Mistake
I got lazy with caulking the first time, and a storm proved me wrong—water leaked around the sleeve. I had to recaulk, and since then it’s been watertight.
🛠️ Step 6: Finishing Touches
Once the heavy lifting was done, the rest felt easy:
-
Snapped on the front grille.
-
Plugged the unit into the new 230V outlet.
-
Tested both cooling and heating modes.
-
Set the thermostat and tested the remote.
Nothing beats the first blast of cool air after hours of hard work.
👷 DIY vs. Hiring a Pro
So, should you tackle this install yourself? Here’s my honest take:
DIY Makes Sense If:
-
You’re replacing an existing unit in a standard 26" sleeve.
-
Your wall is already wired with a 230/208V outlet.
-
You’re comfortable with tools and sealing.
Call a Pro If:
-
You need a new sleeve cut into your wall.
-
You need a 230V electrical line installed.
-
You’re not confident handling heavy equipment.
📌 Cost Comparison:
-
DIY replacement in existing sleeve: $50 or less (sealant, insulation).
-
Pro electrical install: $200–$400.
-
Full pro install (new sleeve + wiring): $700–$1,200.
🌀 Samantha’s Lessons Learned
Here are the biggest takeaways from my install:
-
Measure twice, cut once. Sleeve size and level matter more than you think.
-
Don’t skimp on sealing. A well-sealed sleeve saves energy and prevents leaks.
-
Plan for electrical. The 230V outlet is non-negotiable—budget for it.
-
Get help lifting. Save your back and your unit.
-
DIY is rewarding—but know your limits. I saved money by doing the install myself, but I don’t regret hiring a pro for the electrical.
✅ Final Verdict
Installing the Amana 11,500 BTU Through-the-Wall AC/Heat Pump is a manageable project for homeowners willing to plan, measure, and put in the effort. With the right tools and prep, you can enjoy year-round comfort without waiting on a contractor’s schedule.
For me, it was worth every bit of effort—I ended up with a quieter, more efficient system and the satisfaction of knowing I did it myself (well, with a little help from my electrician).
In the next topic we will know more about: Top Accessories for Your Amana PTAC: Wall Sleeves, Thermostats, and Smart Controls


