When I finally decided to replace my old air conditioner, I chose the Goodman 2.5 Ton 14.4 SEER2 R-32 system. I wanted something efficient, eco-friendly, and reliable. But here’s the thing: I wasn’t just buying equipment — I was diving headfirst into the world of HVAC installation.
Could I do it myself? Or would I need to hire a pro? I didn’t want to risk my investment, but I also wanted to understand every step so I could make smart choices, save money, and know when to get help.
This guide is what I wish I had when I started — a step-by-step look at what’s involved in installing a 2.5 ton Goodman R-32 system, complete with tips, lessons, and a clear picture of the DIY vs. professional balance.
📦 What’s in the Box? Goodman 2.5 Ton R-32 System Components
When my unit arrived, it came with more than just the condenser. Here’s what was included:
-
Outdoor condenser unit (pre-charged with R-32 refrigerant).
-
Matching indoor air handler/coil.
-
Control wiring terminals.
-
Owner’s manual and installation guide.
-
Factory warranty information.
What’s not included but usually needed:
-
Line set (copper refrigerant lines).
-
Electrical whip and disconnect.
-
Concrete pad or wall brackets.
-
Thermostat (I upgraded mine to a smart thermostat).
Knowing what’s in the box helped me budget for the extras.
🏠 Pre-Installation Checklist
Before touching a wrench, I made sure I had everything lined up.
✅ Permits and Local Codes
Most municipalities require a permit for installing a new AC. Skipping this can cost you fines or void warranties.
✅ Electrical Panel Check
A 2.5 ton Goodman condenser usually requires:
-
208/230V
-
30–40 amp breaker
-
Proper wire gauge
I had to double-check my breaker panel to make sure it was ready.
✅ Tools Needed
-
Manifold gauges (R-32 compatible).
-
Vacuum pump.
-
Nitrogen tank (for leak testing).
-
Torque wrench.
-
Drill, level, and tape measure.
-
Safety gear (gloves, goggles).
✅ Safety First
Working with refrigerants and high-voltage power is no joke. Even though I wanted to DIY, I set boundaries: I’d prep as much as I could, but I’d call a licensed tech for charging and final sign-off.
📌 Source: DOE – Central AC Installation Guide
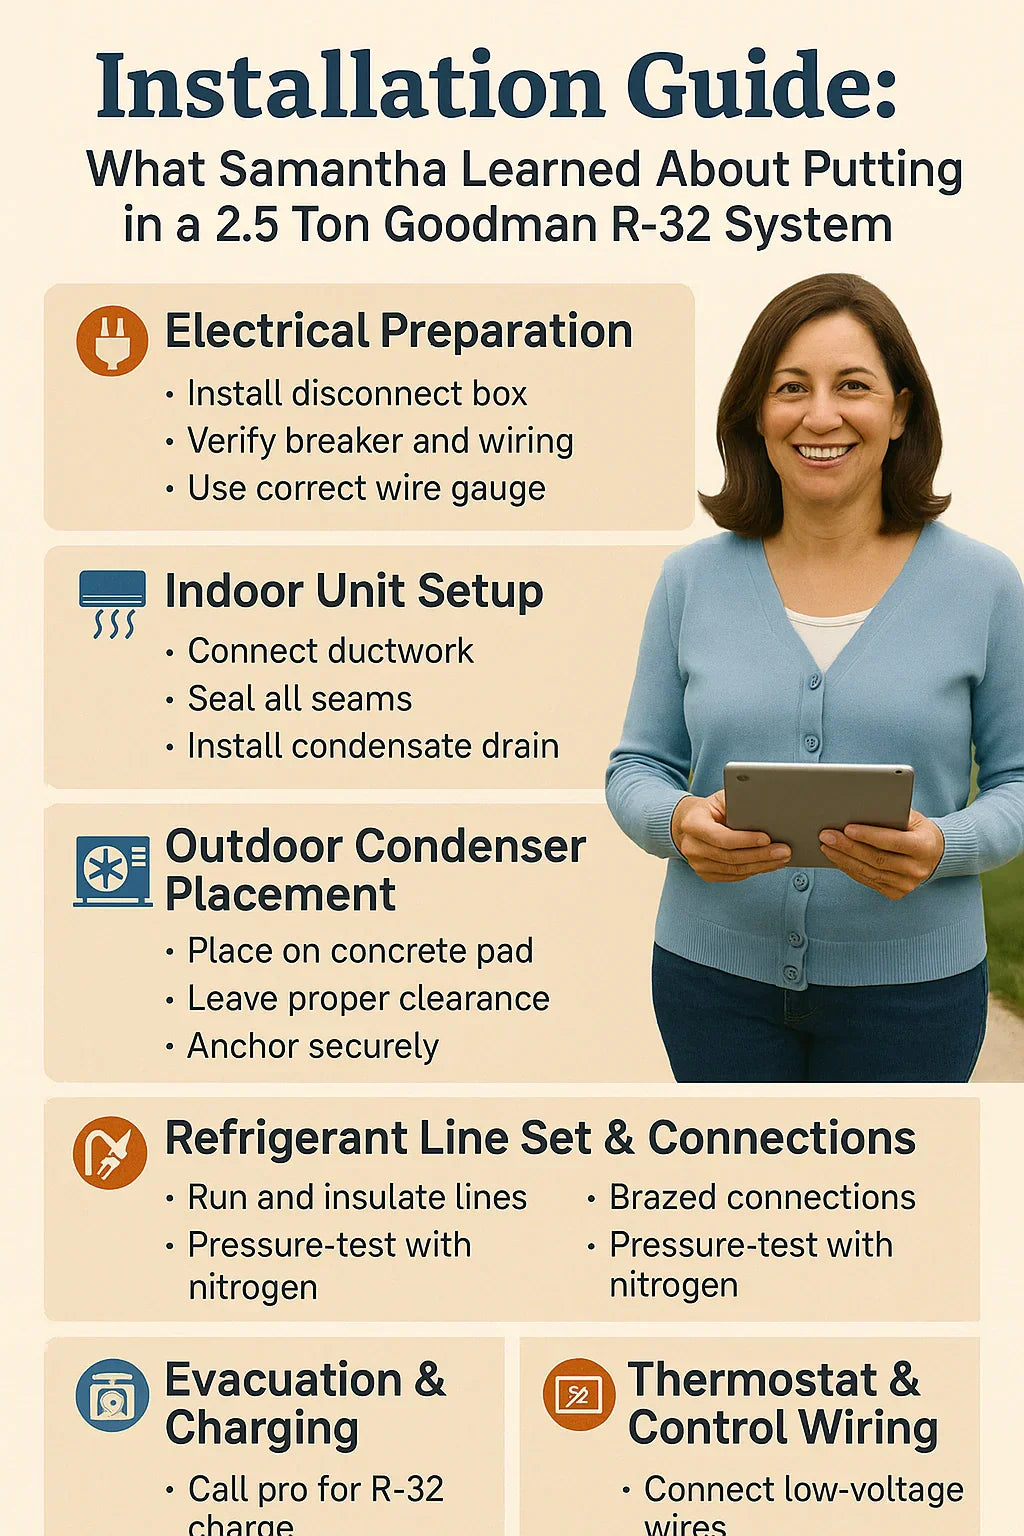
🔌 Step 1: Electrical Preparation
The first step was making sure the electrical side was ready.
-
I installed a disconnect box near the condenser for safety.
-
Verified that my breaker panel could handle the load.
-
Used the correct wire gauge for the 30-amp circuit.
👉 Lesson learned: Always double-check voltage requirements before you even unbox the unit. The Goodman R-32 condenser was 208/230V, and my wiring matched perfectly.
🌬️ Step 2: Indoor Unit Setup
Next, I moved indoors to install the air handler.
-
Connected the supply and return ductwork.
-
Sealed all seams with mastic to prevent air leaks.
-
Installed the condensate drain line to a safe outlet.
👉 Samantha’s tip: Use a wet/dry vacuum on the drain line to confirm it’s clear before startup.
📌 Source: Energy Star – HVAC Installation Standards
🏡 Step 3: Outdoor Condenser Placement
The outdoor condenser needed proper placement for efficiency and noise control.
-
I poured a small concrete pad to keep it level.
-
Left at least 18 inches of clearance on all sides.
-
Positioned it away from bedroom windows to reduce noise.
-
Anchored it securely (important in storm-prone areas).
👉 My mistake: I almost set it too close to a fence. Good thing I checked the manual — Goodman specifies clearance requirements for airflow.
🔗 Step 4: Refrigerant Line Set & Connections
This was one of the most technical steps.
-
Ran the line set (copper tubing) between indoor and outdoor units.
-
Made sure to use the correct size for 2.5 tons.
-
Brazed the connections carefully, then insulated the suction line.
-
Pressure-tested with nitrogen to check for leaks.
👉 With R-32, I learned that precision matters. Even a small leak could waste refrigerant and reduce efficiency.
📌 Source: ACCA – Quality Installation Guidelines
💨 Step 5: Evacuation & Charging
This is where things got serious — and where I knew I needed a pro.
-
Used a vacuum pump to remove air and moisture from the lines.
-
Pulled down to 500 microns to ensure a clean system.
-
Verified that the condenser’s R-32 factory charge matched my line set length.
👉 Samantha’s advice: Unless you’re EPA 608 certified, let a professional handle refrigerant. It’s safer and keeps your warranty intact.
📌 Source: EPA – Refrigerant Handling Regulations
📲 Step 6: Thermostat & Control Wiring
With the mechanical side ready, I moved to the controls.
-
Connected low-voltage wires (Y, G, R, C).
-
Installed a smart thermostat to track energy use.
-
Labeled all wires before disconnecting the old system (saved me tons of confusion).
👉 Upgrading to a smart thermostat gave me real-time insight into how efficiently my new Goodman system runs.
✅ Final Steps & Startup Checklist
Before flipping the breaker, I went through Goodman’s startup checklist:
-
✅ Tightened all electrical connections.
-
✅ Checked refrigerant line insulation.
-
✅ Verified condensate drain operation.
-
✅ Powered on and tested cooling mode.
-
✅ Measured superheat and subcool to confirm proper charge.
📌 Source: ASHRAE – Safety Standards for A2L Refrigerants
⚖️ DIY vs. Professional Installation
Here’s the reality:
-
DIY-friendly tasks:
-
Pad prep.
-
Duct sealing.
-
Thermostat installation.
-
Running electrical conduit (if comfortable).
-
-
Professional-required tasks:
-
Refrigerant charging.
-
Brazing refrigerant lines (if not experienced).
-
Final system balancing.
-
👉 I saved money by doing prep work myself and then hiring a licensed tech for the final connections. It was the best of both worlds.
💡 Samantha’s Key Takeaways
-
Plan ahead. Permits, tools, and clearance requirements matter more than you think.
-
Don’t cut corners. A sloppy drain line or duct leak will haunt you for years.
-
R-32 is the future. It’s more efficient, eco-friendly, and worth the switch.
-
Mix DIY and pro work. Doing the groundwork yourself can save hundreds, while leaving critical refrigerant handling to the pros protects your investment.
🏆 Conclusion: Confidence in the R-32 Era
Installing a Goodman 2.5 Ton R-32 system isn’t just about cooling your home — it’s about future-proofing your comfort.
I didn’t do everything myself, but I learned every step. That knowledge gave me confidence, saved me money, and left me with a home that feels more comfortable and efficient than ever.
As I like to remind other DIY homeowners:
“The smartest installation is knowing what you can handle — and when to call in the experts.”
In the next topic we will know more about: How Much Does a 2.5 Ton R-32 AC Cost in 2025? Full Budget Breakdown


