👋 Introduction: Why Mike Decided to Install a PTAC
Mike was tired of juggling window ACs in the summer and space heaters in the winter. His 550 sq. ft. apartment in Ohio needed a single solution that worked year-round.
After weeks of research, he landed on the Amana Distinctions 12,000 BTU PTAC with a heat pump and 5kW electric backup. It checked all his boxes:
-
❄️ Cooling for muggy summers.
-
🔥 Heat pump for spring/fall.
-
⚡ Electric backup for freezing January nights.
Instead of hiring a full-service HVAC crew, Mike decided to do most of the work himself—and this is everything he learned.
Amana Distinctions Model 12,000 BTU PTAC Unit with Heat Pump and 5 kW Electric Heat Backup
🧰 Tools & Materials Checklist
Mike quickly discovered that preparation makes or breaks a PTAC installation. Here’s what he gathered before starting:
🔧 Tools
-
Tape measure & level 🧮
-
Stud finder 📡
-
Power drill & bits 🔩
-
Screwdrivers (Phillips + flathead) 🔧
-
Utility knife for insulation ✂️
-
Caulking gun & weatherproof sealant 🪛
📦 Materials
-
Amana PTAC unit (12,000 BTU, heat pump + backup).
-
Wall sleeve (16" x 42", the standard PTAC housing).
-
Exterior grill (for airflow and protection).
-
Foam insulation or weatherstripping.
-
Trim kit (for a finished indoor look).
-
Dedicated 208/230V outlet (installed by electrician).
👉 Mike’s Tip: Don’t cheap out on the sleeve or grill. Without them, the PTAC won’t drain correctly, and your efficiency drops fast.
📎 Reference: Amana PTAC Owner’s Guide
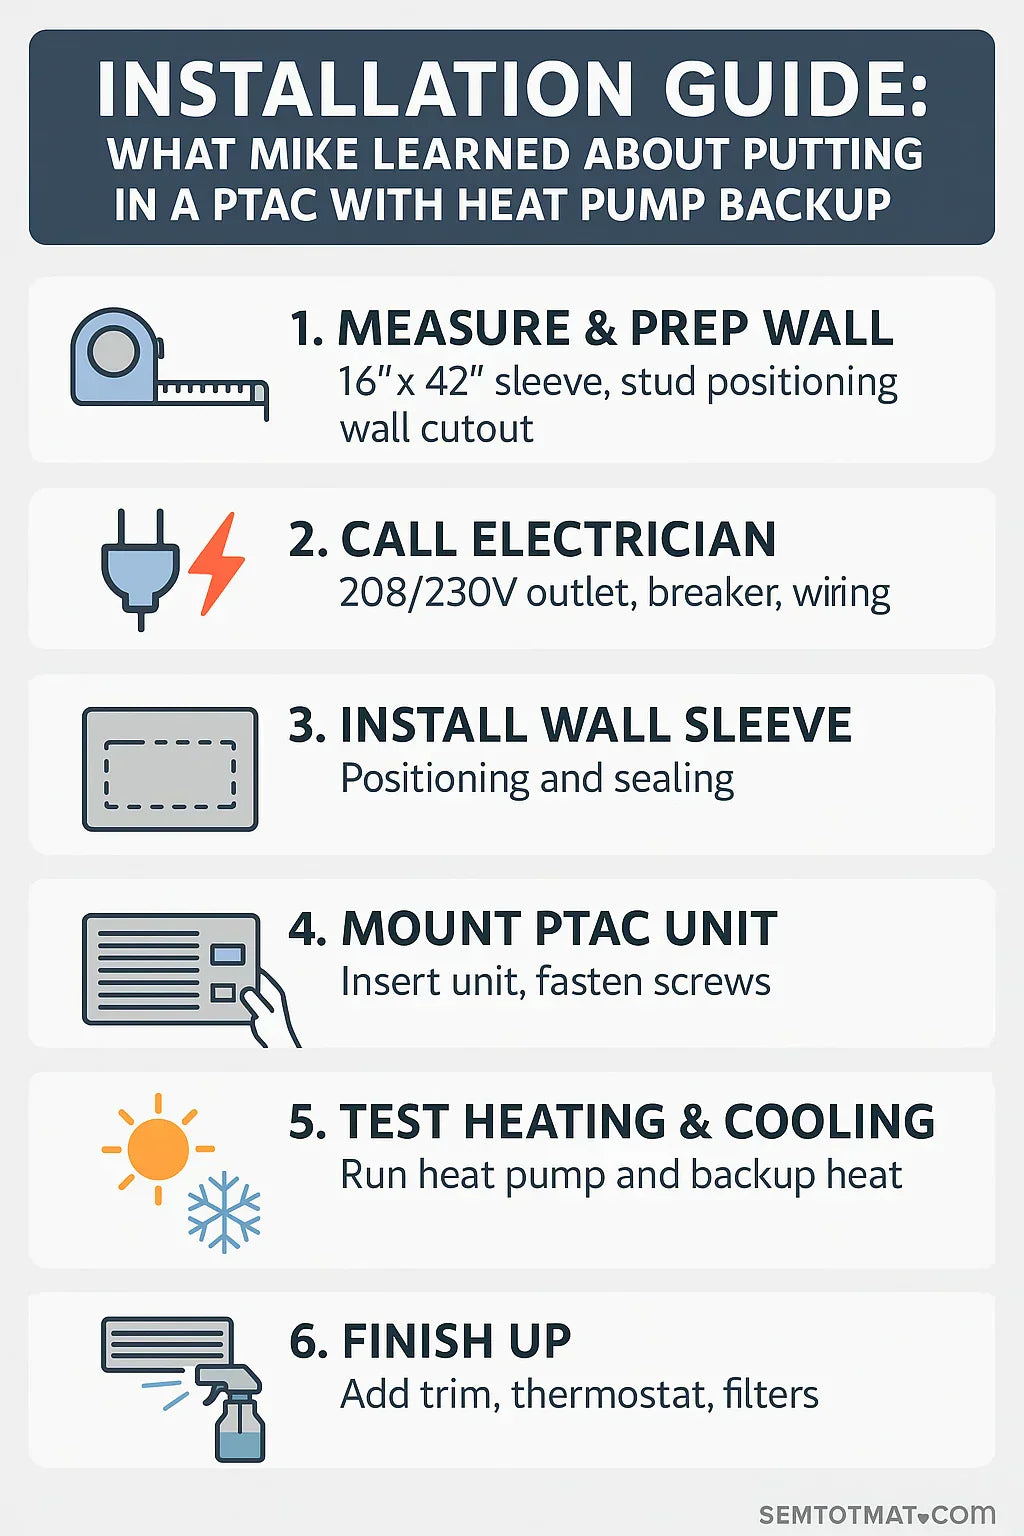
📏 Step 1: Measuring & Prepping the Wall
The wall cutout is the foundation of the install. Mike learned quickly: if this step is wrong, everything else goes sideways.
🔨 What He Did:
-
Measured the wall twice (inside & outside).
-
Marked a rectangle at 16 inches high x 42 inches wide.
-
Used a stud finder to avoid cutting into framing or wiring.
-
Cut through drywall and exterior siding.
-
Added framing support above the opening (like a window header).
Key Considerations:
-
Clearance: At least 36" outside for unobstructed airflow.
-
Location: Away from furniture or curtains.
-
Drainage: Slight tilt toward outdoors for condensate.
👉 Mike’s Lesson: “Measure twice, cut once. I had to patch drywall because my first cut was crooked.”
📎 Reference: Energy Star – Proper AC Placement
🔌 Step 2: Electrical Setup (Why Mike Hired a Pro)
This was the one area Mike refused to DIY.
⚡ Requirements:
-
PTAC units need a dedicated 208/230V circuit.
-
The Amana 12k BTU with 5kW backup draws up to 20–30 amps under load.
-
NEC (National Electrical Code) requires correct breaker sizing and outlet type.
Mike’s electrician:
-
Installed a 20A double-pole breaker.
-
Ran new wiring to the wall cutout.
-
Installed a matching 230V receptacle.
-
Verified correct polarity and grounding.
👉 Mike’s Lesson: “Electrical work isn’t worth the risk. A pro did it in under 2 hours, and I sleep better knowing it’s safe.”
📎 Reference: NFPA – National Electrical Code
🏗️ Step 3: Installing the Wall Sleeve & Exterior Grill
The sleeve is the PTAC’s permanent “home.”
🔩 Steps Mike Took:
-
Slid the sleeve into the wall opening.
-
Leveled it front-to-back with a slight outward slope.
-
Anchored it with screws into framing.
-
Foamed/sealed gaps to prevent leaks.
-
Mounted the exterior grill to protect against weather, insects, and debris.
Why It Matters
-
A misaligned sleeve = poor drainage.
-
Unsealed edges = drafts, noise, and wasted energy.
👉 Mike’s Lesson: “Take your time here. A crooked sleeve means water leaks inside.”
📎 Reference: ASHRAE Installation Guidelines
🧩 Step 4: Mounting the PTAC
This is where Mike really needed a second set of hands.
⚙️ Process:
-
With help, lifted the ~100 lb unit.
-
Carefully slid it into the sleeve.
-
Aligned and secured mounting brackets.
-
Plugged into the new 230V outlet.
-
Installed the indoor trim kit for a finished look.
👉 Mike’s Lesson: “These aren’t light. Don’t risk your back—get a buddy.”
🌬️ Step 5: Testing Heating & Cooling
Mike ran full system tests before declaring victory.
-
Cooling Mode: Set thermostat to 68°F → cold air within 5 minutes.
-
Heat Pump Mode: Worked efficiently in 50°F weather.
-
Electric Backup: Verified 5kW heater kicked in below 30°F.
-
Condensate Drainage: Water trickled outside, not inside.
👉 Mike’s Lesson: “Run each mode for at least 15 minutes before calling it good.”
📎 Reference: Energy.gov – Heat Pump Basics
🧹 Step 6: Finishing Touches
-
Inserted filters behind the front grille.
-
Connected optional wall thermostat for better control.
-
Vacuumed up drywall dust.
-
Sealed trim edges for soundproofing.
Mike also scheduled monthly filter cleaning in his phone calendar.
📎 Reference: Energy.gov – Cooling System Maintenance
⚠️ Mistakes Mike Warns Against
Mike’s trial and error left him with a short list of don’ts:
-
❌ Skipping measurements → leads to expensive mistakes.
-
❌ DIY electrical → fire hazard and code violation.
-
❌ Poor sealing → higher bills and drafts.
-
❌ Not leveling sleeve → water leaks inside.
-
❌ Forgetting filters → shortens PTAC life.
👉 Mike’s Golden Rule: “Do what you can, but hire out what you shouldn’t.”
💵 What It Cost Mike
-
PTAC Unit: $1,050
-
Sleeve + Grill: $180
-
Electrician: $450
-
Supplies: $60
-
DIY Labor: Free
Total: ~$1,740
A pro installation quote had been $2,200–$2,400, so Mike saved ~$600 doing most of it himself.
📎 Reference: PTAC Installation Costs
✅ Mike’s Final Advice
-
Yes, you can DIY parts of this install.
-
No, you shouldn’t wire it yourself.
-
Budget 4–6 hours of work with two people.
-
The reward: year-round comfort, lower bills, and pride of ownership.
“Installing the Amana PTAC was one of my best home upgrades. I saved money, learned a ton, and now my place stays comfortable all year.”
📌 Conclusion: Should You DIY a PTAC Install?
A PTAC installation is manageable for a handy homeowner—if you’re willing to measure carefully, seal thoroughly, and call an electrician for the power hookup.
If you want to save money while still doing it safely, follow Mike’s lead: DIY the wall prep and sleeve, but hire a licensed electrician for wiring.
👉 The result is a system that delivers cool summers, warm winters, and peace of mind.
In the next topic we will know more about: Maintenance Checklist for Your Amana PTAC: Filters, Coils & Seasonal Care


