By Jake — DIY homeowner, weekend project guy, and someone who’s made just about every mistake you can make with a reciprocating saw.
🧱 1. Why Planning Matters Before You Cut
Here’s the thing: cutting a hole in your wall for a through-the-wall air conditioner isn’t rocket science — but it’s also not something you want to “wing.”
When I installed my first wall unit, I thought I’d just trace the outline, grab a saw, and go for it. Ten minutes later, I’d discovered an electrical line right behind the drywall. Lesson learned.
A successful installation starts long before the blade touches the wall. The difference between a clean, quiet, efficient setup and a frustrating redo often comes down to prep work.
This guide walks you through everything I wish I’d known before cutting — from picking the right wall and measuring the sleeve to sealing, wiring, and testing.
📍 2. Step 1: Choose the Right Wall
Not every wall in your home is a candidate for a through-the-wall AC.
You’ll need an exterior wall — meaning one that faces outside, not an interior wall between rooms. Beyond that, location matters for airflow, structure, and electrical access.
Here’s a quick checklist:
✅ Wall Location Requirements
-
Exterior wall only: Never install into an interior partition — your AC needs outdoor airflow.
-
Avoid load-bearing studs: Use a stud finder to locate vertical supports. Cutting into one can compromise your home’s structure.
-
Keep clear of wiring & plumbing: Scan with a multi-function stud finder that detects both.
-
Exterior clearance: Ensure at least 20 inches of open space outside the wall for proper exhaust and drainage.
-
Power access: Choose a wall near an existing outlet that matches your unit’s voltage (115V or 230V).
Jake’s advice:
“I found a perfect wall in my office — no wiring, no studs in the way, and a straight shot to an outlet. Saved me from hours of drywall patching later.”
📏 3. Step 2: Measure, Mark & Confirm the Opening
Once you’ve picked the wall, it’s time to measure. This is where precision pays off.
Every through-the-wall AC comes with a manufacturer’s spec sheet showing exact sleeve dimensions. Most fall around 26" wide × 15.5" tall × 16–18.5" deep, but check your model to be sure.
🔹 Step-by-Step Measurement
-
Mark the opening: Using a level and measuring tape, trace the cutout area on your drywall.
-
Add clearance: Add ¼ inch to each side for easier sleeve insertion.
-
Check both sides: Measure from inside and outside to confirm alignment.
-
Confirm wall thickness: Ensure it matches your sleeve’s depth — this prevents air gaps.
Pro Tip:
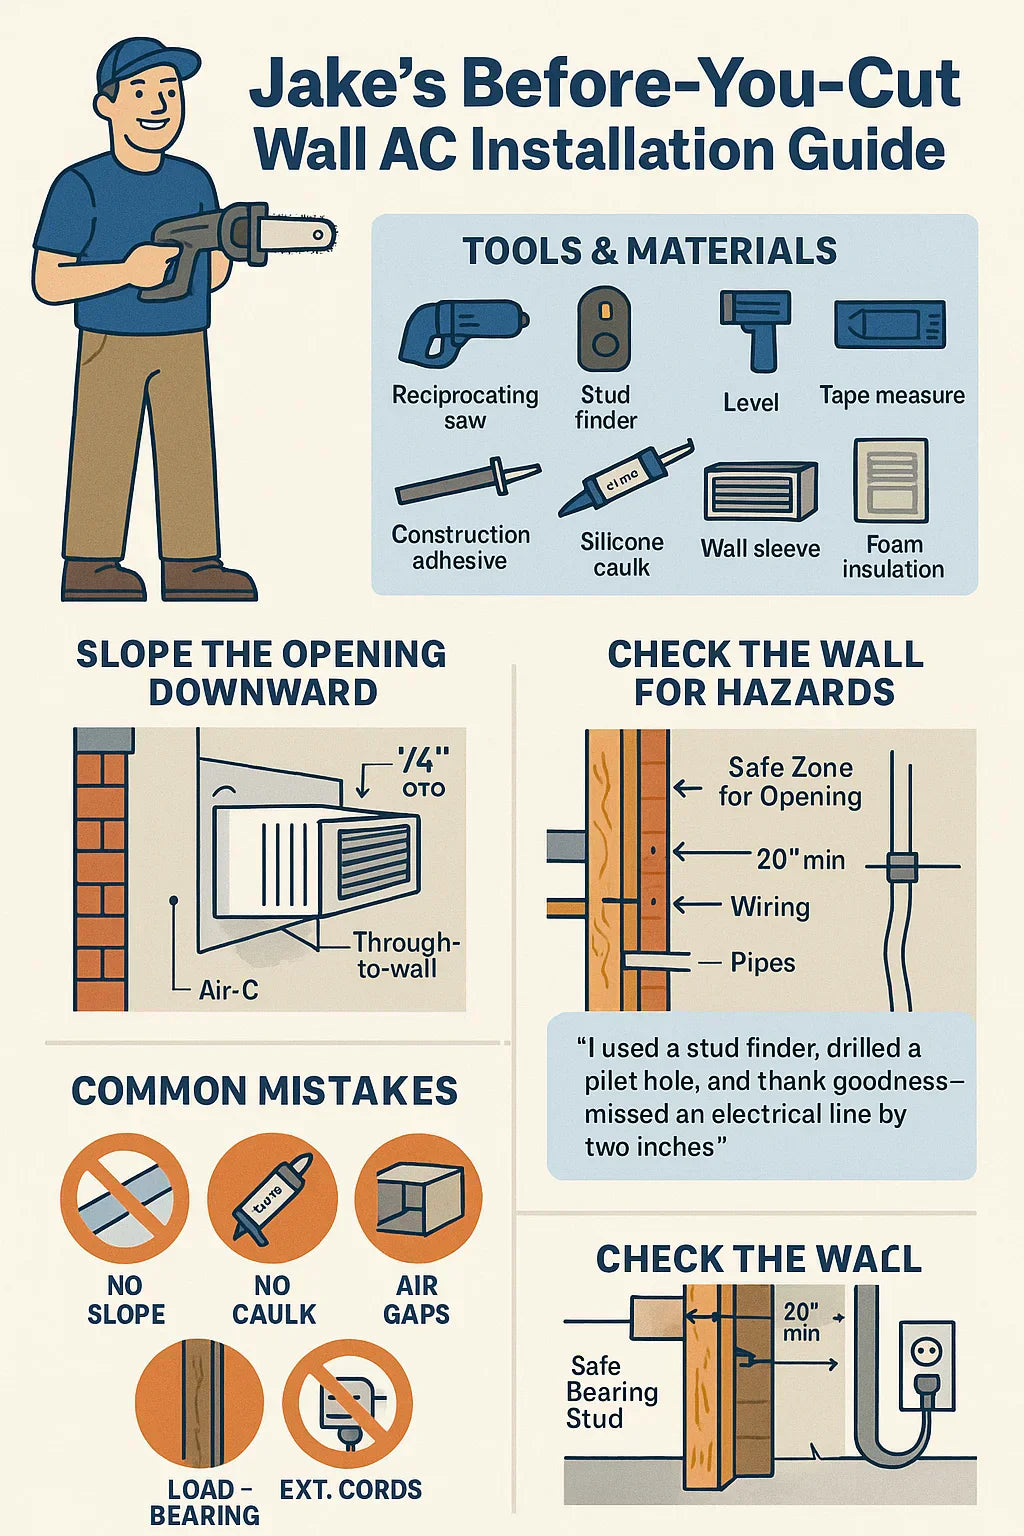
Tilt the bottom of your outline about ¼ inch downward toward the outside wall. That slight slope ensures condensation drains properly through the sleeve instead of back into your house.
⚙️ 4. Step 3: Check Electrical & Voltage Requirements
This is where most DIYers slip up — and it’s a costly mistake.
Wall units come in two power flavors:
-
115V (Standard household outlet): Common for smaller units up to ~10,000 BTUs.
-
230V (High-voltage outlet): Required for 12,000 BTUs or higher.
If you plug a 230V AC into a 115V outlet, it simply won’t run. Reverse that, and you’ll trip your breaker (or worse).
🔌 How to Check What You Have
-
Look at your breaker panel: a double switch means 230V.
-
Measure your outlet:
-
115V plug = two vertical slots
-
230V plug = one horizontal, one vertical, one round
-
Upgrade Option:
If your wall doesn’t have a 230V outlet and your unit needs one, hire an electrician to install a dedicated 20A circuit. It’s safer and keeps your AC from overloading other circuits.
External Resource:
🔗 Energy Star – Electrical Requirements for Room Air Conditioners
🧰 5. Step 4: Gather Tools & Materials
Here’s everything I used on my install:
🛠️ Tools
-
Reciprocating saw or oscillating tool
-
Stud finder (with wire/plumbing detection)
-
Level
-
Tape measure
-
Drill and ¼-inch bit
-
Caulk gun
-
Screwdriver set
🧱 Materials
-
Wall sleeve (brand-specific or universal)
-
Exterior grille
-
Silicone caulk (clear, weatherproof)
-
Foam insulation strips
-
Screws and mounting brackets
-
Drop cloths and dust mask
Budget Tip: If you already have a saw and drill, you can buy the rest for under $75 total.
🪚 6. Step 5: Cut the Opening (Safely)
This is the step that separates the pros from the drywall patchers.
Follow these tips and you’ll only cut once:
-
Drill pilot holes: One in each corner of your traced outline.
-
Cut the drywall: Use your saw to connect the holes along the marked lines.
-
Remove insulation: Clear out foam or fiberglass safely with gloves.
-
Inspect the cavity: Double-check for hidden wires or pipes.
-
Cut exterior wall: Drill corner guide holes, then cut from outside using the interior hole as your guide.
Safety First:
-
Wear safety glasses and gloves.
-
Avoid cutting into electrical lines.
-
If the wall feels unstable, reinforce the opening with framing brackets.
Jake’s confession:
“I once skipped checking the outside before cutting—and nearly sliced into a cable TV line. Now I always drill a test hole first to peek outside.”
🧱 7. Step 6: Insert & Secure the Wall Sleeve
Now comes the most important structural step.
Slide your wall sleeve into the opening from inside the room. It should fit snugly but not jam.
✅ Installation Tips
-
Slope: Tilt the sleeve about ¼ inch downward toward the outside for condensation drainage.
-
Leveling: Use a bubble level to ensure the sides are even.
-
Anchoring: Secure to studs or wall frame using screws or brackets.
-
Sealing: Run a continuous bead of silicone caulk around interior and exterior edges.
This step determines how airtight and watertight your setup will be. Take your time — a perfectly leveled sleeve means your AC slides in easily and performs quietly.
External Resource:
🔗 GE Wall Sleeve Installation Guide (AKJW10A)
🌦️ 8. Step 7: Weatherproof & Add the Exterior Grille
The sleeve protects your wall, but the grille protects your air conditioner.
Attach the manufacturer-supplied grille to the outside opening. It shields your condenser from rain, pests, and debris while ensuring proper airflow.
🛡️ Weatherproofing Checklist
-
Apply exterior-grade caulk around the sleeve edges.
-
Use foam strips to fill any visible gaps.
-
Make sure the drain holes at the bottom aren’t blocked.
-
For rainy regions, consider adding a small drip edge or awning above the grille.
External Resource:
🔗 Amana Wall Sleeve & Grille Specification Sheet
⚡ 9. Step 8: Slide in the AC Unit
Now for the satisfying part — installing the AC itself.
Steps:
-
Align the chassis: Slide the unit gently into the sleeve until it clicks or stops flush with the trim.
-
Check cord reach: Plug it directly into the outlet (no extension cords).
-
Add insulation: Insert foam gasket strips around edges for airtight seal.
-
Secure trim kit: Snap or screw in decorative front trim for a clean look.
Jake’s line:
“When I slid my unit in and felt that tight, clean fit, I knew the hard part was over. It looked factory-installed — and that’s the goal.”
🔌 10. Step 9: Power On & Test Everything
Before you celebrate, run a quick performance check.
✅ Jake’s Test Run Checklist
-
Unit turns on smoothly.
-
Cool air blows from vents within 30 seconds.
-
No vibration noises.
-
Water drains outside (not inside).
-
Sleeve and grille feel stable, no rattles.
If anything sounds off, recheck:
-
Sleeve slope (drainage)
-
Loose screws
-
Foam insulation placement
Let it run for 15–20 minutes to confirm consistent cooling and proper water runoff.
⚠️ 11. Common Mistakes to Avoid
Even with careful prep, it’s easy to overlook small details. Avoid these traps I’ve personally fallen into:
-
❌ Cutting into a load-bearing stud.
Always check your home’s framing layout before cutting. -
❌ Skipping the drainage slope.
Causes leaks or mold inside the wall. -
❌ Installing too high or low.
The ideal height is 12–18 inches from the floor for balanced airflow. -
❌ Ignoring sealing.
Air leaks kill efficiency and create drafts. -
❌ Using an extension cord.
Creates a fire hazard and can void your warranty.
🧾 12. When to Call a Professional
Some walls just aren’t DIY-friendly. Knowing your limits saves both money and headaches.
🧱 Call a Pro If:
-
You’re cutting through brick, concrete, or stucco.
-
The wall is load-bearing and needs reinforcement.
-
The unit requires a 230V circuit and you’re not licensed for electrical work.
-
The wall’s exterior isn’t easily accessible (like a second floor).
Cost Estimate:
-
Full installation (wall cutting + setup): $400–$800
-
Wall cutting only: $250–$400
Jake’s rule of thumb:
“If you’re not sure what’s behind that wall — call in a pro. It’s cheaper than repairing a burst pipe or rewiring your breaker panel.”
🧩 13. Maintenance After Installation
The good news? Once your through-the-wall AC is in, maintaining it is simple.
🧼 Maintenance Schedule
-
Monthly: Clean filters and vacuum intake grille.
-
Seasonally: Inspect sleeve for debris or standing water.
-
Annually: Re-caulk edges and check for rust or cracks.
-
Off-season: If you remove the unit, plug the sleeve with a cover or foam panel.
Jake’s tip:
“Every spring, I pull my unit out, vacuum the sleeve cavity, and check the tilt. Keeps it efficient and quiet.”
External Resource:
🔗 Energy Star – Maintenance Tips for Room Air Conditioners
🧠 14. Jake’s “Cut Smart” Installation Formula
After a few installations (and a few patch jobs), here’s the formula I stick to:
| Step | Task | Key Reminder |
|---|---|---|
| 1 | Choose your wall | Exterior only, check studs & wiring |
| 2 | Measure & mark | Add ¼” clearance and ¼” slope |
| 3 | Cut carefully | Drill pilot holes, cut slow |
| 4 | Insert sleeve | Tilt outward for drainage |
| 5 | Seal edges | Silicone inside & out |
| 6 | Install grille | Keep vents clear |
| 7 | Slide in unit | Tight fit, no gaps |
| 8 | Test operation | Drain flows outside |
| 9 | Maintain annually | Clean filter, re-caulk edges |
🧩 15. Final Thoughts: Don’t Rush the Cut
Installing a through-the-wall AC is one of the most rewarding DIY upgrades I’ve done. It gave me quieter comfort, freed up my window, and added value to my home — all in a single weekend project.
But the secret? Patience.
Measure carefully, plan your wall choice, and understand every part of the system before cutting. That little extra prep means your AC will fit tight, drain properly, and last for years without leaks or noise.
Jake’s final advice:
“Treat the wall like the foundation of your comfort — get it right, and your through-the-wall unit will run like a dream for the next decade.”
In the next topic we will know more about: How to Maintain the Original Performance of Your Through-the-Wall Air Conditioner


