🏡 Introduction: Setting the Stage for Warmth That Lasts
Buying a new furnace feels like a big win for comfort — until installation day arrives and you wonder, “What’s actually happening in my basement right now?”
Savvy’s here to demystify the process. A two-stage gas furnace, like the Goodman GRVT960803BN, isn’t just a plug-and-play appliance. It’s a precision-engineered comfort system that needs the right setup to perform quietly, safely, and efficiently for years to come.
“Think of installation as the opening act for your furnace’s lifespan,” Savvy says. “When it’s done right, everything afterward — warmth, efficiency, peace and quiet — just falls into place.”
Let’s walk step-by-step through what to expect, what to prepare, and why each phase matters.
📦 1. Before Installation: Preparing Your Space and Expectations
A few simple actions make a big difference before your technician even arrives.
✅ Clear the Area
Move boxes, furniture, or storage bins at least 3 feet from the furnace location — whether it’s a basement, attic, or closet. Clear pathways for tools and duct sections.
✅ Check Utilities
Confirm the installer can easily access your gas shut-off valve, electrical panel, and thermostat wiring. Don’t attempt to disconnect anything yourself.
✅ Think Ventilation and Drainage
Ensure vent terminations and floor drains aren’t blocked. Modern two-stage furnaces often produce condensate, so proper drainage is key.
Savvy tip:
“Your installer’s first impression should be of a clean, open workspace. It speeds things up and sets the tone for a meticulous install.”
For safety prep details, see Energy.gov’s Heating Installation Guidelines.
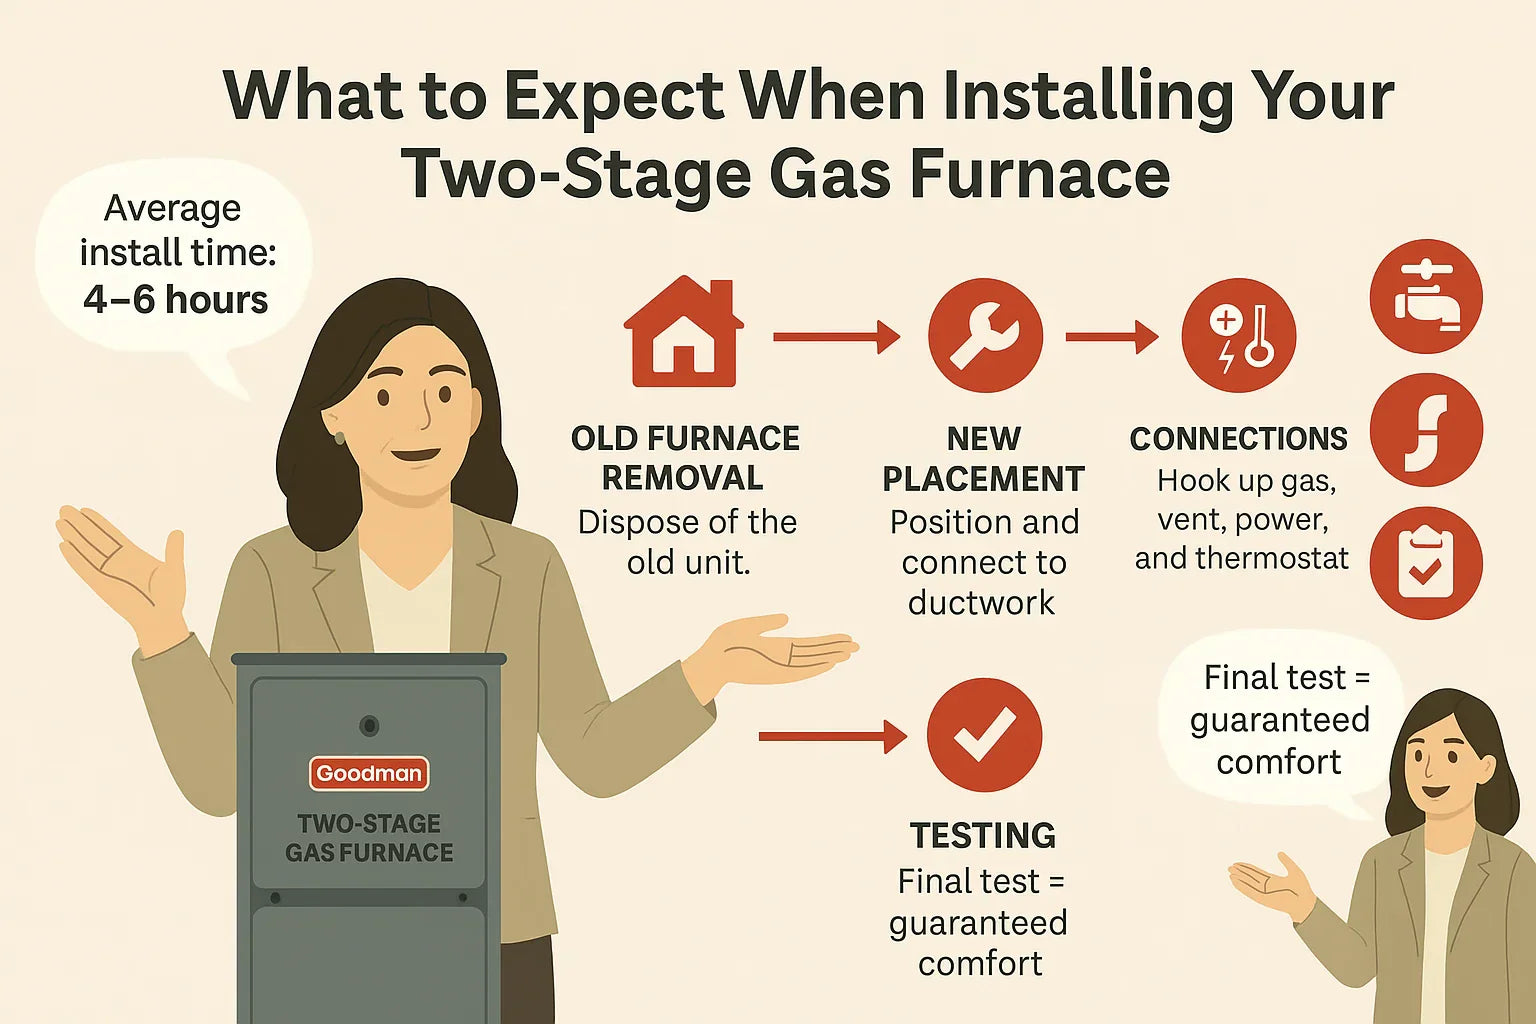
🧱 2. Step 1 — Removing the Old Furnace
The process starts with safely retiring your previous unit.
-
Power and gas are shut off.
-
The technician disconnects the vent, duct, and electrical lines.
-
The old furnace is removed and properly disposed of per code.
This phase also reveals surprises like outdated wiring or undersized ducts. Your pro will fix these before installing the new Goodman.
“It’s not just a swap-out,” Savvy notes. “This step is about giving your new furnace a clean, code-ready foundation.”
🔧 3. Step 2 — Positioning the New Goodman Furnace
The fresh unit arrives compact but powerful. Placement depends on your home’s layout:
-
Upflow orientation: Stands vertically so air moves bottom-to-top; ideal for basements or closets.
-
Horizontal orientation: Lies on its side so air moves left-to-right; perfect for attics or crawl spaces.
Installers level the cabinet to prevent vibration and ensure condensate drains correctly. They also align the furnace with existing ductwork.
Reference: Goodman Installation Manuals.
Savvy analogy:
“Positioning is like setting a piano — level it wrong, and nothing sounds right later.”
⚙️ 4. Step 3 — Connecting Gas, Power, and Venting
Here’s where precision matters most.
-
Gas Line: Technicians attach a shut-off valve and flexible connector, checking for leaks with soap solution or electronic detectors.
-
Electrical Hookup: The furnace connects to a dedicated breaker circuit and low-voltage thermostat wires.
-
Venting: PVC or metal flues carry exhaust safely outdoors; intake pipes bring in combustion air.
Proper vent slope prevents moisture pooling and ensures safe operation.
“Two-stage furnaces rely on balanced gas flow and airtight venting to reach their 96% AFUE promise,” Savvy explains.
For safety codes, see the National Fuel Gas Code NFPA 54.
🧰 5. Step 4 — Ductwork and Condensate Connections
Ductwork is where comfort truly travels.
Installers reconnect or resize ducts to fit the new plenum openings, sealing joints with mastic or foil tape. Leaky ducts can waste up to 30% of heated air.
Condensate Line
High-efficiency furnaces remove moisture during combustion. A vinyl drain tube routes this water to a floor drain or pump.
Savvy tip:
“Ask your installer to show you where the drain line is — it’s a small detail that keeps your system safe from water damage.”
Learn more from the EPA Guide to Duct Sealing.
🔋 6. Step 5 — Thermostat and Control Setup
Your thermostat becomes the brains of the new system.
-
Smart models like ecobee Premium or Honeywell T9 can manage both furnace stages automatically.
-
Installers wire the “W1” and “W2” terminals for low- and high-heat operation.
-
The blower speed and fan-on delay are programmed for maximum efficiency.
“With a two-stage system, your thermostat and furnace talk constantly — adjusting airflow and fuel flow in real time,” Savvy says.
Check compatibility at Honeywell Home.
🔍 7. Step 6 — System Startup and Testing
Once wired and vented, the furnace goes through its first ignition sequence. Your technician will:
-
Verify gas pressure and manifold settings.
-
Observe burner flame color (blue = perfect).
-
Check static pressure in ducts.
-
Confirm blower amperage draw.
-
Measure temperature rise between supply and return air.
These readings prove your furnace is operating at peak performance and safety.
“It’s the moment of truth — the system hums softly, the air warms evenly, and you know everything’s dialed in,” Savvy smiles.
Reference: ACCA Quality Installation Guidelines.
🧾 8. Step 7 — Permits, Safety Checks, and Paperwork
Quality installers close the job with documentation that protects your investment.
-
City Permits: Required for gas and vent work.
-
Safety Labels: Confirm pressure, BTU input, and AFUE compliance.
-
Warranty Registration: Goodman offers a 10-year parts warranty if you register within 60 days.
-
Homeowner Orientation: Techs show you filter size, shut-off switches, and maintenance steps.
Savvy reminder:
“Keep that paperwork in a safe place — it’s proof your system was installed right and under warranty.”
Register here: Goodman Warranty Center.
🌡️ 9. Why Installation Quality Matters More for Two-Stage Systems
Two-stage furnaces depend on precision tuning. Stage 1 handles about 65% of your heating load; Stage 2 kicks in when outdoor temps plummet.
If gas pressure or blower calibration is off, comfort suffers. Proper installation ensures:
-
Smooth transitions between stages.
-
Whisper-quiet low-speed operation.
-
Balanced airflow to every room.
“A two-stage furnace isn’t smarter by default — it’s smarter because it’s tuned that way during setup,” Savvy explains.
💬 10. What Installation Day Looks Like — Timeline Snapshot
| Task | Typical Duration | What’s Happening |
|---|---|---|
| Site prep & removal | 1–2 hours | Old unit out, workspace cleared |
| Furnace placement | 1 hour | Leveling, alignment |
| Gas/power/vent hookups | 2 hours | Precise connections |
| Duct & drain lines | 1 hour | Sealed, tested |
| Startup & testing | 1 hour | Performance verification |
Total: 4–7 hours depending on access and complexity.
Savvy’s advice:
“Plan for half a day of light background noise. Let the pros work — and maybe treat yourself to a coffee run.”
🧠 11. After Installation: Your Homeowner To-Do List
-
Change filters regularly — every 60–90 days.
-
Schedule annual maintenance — keeps warranties valid.
-
Keep vents open to maintain balanced airflow.
-
Check thermostat schedules for efficiency.
-
Inspect condensate line each season for clogs.
For tutorials, visit the Goodman Learning Center.
Savvy note:
“Furnace care is simpler than people think — it’s mostly about remembering the small stuff.”
💵 12. Cost, Rebates, and Long-Term Savings
Average Goodman two-stage installation costs:
| Item | Price Range |
|---|---|
| Furnace unit | $2,500–$4,000 |
| Labor & materials | $1,000–$2,000 |
| Total Investment | $3,500–$6,000 |
💸 Rebates & Credits
-
Federal Energy Efficient Home Improvement Credit: up to $600 (IRS Form 5695).
-
Local utility rebates: typically $200–$400 off qualifying 95%+ AFUE models — see Energy Star Rebate Finder.
Because two-stage systems use less fuel and electricity, homeowners often recoup the upgrade cost within 5 years.
“The install pays you back every month you stay warm for less,” Savvy says.
🔐 13. Goodman Warranty and Peace of Mind
Your installation includes built-in protection:
-
Lifetime Heat Exchanger Limited Warranty (original owner).
-
10-Year Parts Limited Warranty (with registration).
-
Optional labor coverage through authorized dealers.
Goodman also performs 100% factory run-testing for every unit, regardless of whether you install it upflow or horizontal.
Savvy reminder:
“A great warranty is more than fine print — it’s a promise that your comfort is covered.”
🧭 14. Common Questions Savvy Gets from Homeowners
Q: Can I install a two-stage furnace myself?
A: No. Gas, venting, and electrical connections require licensed technicians for code compliance and warranty validity.
Q: How long should my new furnace last?
A: With annual maintenance, 15–20 years is common.
Q: Do I need to upgrade my thermostat?
A: Probably — a two-stage-compatible or smart thermostat ensures full efficiency.
Q: Will it be quieter than my old unit?
A: Absolutely. The variable-speed blower and low-stage heat keep noise around conversation level (~45 dB).
🏁 15. Conclusion: Installation Is Where Comfort Begins
Installing a furnace isn’t just about getting heat back into your home — it’s about setting up a precision system designed for decades of reliable performance.
When you choose a Goodman two-stage furnace, you’re investing in:
-
Smarter airflow control.
-
Quieter, gentler heating cycles.
-
Lower energy bills.
-
And the confidence of one of the industry’s best warranties.
Savvy’s closing thought:
“The install day might be the only time you think about your furnace — and that’s the goal. When it’s done right, you’ll forget it’s even there.”


