The "Quote by Photo" tool is a powerful way to save time and get fast, accurate HVAC estimates. But your quote is only as good as the pictures you send. If you’re like Tony—a detail-driven, results-focused homeowner who wants it done right the first time—you know the key is providing the right visuals based on where your HVAC system is located.
This guide breaks down what to photograph in each common installation scenario: basement, attic, slab-mounted, and wall-mounted units. With the right approach, you’ll help your quote team deliver a precise estimate with zero guesswork.
🛌 Why Photo Technique Matters by Install Location
Different HVAC installs have different visual challenges. Taking the wrong angle, missing the label, or skipping key components can result in:
-
Delays in getting your quote
-
Inaccurate equipment recommendations
-
Requests for follow-up photos
Each install location has its quirks. Here’s how to handle them.
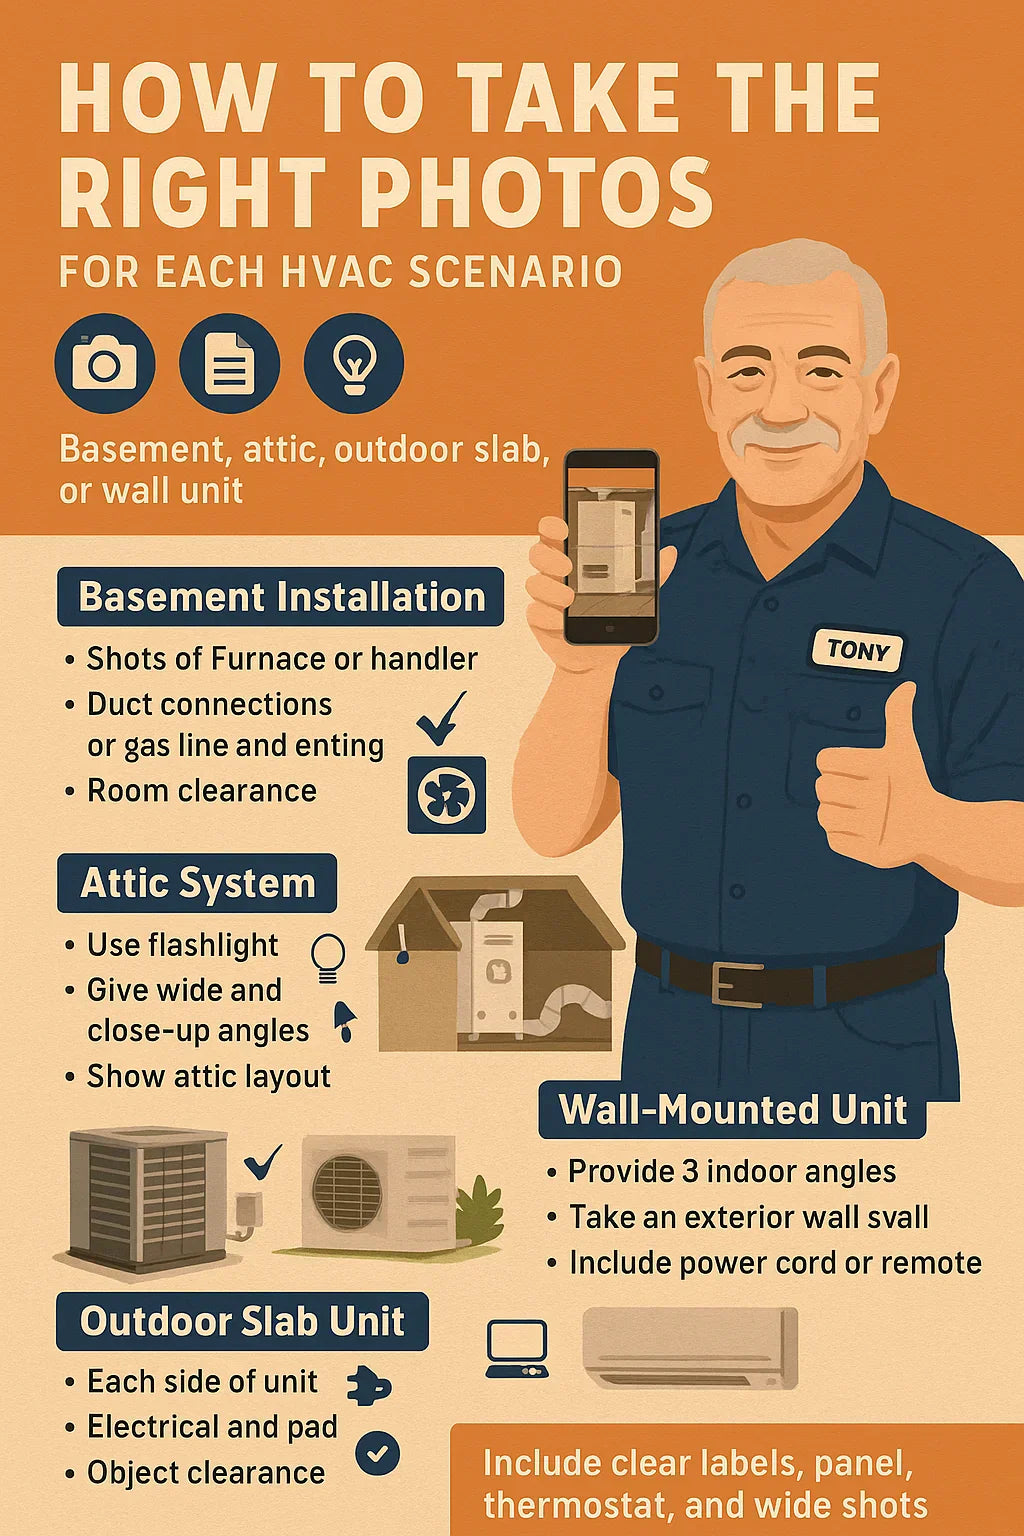
🏠 Basement Installations: What to Photograph
Basements often offer good access and lighting, but photos still need to be intentional. Here’s what to include:
🔍 Key Shots:
-
Full shot of the furnace or air handler from 3–6 feet away
-
Model and serial label on the side or front panel
-
Gas line connection (if applicable)
-
Venting (metal flue or PVC pipes)
-
Return duct and supply plenum
-
Breaker panel showing labeled HVAC breakers
-
Room layout with clearance space around the unit
Pro Tip: Include a sticky note or tape measure in one photo to show scale.
⚠️ Watch Out For:
-
Poor lighting (use flash if needed)
-
Clutter around the unit
-
Label hidden behind piping
🏗️ Attic Systems: Tricky, But Doable
Attic installs are harder to photograph due to space, lighting, and insulation. But with preparation, you can still capture what matters.
🔍 Key Shots:
-
Wide shot of the mechanical platform
-
Close-up of the air handler or furnace
-
Model/serial tag with readable info
-
Drain pan and condensate line
-
Access view showing ladder or hatch
-
Shot of any obstructions (beams, insulation, trusses)
Bring a flashlight or work light. A headlamp is ideal for hands-free lighting.
⚠️ Watch Out For:
-
Blurry images due to low light
-
Incomplete tag info
-
Unsafe angles or climbing hazards (stay safe!)
🚶️ Slab-Mounted Outdoor Systems
Outdoor condensers and heat pumps are easier to photograph, but good framing still matters.
🔍 Key Shots:
-
Full front and side view of the outdoor unit
-
Close-up of the label plate (often on the side)
-
Concrete pad and unit base
-
Distance from house wall or fencing
-
Electrical disconnect box and line set entry
Shoot from standing eye level, then angle downward to show pad details.
⚠️ Watch Out For:
-
Shadows on the label plate (take from different angles)
-
Shrubbery blocking the view (trim or tie back temporarily)
🏢 Wall-Mounted or Through-the-Wall Units
Whether you’re using a PTAC, Amana-style wall unit, or ductless mini split, the photos vary slightly.
🔍 Key Shots (PTAC/Wall Units):
-
Indoor unit front and side angle
-
Label or control plate with brand/model
-
Exterior vent or grille if accessible
-
Wall sleeve (if present) and thickness
-
Remote control or thermostat
🔍 Key Shots (Mini Split Systems):
-
Each indoor head unit (wide + label)
-
Outdoor condenser from multiple angles
-
Close-up of line set covers or penetrations
-
Breaker panel and thermostat/remote
Tip: For condos or apartments, include room layout to show air distribution.
⚠️ Watch Out For:
-
Leaving out the outdoor component
-
Forgetting remote or smart thermostat photos
-
Not showing where the system vents outdoors
✔️ Universal Must-Haves (No Matter Where the Unit Lives)
Some shots are required across all install types:
-
🔺 Model and Serial Tags on all equipment
-
🛏️ Thermostat (wide and close-up)
-
🛠️ Breaker Panel (door open, HVAC labeled)
-
📸 Wide Shot + Detail Close-Ups for every system piece
-
🔦 Good Lighting (flash or work light as needed)
-
🛂 Any Problem Areas (rust, leaks, code concerns)
Tip: Shoot with your phone sideways (landscape mode) for best framing.
🧠 Pro Tips: Tools That Help You Get It Right
🔦 Bring the Right Light
-
Use a flashlight or headlamp for basements and attics
-
Natural daylight works best outdoors
🪛 Show Scale with Tools
-
Place a tape measure or foot ruler next to the unit
-
Add a sticky note with a label: "Furnace tag here"
📷 Use Better Angles
-
Stand back, then zoom instead of taking extreme close-ups
-
Panoramic mode can help in tight closets or crawlspaces
📁 Keep Photos Organized
-
Name your files (e.g., "furnace_label.jpg," "attic_fullview.jpg")
-
Group them in a folder when submitting
Verified Resource: Blitzz recommends lighted panoramic shots in hard-to-reach areas for visual accuracy.
🔗 External Verified Resources
✅ Conclusion: The Right Photos = The Right Quote
HVAC systems live in basements, attics, slabs, and walls—and every install scenario requires a slightly different approach to photos. But if you think like a tech and follow the checklists above, your submission will:
-
Speed up your quote
-
Increase accuracy
-
Prevent delays
So whether you’re under the rafters or out by the condenser, take a few extra minutes to get the angles right. You’ll thank yourself when the quote comes in fast—and right on target.
In the next topic we will know more about: Is This Secure? Privacy, Data Use & What Happens After You Submit Your Photos


