A cold-snap story and why picking right matters
It’s 6 a.m. in January. The dog wants out. Your old furnace is wheezing. The thermostat says 62°F. You sip coffee and scroll options, hoping for real answers, not fluff. That’s where we come in. At The Furnace Outlet, our licensed techs help homeowners pick cold-climate heat pumps that actually keep rooms warm when the mercury dives. We sell direct, so you get wholesale pricing and fast, free shipping. And we’ll tell you when a small fix beats a full replacement. This guide turns confusion into a plan. It explains what to check, how to size, and which features save money in real winter. Follow it, and you’ll know exactly what to ask an installer before spending a dollar. If you want sizing help or a quick quote, try our sizing guide
Step 1: Assess your home and climate (the foundation)
Start with the shell. A professional energy check finds leaks and weak insulation. Fixing those first lowers the size and cost of your new system. Next, look at your lowest winter temperatures. Cold-climate units should keep heating down to at least −15°F (−26°C). In harsher zones, aim lower. Some models hold capacity near −22°F. Right-sizing matters. Bigger isn’t better; it shortens cycles and wastes energy. Smaller runs too hard and feels chilly. If you’re not sure, our team can review your layout and load targets through the Design Center. We’ll also discuss ducts, zoning, and backup heat. Honest tip: address drafts now. It’s the cheapest “upgrade” you can make, and it boosts comfort with any heat pump.
Step 2: Confirm low-temperature operating range
Cold-climate heat pumps live or die by their operating range. Check the spec sheet for the minimum ambient temperature and the capacity it can maintain there. Look for language like “rated to −15°F” or model families known for deep-cold performance. Some lines, such as certain “hyper-heat” designs, are tested for reliable output near −22°F. Also confirm defrost strategy and crankcase heat details. Those affect energy use on icy mornings. If snow drifts are common, plan for elevation and shelter during install. Need help reading specs? Our licensed techs on chat can walk through a model’s low-temp tables before you buy. We keep stock ready for fast shipping, and we’ll point out when a budget option plus minor home sealing may hit your goals for less. When you’re ready, compare our R-32 heat pump systems.
Step 3: Understand HSPF and SEER without the jargon
Two ratings guide year-round savings. HSPF reflects heating efficiency across a season. Aim for 10 or higher. SEER shows cooling efficiency; top models can exceed 30. Higher is better for both, but matches ratings to climate and budget. Also check matched system ratings in the AHRI directory to confirm what you’ll actually get with your chosen indoor coil or air handler.
Quick reference
|
Rating |
What it measures |
Cold-climate target |
|
HSPF |
Seasonal heating efficiency |
10+ preferred |
|
SEER |
Seasonal cooling efficiency |
20+ is strong; 30+ is elite |
Step 4: Prioritize inverter and variable-speed operation
Cold mornings punish on/off systems. Variable-speed, inverter-driven compressors ramp smoothly to meet demand. The result is steadier room temperatures, fewer spikes, and better efficiency in shoulder seasons. In deep cold, inverters hold capacity more effectively than single-stage gear. They also run quieter because they avoid constant hard starts. Ask for load-matching range (turndown ratios) and confirm the blower can also modulate. Smart pairing matters: choose indoor units that support multi-stage or variable airflow. If you’re ductless or mixing zones, check our DIY ductless mini splits. We’ll help you compare line lengths, control options, and what’s truly plug-and-play. If a simple repair or control tweak can steady your comfort first, we’ll say so before pushing a full system swap.
Step 5: Pick refrigerants that look forward (R-32 and beyond)
Refrigerant choice affects climate impact and future rules. Many new systems use R-32 or R-454B, which have lower global warming potential than older blends. Lower-GWP options support sustainability goals and may future-proof your purchase. You’ll also see design improvements like better heat exchangers arrive with these new lines. Not sure which path fits your home? Our Help Center breaks down options in plain language, or reach us for licensed tech support. We’ll match refrigerant, capacity, and budget without upsells.
Step 6: Focus on features you’ll notice daily
Specs sell boxes. Features sell comfort. Look for quiet outdoor fans, insulated cabinets, and low-vibration mounts. Confirm smart thermostat compatibility for setback schedules, geofencing, and better defrost management. Zoning helps too. It sends heat where people are and trims waste elsewhere. Ask about warranty length; 10+ years on major parts is a great sign. If you’re packaging with ducts, select a blower that supports continuous low-speed circulation. It evens temperatures and filters air more often. We carry matched line sets for clean installs. Want simple room control? Check our PTAC heat pumps. Unsure how loud “quiet” really is? Ask us. Our team compares decibel ratings and real-world noise impressions every day.
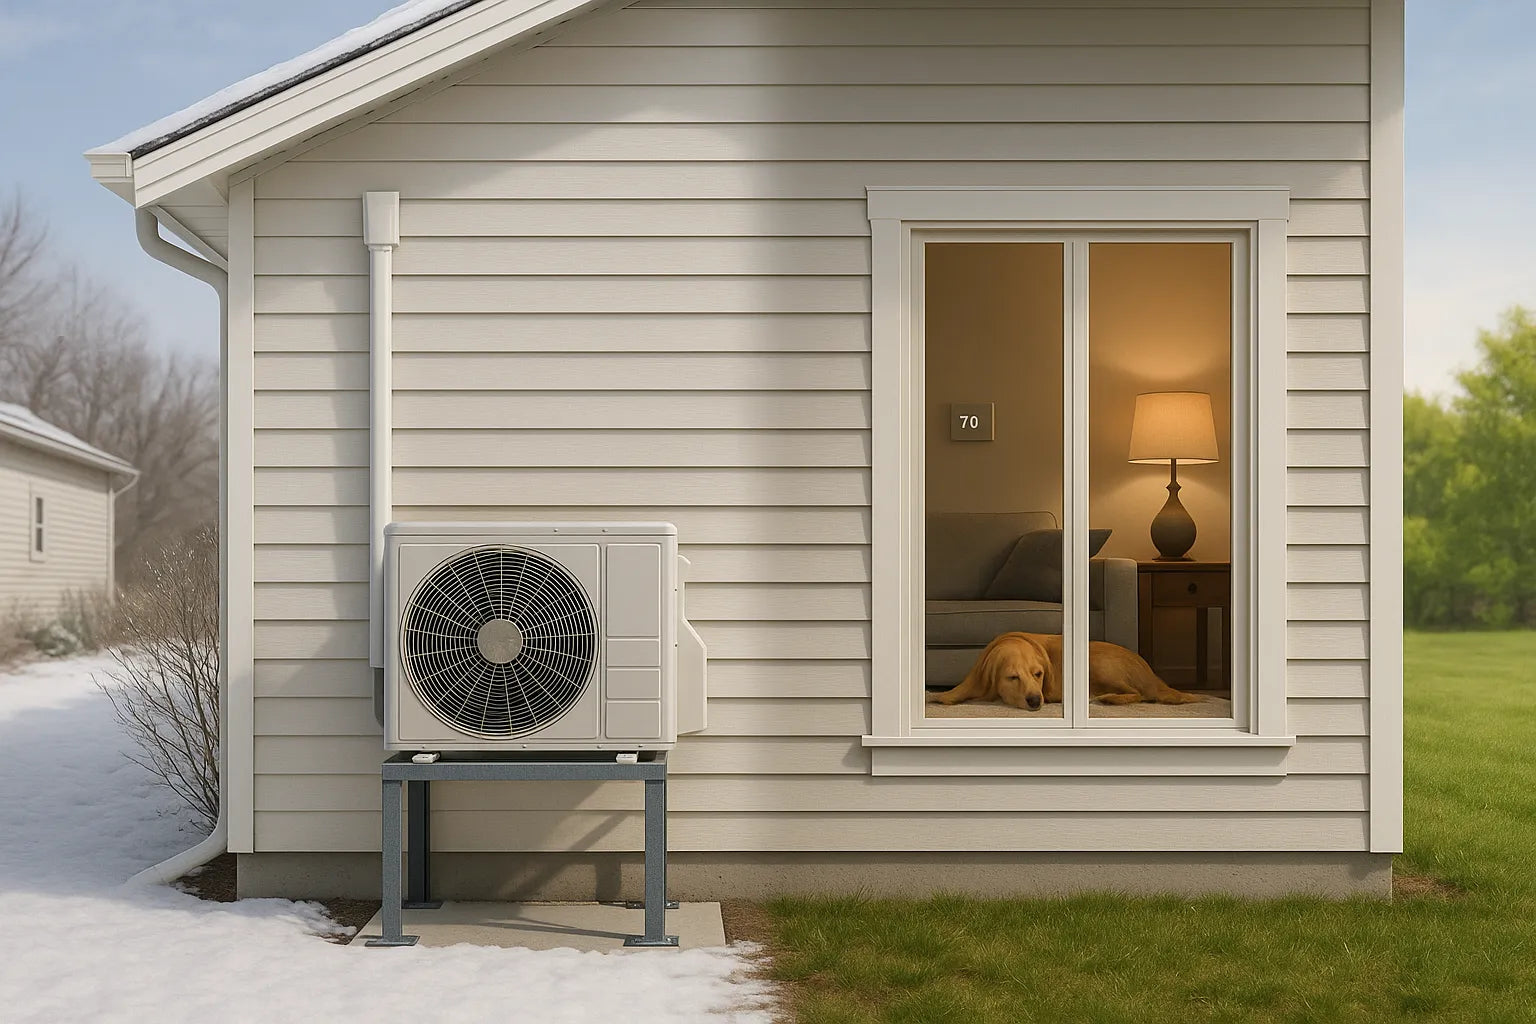
Step 7: Plan the installation for snow, ice, and drainage
The best unit fails if it sits in a snowbank. Install above the snow line with a stand or wall brackets. Keep airflow clear of shrubs and drifting areas. Add a base with good drainage so defrost water doesn’t refreeze under the coil. In windy sites, a modest wind baffle can help. Confirm line-set routing, condensate handling, and service access. For ductless heads, pick locations that avoid blinds and doors. If you’re packaging everything together, see our package units. DIY-inclined? Some systems are homeowner-friendly, but always follow code and warranty rules. Our techs can sanity-check your plan and flag red-zone mistakes before you order. Honest advice first; sales second.
Step 8: Stack rebates, incentives, and financing
Rebates can be generous, sometimes thousands. Check local utility programs and state offers, then layer any federal credits you qualify for. The NEEP cold-climate ASHP list helps verify models for programs in many northern states. We’ll also help you weigh payback: sometimes a mid-range unit plus better air sealing beats a luxe model. And remember our lowest price guarantee we keep pricing honest, then help you capture every incentive you can.
Brands performing in deep cold (what to expect in 2025)
Several brands lead in cold-climate performance. Lines from Mitsubishi Electric (including “hyper-heat” styles), Napoleon, Carrier, Daikin, and Trane have models designed to hold capacity at very low temps. Many pair inverter compressors with beefy coils and smart defrost strategies. The result is strong heat near −15°F and useful output even closer to −22°F in select models. Still, brand is only half the story. The match between outdoor unit and indoor coil or handler matters just as much. So does install quality. We’ll help you cross-check AHRI matches and confirm that the exact pairing you buy is rated for your climate. Looking at ductless? Compare our ductless mini split options for flexible zoning and fast installs.
Sizing, zoning, and lifetime value (beyond the sticker)
Right size = right comfort. Use tools, but trust a load calculation. We can help through the Design Center. Zoning pays off when rooms differ. Basements, additions, and sunrooms often need their own control.
For packaged or single-space needs, review through-the-wall heat pumps. Think lifetime costs: energy, maintenance, and warranty. Many systems last 15–20 years with proper install and filter care.


