So, you're Jake—a hands-on homeowner who’s not afraid to break out the drill, read a manual, and save thousands by doing it yourself. If you're eyeing a 3-zone mini split system for your home, you're probably wondering: Can I install this myself? What tools will I need? What steps are involved?
This guide walks you through everything from choosing your system and tools, to mounting, line sets, electrical prep, and final checks. Whether you're installing a MRCOOL DIY system or another multi-zone ductless setup, here's what Jake really needs to know.
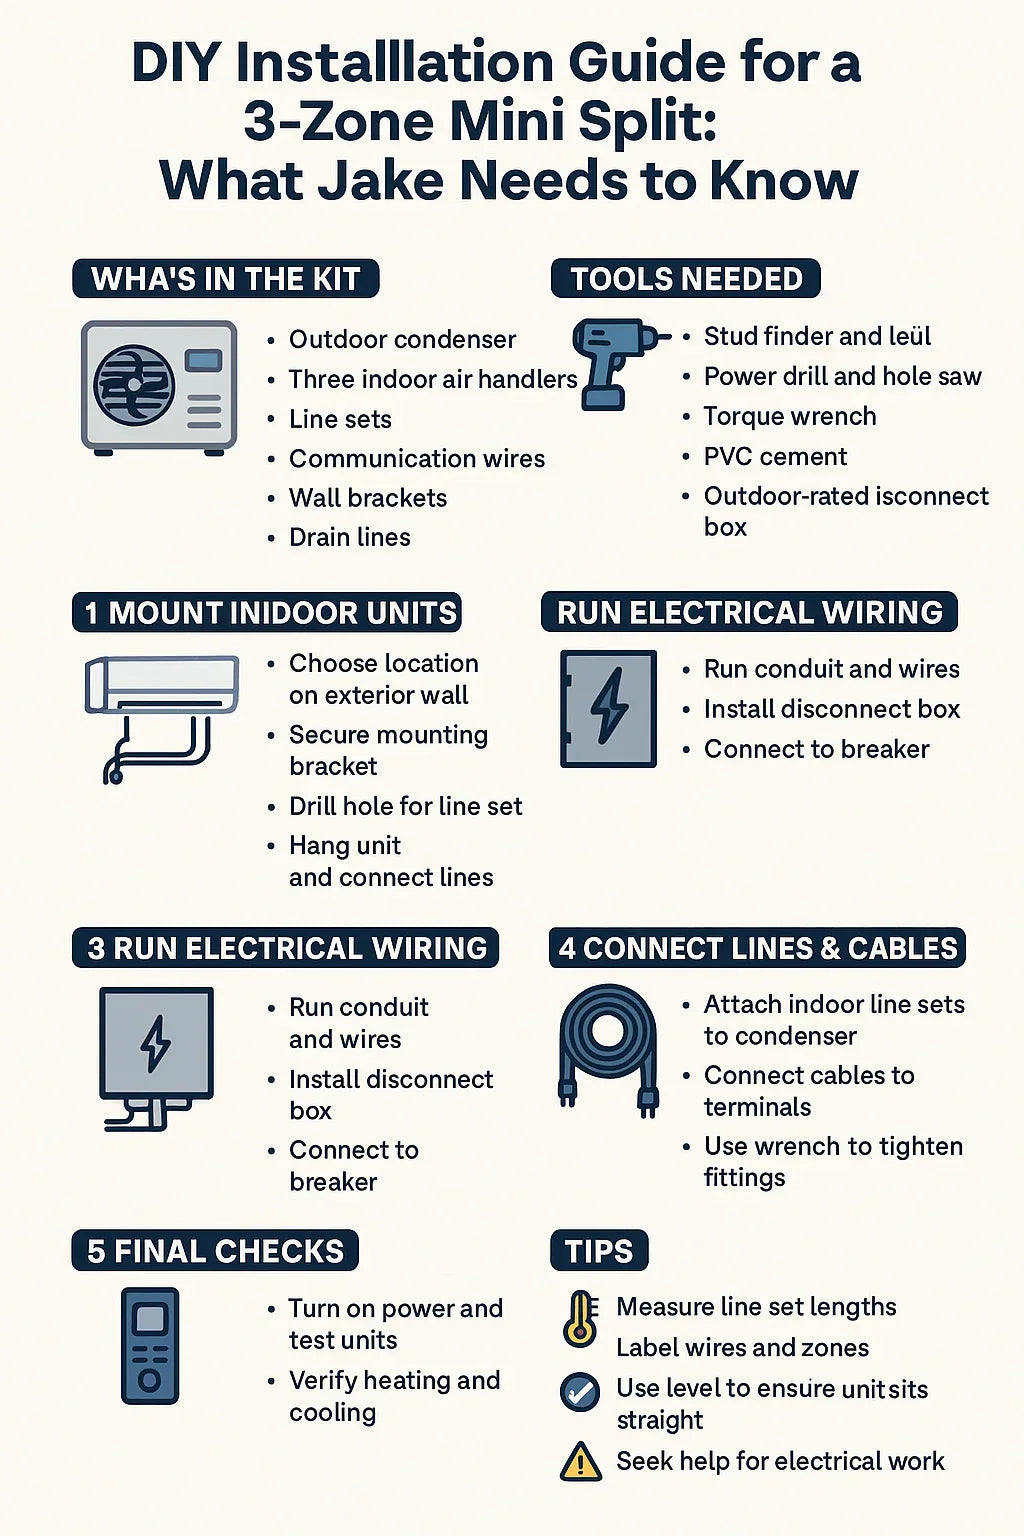
📦 What’s in the Box? Know Your 3-Zone Kit
A typical 3-zone mini split DIY kit includes:
-
✅ One outdoor condenser
-
✅ Three indoor air handlers
-
✅ Line sets (refrigerant lines)
-
✅ Communication wires
-
✅ Wall brackets or mounting plates
-
✅ Drain lines
-
✅ Remote controls or smart thermostats
Some kits (like MRCOOL) come with pre-charged line sets, which allow EPA-unlicensed homeowners to install systems without handling refrigerant directly.
📎 Reference: MRCOOL DIY Multi-Zone Product Page
🔧 Tools Jake Will Need (and Why)
You don’t need a professional HVAC van, but you will need:
| Tool | Purpose |
|---|---|
| Stud finder | Locate wall studs for mounting indoor units |
| Level | Ensure indoor units are even |
| Power drill | For mounting brackets and securing lines |
| Hole saw (2.5"–3") | For line set penetration through the wall |
| Torque wrench | If you're tightening flare nuts yourself |
| PVC cement + drain line | For condensate drainage |
| Outdoor-rated electrical disconnect box | Required by code in most areas |
| Conduit & whip | Electrical safety and code compliance |
Some tools (like vacuum pumps or gauges) aren’t needed for MRCOOL systems—but may be necessary for other brands.
🏠 Step-by-Step DIY Installation Walkthrough
🧱 Step 1: Mount Indoor Air Handlers
-
Choose location: High on the wall, away from heat sources or electronics.
-
Mount template to wall using level.
-
Drill pilot holes and secure mounting bracket.
-
Drill 2.5"–3" hole through wall for refrigerant and drain line.
-
Feed line set, drain hose, and control wire through wall.
-
Hang indoor unit on bracket securely.
📎 Tip: Tilt the drain hose slightly downward for proper condensate flow.
🌬️ Step 2: Place the Outdoor Condenser
-
Choose a level, shaded spot with good airflow.
-
Set condenser on a concrete pad or wall bracket.
-
Leave 12–24 inches clearance on all sides.
-
Connect each line set to the appropriate port (Zone 1, 2, 3).
📎 Tip: Don’t mix up zones—label line sets as you route them.
🔌 Step 3: Run Electrical Wiring
You’ll need:
-
240V circuit from your panel to the outdoor unit
-
Disconnect box (within 6 feet of unit)
-
Proper gauge wire (typically 10/2 or 8/2)
Steps:
-
Turn off power at the main panel.
-
Run wire through conduit to disconnect box, then to condenser.
-
Connect L1, L2, and ground according to wiring diagram.
📎 Always follow NEC (National Electrical Code) and local requirements. Consider hiring an electrician for this step.
❄️ Step 4: Connect Line Sets & Power Cables
For MRCOOL:
-
Line sets are pre-charged and require no vacuuming.
-
Simply remove protective caps, align flare nuts, and tighten with torque wrench.
For standard systems:
-
You’ll need to:
-
Connect lines
-
Evacuate with a vacuum pump
-
Check for leaks
-
Release refrigerant
-
📎 Unless you’re EPA 608 certified, use a system like MRCOOL or hire a pro for the refrigerant steps.
💧 Step 5: Install Condensate Drain Line
-
Connect drain hose to the indoor unit’s bottom port.
-
Run it downhill continuously or use a condensate pump.
-
Secure the line outside or into a drain system.
📎 Tip: Test it by pouring a bit of water into the tray and confirming flow.
⚙️ Step 6: Final Checks & Power On
-
Check all line set connections.
-
Confirm correct wiring at indoor and outdoor units.
-
Turn on breaker and use remotes to activate each zone.
-
Watch for:
-
Airflow
-
Cooling/heating response
-
Any leaks or error codes
-
🧠 Smart Install Tips from Other DIYers Like Jake
-
✅ Pre-plan line set lengths—measure runs before you order. Consider 16', 25', 35', 50' options.
-
✅ Use cable clamps and covers to tidy up refrigerant lines and wires on the outside wall.
-
✅ Label wires and zones clearly to avoid miswiring.
-
✅ Don’t skip the disconnect box—it’s often required by code and increases safety.
-
✅ Download your brand’s app for remote setup and firmware updates.
📎 Forum for reference: Reddit r/DIY – Mini Split Installs
⚠️ Know When to Call a Pro
Jake may be good, but here are red flags where a pro should step in:
-
⚠️ Need to vacuum refrigerant lines or charge the system manually.
-
⚠️ Running 240V power from panel and unsure of NEC code.
-
⚠️ Installing heads on high ceilings, requiring scaffolding or tall ladders.
-
⚠️ Encountering condensation issues or wiring faults post-install.
💰 Cost Savings of a DIY 3-Zone Install
| Expense | DIY Cost (USD) | Pro Installed |
|---|---|---|
| Equipment (MRCOOL 3-Zone) | $3,800–$5,000 | $3,800–$5,000 |
| Installation Labor | $0 | $3,000–$5,500 |
| Tools & Accessories | $200–$600 | Included |
| Total | $4,000–$5,600 | $7,000–$10,500 |
DIY savings = up to $4,000+, depending on complexity.
✅ Final Verdict: Can Jake Do This?
Absolutely. With a DIY-friendly brand like MRCOOL, the right tools, some weekend time, and an eye for detail, Jake can successfully install a 3-zone mini split system. The key is preparation—measure twice, install once, and don’t skip safety steps.
Need help deciding which BTU sizes to order or what line set lengths work best? I can help you build your parts list next.
In the next topic we will know more about: What’s the Cost of a 3-Zone Mini Split System in 2025?


