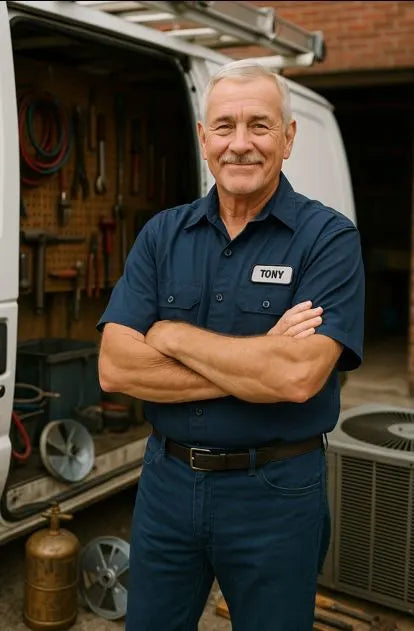
Common A-Coil Installation Mistakes Tony Sees (And How They Destroy Equipment)
Tony breaks down the real-world installation failures that flood basements, freeze coils, burn compressors, and turn perfectly good HVAC systems into money-wasting disasters.
Let me tell you something most homeowners don’t want to hear:
**A-coils don’t fail because they’re bad.
They fail because people install them wrong.**
Every summer, Tony walks into houses where the A-coil is freezing, leaking, sweating, starving, flooding the furnace, choking airflow, or collapsing efficiency. The homeowner blames the equipment. The contractor blames the refrigerant. The internet blames the condenser.
But the real culprit?
Bad installation.
Today, I’m breaking down the most common Goodman CAPFA6030C3 installation mistakes and EXACTLY how they destroy system performance.
We’re talking:
-
wrong airflow direction
-
incorrect sealing
-
sloppy brazing
-
TXV and piston mismatch
-
clogged or misrouted drains
-
undersized ductwork
-
wrong coil positioning
-
ignored static pressure
-
airflow starvation
-
and mistakes that literally drown furnaces
Let’s get into it — Tony style. No sugarcoating.
Mistake #1: Installing the Coil in the Wrong Direction (Upflow vs. Downflow Disaster)
This is the #1 mistake Tony sees, and it ruins equipment fast.
The Goodman CAPFA6030C3 works for upflow AND downflow, but that does NOT mean you can install it whichever way you “feel like.” If airflow direction doesn’t match the furnace or air handler design, you get:
✔ condensate draining the wrong way
✔ water dumping into the furnace
✔ refrigerant boiling unevenly
✔ coil freezing
✔ humidity problems
✔ poor temperature drop
Most of the time, the homeowner never realizes the mistake — until they see rust on the burners or standing water under the furnace.
Here’s the engineering behind this:
[Coil Orientation Errors and Consequences in Vertical HVAC Systems]
Installing the coil in the wrong orientation is like putting a car engine in backwards and wondering why the exhaust blows out the front grill.
Mistake #2: Not Sealing the Coil to the Furnace (The “Air Bypass Killer”)
This one is shockingly common.
The coil must be sealed tightly to the furnace cabinet so that ALL air is forced through the coil, not around it.
When installers get lazy and skip sealing:
-
air bypasses the coil
-
cooling efficiency drops
-
humidity removal collapses
-
coil temperature rises
-
coil can freeze even with correct refrigerant charge
-
blower pressure spikes
-
dust bypasses filtration and coats the coil
If you’ve ever seen a coil freeze “for no reason,” lack of sealing is the reason.
Here’s why sealing is mission-critical:
[Air Leakage Effects on Evaporator Coil Heat Transfer Efficiency]
A $7 tube of mastic or foil tape prevents a $7,000 system failure. Most people never hear that.
Mistake #3: Using the Wrong TXV or Piston (Biggest Refrigerant Flow Mistake in HVAC)
Goodman coils come with piston options, and most pros upgrade to a TXV. But here’s the truth:
If the metering device doesn’t match the condenser tonnage, refrigerant type, and system configuration — the entire HVAC system fails.
A mismatched metering device causes:
✔ coil starvation (low refrigerant flow)
✔ coil flooding (too much refrigerant)
✔ warm supply air
✔ compressor damage
✔ wildly unstable pressures
✔ SEER2 efficiency collapse
✔ short cycling
✔ coil freezing
Homeowners love to blame refrigerant levels when in reality, the metering device is wrong.
Here’s the refrigerant science behind it:
[Metering Device Sizing and Evaporator Coil Performance Stability]
Matching the TXV/piston to the condenser is NON-NEGOTIABLE.
Mistake #4: Sloppy Brazing and Dirty Lines (The Silent Coil Killer)
If the lineset has:
-
scale
-
oxidation
-
moisture
-
debris
-
flux contamination
-
improper nitrogen purging
…all that garbage ends up inside the A-coil. And once debris hits the TXV?
The coil starves.
Debris in the system causes:
✔ restricted refrigerant flow
✔ insufficient cooling
✔ erratic pressures
✔ TXV hunting
✔ overheating compressor
✔ coil freeze-ups
Homeowners NEVER know this happened — until months later when performance drops.
Here’s the contamination principle behind it:
[Impact of Brazing Contaminants on HVAC Refrigerant Circuit Integrity]
Bad brazing kills coils slowly and painfully.
Mistake #5: Incorrect Coil Positioning (Crooked, Tilted, or Floating Coils)
A coil must sit perfectly level — or slightly tilted TOWARD the drain — to prevent water backup.
When the coil is crooked, you get:
✔ uneven drainage
✔ water pooling
✔ drain pan overflow
✔ mold growth
✔ coil sweat dripping into the furnace
✔ warped sheet metal
✔ blower damage
Tony once saw a coil resting on a block of wood.
Yes, really. A literal block of wood.
Improper positioning turns your coil into a water disaster machine.
Here’s the drainage mechanic behind this:
[Effect of Coil Tilt and Orientation on Condensate Flow Paths]
Don’t tilt your coil wrong — it will make you pay for it.
Mistake #6: No Secondary Drain or Trap (Leading Cause of Flooded Furnaces)
Every coil needs:
✔ a primary drain
✔ a secondary drain
✔ a proper trap
✔ correct pitch
✔ safe routing
If ANY of these are wrong, water WILL leak.
A coil that drains backwards, uphill, or without a trap causes:
✔ coil pan overflow
✔ water pouring into the furnace
✔ rusted heat exchangers
✔ ruined blowers
✔ soaked electronics
✔ mold in ductwork
✔ drywall damage
Half of the flooded systems Tony sees boil down to one problem:
No trap, wrong trap, or poorly-pitched drain line.
Here’s the drainage standard behind this mess:
[Condensate Drain Piping Requirements for Evaporator Coil Installations]
If water can find the wrong way out — it will.
Mistake #7: Undersized or Restricted Ductwork (Airflow Starvation = Frozen Coil)
This is a BIG one.
A 3.5–5 ton A-coil requires:
-
1,400–2,000 CFM of airflow
-
low static pressure
-
proper return and supply sizing
If the ductwork is too small or too restrictive, airflow drops — and the coil freezes.
Airflow starvation causes:
✔ ice buildup
✔ compressor strain
✔ TXV hunting
✔ reduced heat absorption
✔ high humidity
✔ miserable comfort levels
Most HVAC installs fail because of ductwork, not equipment.
Here’s the airflow science behind that truth:
[Static Pressure and CFM Requirements for Proper Coil Airflow]
You cannot choke a 5-ton coil with 3-ton ductwork and expect it to work.
Mistake #8: Poor Coil Sealing at the Furnace Cabinet (Air Bypass Disaster)
This is different from airflow bypass — this is AIR INVASION.
Gaps between the coil cabinet and furnace pull:
-
unfiltered air
-
attic air
-
crawlspace air
-
cold basement air
This creates:
✔ dust buildup
✔ coil fouling
✔ poor temperature control
✔ negative pressure issues
✔ higher static pressure
✔ blower wear
✔ mold from unconditioned air
Tony’s rule:
“If I see daylight, the install is not done.”
Mistake #9: Ignoring Static Pressure (Blower Killer + Coil Freezer)
Static pressure is the TRUE measure of system health.
High static = low airflow.
Low airflow = coil freezing.
Coil freezing = refrigerant disaster.
Bad installers never measure static pressure.
Good installers measure it every time.
Static pressure that exceeds equipment limits (usually ~.5" w.c.) causes:
✔ blower motor failure
✔ loud ducts
✔ poor cooling
✔ coil icing
✔ system short cycling
Here’s the static pressure principle behind all this:
[Static Pressure Influence on Evaporator Coil Performance and System Efficiency]
A well-installed coil always matches the duct system — not the other way around.
Mistake #10: Leaving Coils Dirty or Unprotected During Construction
If a coil is installed before drywall sanding, framing, or renovation dust settles?
It becomes completely packed with:
-
drywall dust
-
sawdust
-
insulation fibers
-
dirt
-
construction debris
A dirty coil is an airflow catastrophe.
Symptoms:
✔ weak cooling
✔ overheating furnace
✔ coil freezing
✔ long run times
✔ high electric bills
✔ clogged drain pan
Homeowners think “it’s refrigerant.”
No — it’s dust.
Mistake #11: Forgetting to Install the Correct Furnace Filter Rack
If the filter rack leaks or is undersized, dust bypasses the filter and gets sucked directly into the A-coil.
Dust + moisture = cement.
The coil clogs.
Airflow drops.
Coil freezes.
Compressor dies.
Tony has seen coils with SO much dust that they looked like solid grey bricks.
Mistake #12: Using the Wrong Refrigerant Type or Mischarging the System
The Goodman CAPFA6030C3 coil must be paired with:
-
the right refrigerant type
-
the correct charging method
-
proper superheat/subcooling
If you undercharge:
✔ the coil starves
✔ evaporator pressure drops
✔ coil freezes
If you overcharge:
✔ head pressure skyrockets
✔ liquid floodback occurs
✔ compressor overheats
This ruinous mischarging comes back to one idea:
“The coil is fine — the tech wasn’t.”
Tony’s Step-by-Step Checklist to Avoid A-Coil Installation Failure
Here’s Tony’s real checklist — the one he actually uses:
✔ Verify airflow direction (upflow/downflow)
✔ Confirm coil matches furnace width
✔ Check TXV/piston for correct tonnage
✔ Inspect level and coil position
✔ Seal coil to furnace airtight
✔ Support coil with proper brackets
✔ Install primary and secondary drains correctly
✔ Verify drain trap and proper slope
✔ Purge nitrogen during brazing
✔ Weigh refrigerant charge
✔ Measure superheat/subcooling
✔ Measure static pressure
✔ Inspect filter rack
✔ Test blower CFM
This checklist prevents 99% of coil failures.
Tony’s Final Verdict
A-coils don’t destroy themselves — bad installation destroys them.
Here’s the truth:
✔ Wrong airflow direction floods systems
✔ Bad sealing kills efficiency
✔ Wrong TXV/piston ruins refrigerant flow
✔ Bad brazing starves coils
✔ Poor positioning causes leaks
✔ Incorrect drainage floods furnaces
✔ Undersized ductwork freezes coils
✔ Bad charging burns compressors
The Goodman CAPFA6030C3 is a fantastic coil — but it MUST be installed correctly.
Install it like a pro, and it will run flawlessly for years.
Install it like a hack, and Tony will see you every summer.
Let's know why your A coil freezes up in the next blog.


