One of the first questions homeowners ask me isn’t about SEER2 ratings or system tonnage—it’s:
“Mark, will this thing even fit in my basement/closet/attic?”
And that’s a good question. Because while the Goodman 2.5 Ton 13.8 SEER2 Northeast System (GLXS3BN3010 condenser + AMST30BU1300 air handler) is designed to work in a variety of home layouts, not every utility space is created equal.
If you don’t plan for clearance, airflow, and serviceability, you’ll end up with a noisy, inefficient system that’s a nightmare to repair later. I’ve seen plenty of jobs where someone “squeezed” a unit into a tight closet and three years later we had to rip drywall out just to replace a blower motor.
In this guide, I’ll walk you through real-world clearance requirements, placement tips, and space considerations to help you figure out whether a 2.5 Ton Goodman will work in your home.
📦 System Dimensions & Specs
First things first—you need to know the size of the equipment you’re working with.
Outdoor Condenser (GLXS3BN3010)
-
Height: ~35 inches
-
Width: ~29 inches
-
Depth: ~29 inches
-
Weight: ~160 lbs
Indoor Air Handler (AMST30BU1300)
-
Height: ~42 inches
-
Width: ~17.5 inches
-
Depth: ~21 inches
-
Weight: ~100 lbs
👉 These numbers can vary slightly by manufacturing batch, but they give you a ballpark. Always confirm with the model-specific spec sheet before install.
Goodman publishes system specs on their product resources page.
📏 Clearance Requirements
Outdoor Condenser
Goodman recommends:
-
12–18 inches clearance on all sides.
-
60 inches (5 feet) overhead clearance (no decks or eaves directly above).
-
Clear path for service access—don’t back it into a corner.
💡 Mark’s Tip: I always leave 24 inches on the service side (where the electrical panel is). Techs will thank you when it’s time to check pressures or replace a capacitor.
Indoor Air Handler
For the AMST30BU1300 air handler, you’ll need:
-
24 inches in front for service access.
-
Enough space on top or sides for supply and return duct connections.
-
Clearance for condensate drain routing.
ASHRAE guidelines on equipment clearance.
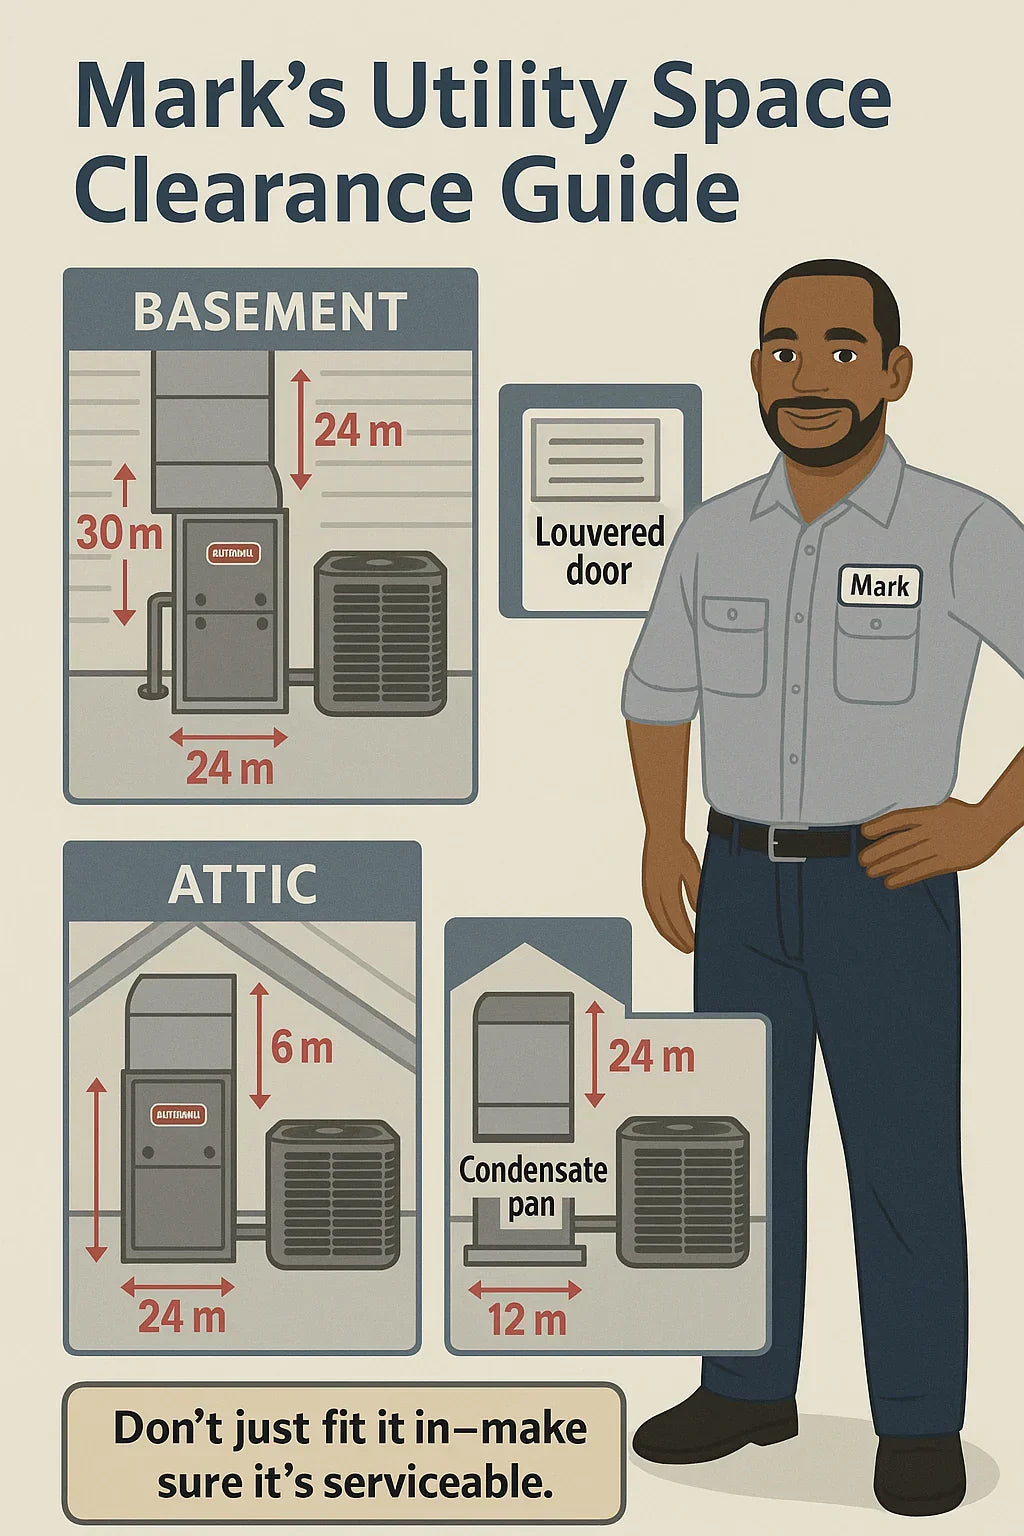
🏠 Basement Installations
A lot of Northeast homes keep air handlers in the basement.
Pros:
-
Easy access for service.
-
Naturally cooler space helps efficiency.
-
Easy routing for condensate drains.
Watch Out For:
-
Low ceilings: Make sure you have at least 7 feet clearance for safe service access.
-
Moisture: Basements can be damp. Elevate the air handler on a platform to avoid water damage.
-
Drainage: If no gravity drain is available, you’ll need a condensate pump ($200–$400).
👉 I’ve had installs where the system fit, but the homeowner didn’t account for clearance around beams or duct runs. Always measure basement headroom carefully.
🚪 Closet Installations
Closet installs are popular in smaller homes, but they can be tricky.
Requirements:
-
Return air ventilation: Closet doors must be louvered or include a dedicated return vent.
-
Combustion air (if furnace present): Ensure adequate airflow.
-
Service space: Leave 24 inches in front and at least 3 inches around sides.
Common Mistakes I See:
-
Drywall closets with no return vent → system starves for air.
-
Units jammed in so tight that techs have to cut drywall to service.
-
No drain access → clogged drain floods the closet.
💡 Mark’s Rule: If I can’t remove the blower motor without ripping walls, it’s not a good install. Always think “serviceability first.”
🪜 Attic Installations
Attic installs are common in the Northeast for homes without basements.
Pros:
-
Out of sight, out of the way.
-
Frees up closet or basement space.
Challenges:
-
Heat: Attics can reach 120°F+. Insulate ducts and air handler to prevent efficiency loss.
-
Access: Must have a proper walkway and service platform per code.
-
Drainage: Condensate pans with float switches are critical to avoid ceiling damage.
Building America guidance on attic HVAC placement.
🔇 Noise Considerations
Noise is often overlooked until the first hot night when the system kicks on.
Outdoor Condenser
-
Typical noise level: 72–76 decibels (about as loud as a running dishwasher).
-
Place away from bedroom windows or patios when possible.
Indoor Air Handler
-
In closets, vibration pads and sound insulation reduce noise.
-
Return air design plays a big role—undersized returns make the system louder.
👉 I always tell homeowners: a properly sized and balanced duct system makes a huge difference in noise levels.
Consumer Reports noise considerations for ACs.
🧮 Planning for Ductwork
Don’t forget about the space ducts need.
-
Supply plenum: Must have room above or beside the air handler.
-
Return plenum: Needs clear airflow path—don’t squeeze it against a wall.
-
Transitions: Allow space for smooth duct transitions, not cramped “bends.”
Poor duct design = higher static pressure = system wear and poor comfort.
🛑 What Happens If You Ignore Clearance
I’ve been called to service jobs where clearance wasn’t considered:
-
Basement install: No clearance in front → blower motor change required cutting pipes.
-
Closet install: No return vent → system iced up constantly.
-
Outdoor unit under deck: Air recirculated into itself, leading to compressor failure.
👉 Skipping clearance to “make it fit” always costs more in the long run.
📊 Real-World Fit Examples
-
1,600 sq. ft. ranch, Albany, NY: Basement install, plenty of clearance → easy access, smooth running.
-
1,400 sq. ft. townhouse, Boston, MA: Closet install → required custom louvered door for return air.
-
2,000 sq. ft. Cape Cod, Hartford, CT: Attic install → needed extra insulation and dual condensate safety switches.
💰 Cost Considerations for Clearance Adjustments
-
Closet modifications (louvered doors, drywall work): $300–$800
-
Condensate pump install: $200–$400
-
Attic platform + drain pan: $500–$1,000
-
Duct modifications for clearance: $500–$1,500
HVAC installation cost averages.
🧰 Mark’s Pro Tips
-
Leave room for service. Always plan for blower removal, coil cleaning, and filter changes.
-
Think airflow, not just fit. Tight installs choke systems.
-
Plan for noise. Don’t put condensers under bedroom windows.
-
Follow code. NEC and local building codes have clearance rules for safety.
-
Consult your installer early. A site visit avoids surprises.
✅ Bottom Line: Fit Isn’t Just About Size
A Goodman 2.5 Ton 13.8 SEER2 system will fit in most Northeast homes—but whether it runs efficiently and lasts depends on clearance, airflow, and serviceability.
-
Basements: Best choice if you’ve got headroom and drainage.
-
Closets: Workable with proper return ventilation and space.
-
Attics: Fine if you insulate, add drainage protection, and allow service access.
👉 My installer advice: Don’t just make it fit—make it serviceable. That’s how you keep your Goodman running smooth for 15–20 years.
In the next topic we will know more about: Goodman vs. Carrier vs. Amana: Which 2.5 Ton System Fits Northeast Homes Best?


