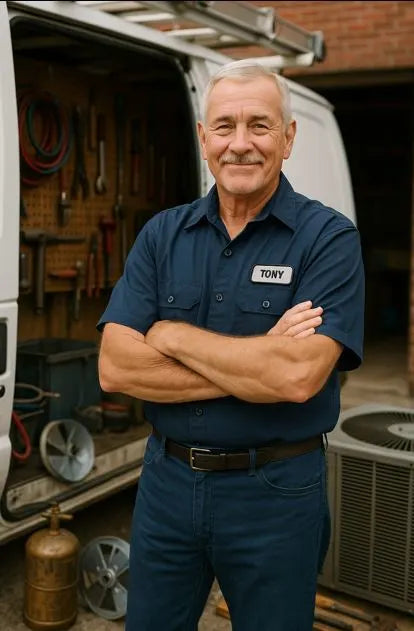
Choosing the Right Dealer/Installer for Your Goodman Package AC — What Tony Looks For
Introduction
Buying a new air conditioner is a big investment — but here’s a hard truth most homeowners don’t hear until it’s too late:
The installer matters more than the brand.
You can buy the best system on the market — like the Goodman 2.5-Ton 13.4 SEER2 Self-Contained Horizontal Package AC Unit — but if it’s installed wrong, you’ll lose efficiency, comfort, and warranty protection before summer’s even over.
I’ve seen it all: systems wired backward, ducts taped instead of sealed, and units sitting off-level like a bar stool on gravel. These mistakes cost thousands down the line, and most of them start with one bad choice — hiring the wrong installer.
So in this article, I’ll show you how to choose the right dealer or contractor for your Goodman package system, including:
✅ What certifications and credentials actually matter
✅ How to spot red flags before signing a contract
✅ Why Goodman’s own dealer network helps protect your investment
✅ My personal 10-point checklist for evaluating installers
If you’re planning an upgrade this year, grab a cup of coffee — this is the guide every homeowner needs before they hand over a deposit.
1. Why the Installer Matters More Than the Equipment
Let’s start with the simple math.
About 50% of system performance comes from the installation, not the equipment itself.
Poor installation can reduce a 13.4 SEER2 system’s efficiency to the equivalent of 9 SEER, meaning your “high-efficiency” AC could cost more to run than your old one.
Common bad-install issues include:
-
Incorrect refrigerant charge
-
Duct leakage
-
Electrical miswiring
-
Unleveled mounting pads
-
Poor condensate drainage
All of these can void your warranty or shorten the unit’s lifespan by years.
(Energy Star – HVAC Installation Quality)
That’s why I always say: a great installer makes average equipment perform great — and a bad installer can ruin anything.
2. Start with Certification — Who’s Actually Qualified
Anyone can claim they “do HVAC,” but only certified pros know the codes and performance requirements Goodman equipment demands.
Here’s what you should look for:
✅ EPA Section 608 Certification
Required by federal law for handling refrigerants like R-410A and R-32.
Ask to see proof — a good tech will have their card handy.
✅ State HVAC License
Licensing ensures your contractor meets insurance, bonding, and competency standards.
Search your state’s licensing board to confirm that their license is current.
✅ Goodman Dealer or A+ Distributor Certification
Goodman trains and certifies select dealers who meet installation and warranty-compliance standards.
✅ NATE Certification
The North American Technician Excellence (NATE) credential is like the HVAC gold standard. Techs must pass rigorous tests in installation and diagnostics.
If they’re NATE-certified, you’re in good hands.
(NATE – Technician Certification Info)
3. Ask for Proof of Insurance and Warranty Authorization
A reputable installer carries both:
-
General liability insurance – covers damage to your property during installation.
-
Workers’ compensation – protects you if a tech gets injured on-site.
If they can’t show current proof, move on.
Also, ask whether they’re authorized to register Goodman warranties.
Dealers who submit registrations directly ensure your 10-year parts warranty is valid from day one.
(Goodman – Warranty Registration Page)
4. Evaluate Their Reputation — Not Just Reviews
Online reviews are a start, but dig deeper. I always tell homeowners to check these three sources:
-
Better Business Bureau (BBB) — Look for “A” ratings and minimal unresolved complaints.
-
Local building departments — See if they’ve pulled HVAC permits before; consistent records show professionalism.
-
References from real customers — Ask for two recent installs within 10 miles of your area. Then drive by and listen — a good installation sounds quiet and runs smoothly.
(BBB – Accredited HVAC Contractors)
5. Get a Detailed Written Estimate — No Guesswork
A serious HVAC pro won’t quote you a number scribbled on a notepad.
They’ll give you a detailed, itemized estimate covering:
-
Equipment make/model.
-
Labor and materials
-
Permitting costs
-
Start and completion dates
-
Warranty registration responsibility
If the estimate is vague or missing part numbers, it’s a red flag.
And always get at least three quotes — not to find the cheapest, but to spot the outliers. The low-ball bidder usually cuts corners; the highest one might be overpricing labor.
(Energy.gov – Contractor Quote Comparison)
6. Check Their Load Calculations — Not Just “Rule of Thumb”
One of my biggest pet peeves is contractors sizing systems by square footage alone.
They’ll say, “You’ve got a 1,500 sq ft house? That’s a 2.5-ton system.”
That’s lazy — and wrong.
Proper sizing requires a Manual J Load Calculation that factors in:
-
Insulation levels
-
Window area and orientation
-
Ceiling height
-
Occupants and appliances
If your installer doesn’t perform or request this calculation, you’re not getting a professional job.
7. Ask About Installation Standards and Inspection
A pro installer follows best practices — and is proud to explain them. Ask questions like:
-
How will you level and anchor the pad?
-
Will you seal ducts with mastic, not tape?
-
How will you verify refrigerant charge and airflow?
-
Do you provide a startup performance report?
Their answers will tell you everything about their attention to detail.
(AHRI – Quality Installation Standards)
8. Verify They Pull Permits (and Schedule Inspections)
Any legitimate contractor will pull the necessary mechanical and electrical permits.
If someone says, “You don’t need one, we’ll just take care of it off the books,” run the other way.
Unpermitted work can void insurance claims, fail home inspections, and even block home sales.
Permits protect you, not the city.
9. Ask About Post-Install Support and Maintenance
Installing your system is only half the job — keeping it running right is the rest.
Good contractors include a maintenance plan or at least explain what service looks like after install:
-
First-year tune-up
-
Filter replacement schedule
-
Coil cleaning recommendations
-
Warranty claim process
If they vanish the moment the check clears, that’s not a relationship — it’s a transaction.
10. Understand the Red Flags — Tony’s “Walk-Away” List
I’ve worked in this industry long enough to spot trouble before it starts.
Here are my top red flags that scream “walk away.”
🚫 No license or insurance. Big one — that’s a deal-breaker.
🚫 Pressure tactics. “This deal expires today” is a gimmick.
🚫 Cash-only pricing. Legit contractors accept multiple payment forms.
🚫 No written contract. Always get everything in writing.
🚫 No equipment details. If they won’t specify model numbers, they might install something different.
🚫 They skip the site visit. Any estimate without inspecting your home first? Forget it.
11. Why Goodman Dealers Are a Safer Bet
One of the smartest moves you can make is to go through an authorized Goodman dealer.
Why?
Because Goodman doesn’t hand those out to just anyone. Dealers have to:
-
Meet quality-installation requirements
-
Complete factory training on Goodman systems
-
Maintain a positive customer-service record.
-
Register warranties correctly
Authorized dealers also have access to Goodman technical support and genuine OEM parts — which means faster repairs and no knock-off components.
12. Tony’s 10-Point Installer Checklist
Here’s the exact checklist I use when vetting anyone who touches HVAC equipment — whether they’re a subcontractor or a local tech.
1. Licensing and Certification
✔️ EPA 608 certified
✔️ State HVAC license current
2. Insurance Coverage
✔️ Liability and workers’ comp verified
3. Proper Load Calculation
✔️ Manual J performed
4. Warranty Registration
✔️ Goodman warranty handled by installer
5. Installation Quality
✔️ Level pad, sealed ducts, proper airflow tested
6. Electrical Work
✔️ Correct breaker sizing and disconnect placement
7. Permit Compliance
✔️ Mechanical and electrical permits pulled
8. Post-Install Testing
✔️ Startup readings documented
9. Maintenance Plan
✔️ First-year tune-up scheduled
10. Professionalism
✔️ Transparent pricing, respectful communication, no shortcuts
If your installer checks every box, you’ve got yourself a pro.
13. Real-World Example — The “Cheap” Install That Cost $3,000 More
A homeowner in North Carolina called me last year after installing a “budget” system from a cut-rate contractor.
The price was $800 lower than my quote, but here’s what I found:
-
No mastic sealing on ducts
-
Pad slanted ¾ inch off-level
-
Refrigerant charge is 25% low.
-
Drain line untrapped and leaking into the crawlspace
Repairs cost $3,000 — four times what they “saved.”
Moral of the story: you can’t save money on quality installation; you only delay paying for it later.
14. Questions You Should Always Ask Before Hiring
Don’t be shy — any professional installer will welcome your questions. Here are a few of my go-tos:
-
How long have you been installing Goodman systems?
-
Are you a factory-trained dealer?
-
What’s included in your labor warranty?
-
Who will be on-site doing the install — employees or subcontractors?
-
How do you verify refrigerant charge and airflow?
-
Do you register the equipment warranty for me?
-
What’s your post-install inspection checklist?
If they hesitate or can’t answer clearly, that’s your cue to move on.
15. The Bottom Line — The Right Installer Makes All the Difference
The Goodman 2.5-Ton 13.4 SEER2 Horizontal Package AC Unit is engineered for years of efficient, quiet comfort — if it’s installed by someone who knows what they’re doing.
The wrong installer turns that investment into a noisy, high-bill headache.
The right one gives you:
✅ Reliable performance year after year
✅ Full 10-year warranty protection
✅ Lower energy bills
✅ Confidence that it’s done right
So take your time, check credentials, ask tough questions, and trust your gut.
Because when you find the right pro, you won’t just be buying an AC — you’ll be buying peace of mind for the next decade.


