Can You Install an Electric Water Heater Yourself? (And When You Shouldn’t)
Hi, I’m Samantha, and today we’re tackling one of the biggest homeowner questions:
“Can I install my electric water heater myself — or should I call a professional?”
If you’re handy, confident, and cautious, the answer might be yes. But if wiring diagrams make your head spin or your home’s plumbing looks like spaghetti, there’s no shame in letting a pro handle it.
This guide walks you through the DIY vs. professional installation decision, a complete tool checklist, safety and code notes, and the moments when you’ll want to step back and let an expert take over.
💧 Why DIY Installation Appeals to Homeowners
Electric water heaters don’t require gas lines or venting, which makes them simpler and safer to install than gas units. That’s why many homeowners wonder if they can take the project on themselves.
A DIY install can:
-
Save you $300–$600 in labor costs (HomeAdvisor)
-
Let you work on your own schedule
-
Give you the satisfaction of doing it yourself
But — and this is key — electrical systems carry risks. Wiring mistakes or code violations can cause shocks, leaks, or warranty voids, so you’ll want to weigh your comfort level carefully.
🧰 What You’ll Need for a DIY Installation
Before starting, make sure you have the tools and parts ready. Having everything on hand keeps the job smooth and safe.
Tools
-
Adjustable wrench
-
Pipe cutter
-
Teflon tape
-
Screwdrivers
-
Wire strippers
-
Level
-
Garden hose (for draining old tank)
-
Multimeter (for checking power)
Materials
-
New electric water heater (match capacity — most homes use 50–60 gallons)
-
Dielectric unions or flexible water connectors
-
Electrical wire and wire nuts
-
Pressure relief valve (T&P valve)
-
Pipe insulation
-
Drain pan (if required by local code)
💬 Samantha’s Tip: Check your owner’s manual for exact wire gauge and breaker rating — most electric heaters need a 240-volt, 30-amp dedicated circuit (King Electric).
⚙️ Step-by-Step: Installing an Electric Water Heater
If you’re still with me, here’s the process — broken down clearly and safely.
1. Turn Off Power and Water
-
Flip the circuit breaker off.
-
Double-check with a multimeter to confirm no current is flowing.
-
Turn off the cold-water supply valve leading to your old tank.
Never skip these two safety checks. Electricity and water are not forgiving.
2. Drain the Old Water Heater
-
Connect a garden hose to the drain valve at the bottom of the tank.
-
Run the hose to a floor drain or outside.
-
Open a hot-water faucet nearby to let air in.
-
Drain until water flow stops.
💬 Samantha’s Tip: If water drains slowly, open the pressure relief valve to release air pressure.
3. Disconnect Plumbing and Wiring
-
Loosen the hot and cold supply lines using a wrench.
-
Remove the electrical access panel and disconnect the wires, noting their colors and connections.
-
Keep wiring organized — labeling helps when reconnecting later.
If your wiring looks burnt, brittle, or mismatched, stop here and call an electrician.
4. Remove the Old Tank
Carefully move the old tank out of the way. They can be heavy — even empty — so get a friend to help if needed.
Inspect the floor and surrounding area for signs of moisture, corrosion, or mold before placing the new unit.
5. Position the New Heater
-
Place it in the drain pan (especially if your local code requires it).
-
Make sure it’s level and accessible for future maintenance.
-
Keep at least 6 inches of clearance around the tank for airflow and inspection.
6. Connect Water Lines
-
Wrap Teflon tape around threaded fittings.
-
Connect the cold-water inlet and hot-water outlet using flexible connectors.
-
Tighten snugly but don’t overtighten — overtightening can damage threads or crack fittings.
Once connected, open the cold-water valve and fill the tank completely.
You’ll know it’s full when water flows steadily from a nearby hot-water faucet.
7. Connect Electrical Wiring
-
Match wire colors (black to black, red to red, ground to green screw).
-
Use wire nuts and secure them tightly.
-
Replace the access panel and insulation.
Double-check voltage and connections before restoring power (The Spruce).
8. Check for Leaks and Power Up
-
Turn the circuit breaker back on.
-
Set the thermostat to 120°F (the safe and efficient range).
-
Let the heater run for about an hour.
-
Check around fittings, drain valve, and T&P valve for leaks.
If you notice hissing, popping, or a tripped breaker, cut power immediately and inspect your work.
🧯 Important Safety and Code Considerations
Even confident DIYers should pause for these reminders:
⚡ Electrical Codes
-
Electric water heaters must be hardwired to a dedicated circuit, not plugged in.
-
Wiring must meet National Electrical Code (NEC) standards for conductor size and breaker rating (NFPA).
-
If you’re unsure whether your home’s electrical system can handle a new unit, call a licensed electrician for a quick check.
💧 Plumbing Codes
-
Install a Temperature and Pressure (T&P) relief valve — it’s required by code.
-
Use a drain pan with an overflow line if the unit is near living space.
-
Check for local code requirements around expansion tanks (many areas now require one).
🧍 Safety Rules
-
Never work on an energized circuit.
-
Don’t solder near the tank — heat can damage internal seals.
-
Keep kids and pets away while working.
-
Always test for leaks before energizing the unit.
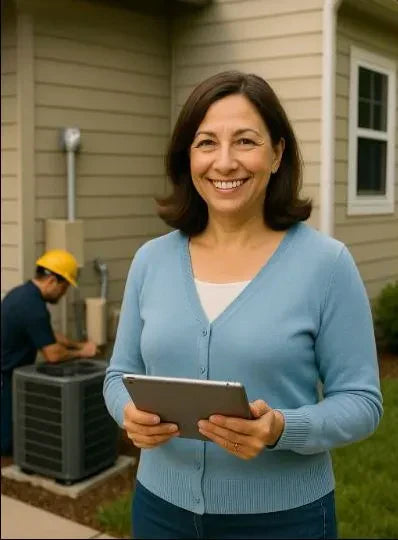
🧠 When to Call a Professional
DIY doesn’t mean doing everything yourself. Here’s when to let the experts handle it:
| Situation | Why to Call a Pro |
|---|---|
| You’re unsure about wiring or breaker sizing | Electrical safety and compliance |
| Your old heater is hardwired in tight conduit | May require rewiring |
| You live in a multi-unit building | Permits and inspection rules |
| There’s visible corrosion on pipes or valves | Could signal hidden leaks |
| You’re switching tank sizes (50→60 gal) | May need new plumbing layout |
| Installing in a new location | Requires drain, water, and electrical rerouting |
💬 Samantha’s Tip: Hiring a licensed installer typically costs $400–$800 but includes permits, pressure testing, and warranty validation.
💡 The Middle Ground: Partial DIY
You don’t have to choose all or nothing. Some homeowners do the prep work—draining, disconnecting, and clearing space—then hire a professional just for electrical hookup and inspection.
It’s a great balance: you save money and keep your installation safe and code-compliant.
🔗 After Installation: Next Steps
Once your new water heater is up and running:
-
Check your FHR (First Hour Rating) to confirm expected performance.
-
Add insulation to exposed pipes to reduce standby losses.
-
Schedule your first flush after 6 months to remove early sediment buildup.
✅ Samantha’s Final Word
Installing an electric water heater yourself can be rewarding if you have the right skills, patience, and respect for safety.
But smart DIYers know their limits — wiring mistakes or skipped code checks can turn into expensive headaches.
Whether you go full DIY or partial assist, the goal is the same: safe, steady, efficient hot water for years to come.
So grab that wrench, review your checklist, and make the choice that keeps your comfort — and your home — protected.
In the next blog, you will dive deep into "What Does an Electric Water Heater Installation Cost in 2025?".


