📌 Introduction: Is DIY PTAC Installation Realistic?
If you’ve ever stayed in a hotel, you’ve probably seen a PTAC (Packaged Terminal Air Conditioner) mounted under the window, quietly (or not so quietly) heating or cooling the room. These units are compact, self-contained, and designed for single-room climate control.
Because PTACs are modular and relatively easy to slide into a wall sleeve, many homeowners and small business owners ask me the same thing:
“Can I install a PTAC unit myself, or should I hire a pro?”
The short answer: Yes, you can install one yourself if you already have a wall sleeve and dedicated electrical line in place. But if you’re cutting a wall, adding new wiring, or want warranty protection, hiring a professional is the safer bet.
In this walkthrough, I’ll share:
-
The tools and materials you need
-
A step-by-step installation guide
-
Safety considerations you can’t ignore
-
A cost breakdown of DIY vs. professional installation
-
My personal pro tips to avoid common mistakes
🧰 1. What You’ll Need Before Starting
🛠️ Tools
-
Tape measure – to size the sleeve opening correctly
-
Level – ensures proper drainage slope
-
Power drill – for mounting hardware
-
Screwdrivers – Phillips and flathead
-
Caulking gun + weatherproof sealant – to prevent leaks
-
Utility knife – for trimming insulation and sealing foam
-
Safety goggles & gloves – non-negotiable for wall cutting and handling metal sleeves
📦 Materials & Accessories
-
PTAC Unit: ($700–$1,200 depending on BTU size)
-
Wall Sleeve: ($100–$200) – required if not pre-installed
-
Exterior Grille: ($50–$150) – protects condenser from debris
-
Drain Kit: ($25–$75) – ensures condensation doesn’t leak inside
-
Electrical Circuit: Usually a 208/230V dedicated outlet or hardwired line
👉 Browse compatible models at The Furnace Outlet PTAC Collection.
🏗️ 2. Pre-Installation Checklist
Before you even pick up a drill, go through this list:
-
✅ Room Size & BTUs: Confirm the PTAC capacity matches your room’s square footage. A common rule: 20 BTUs per square foot.
-
✅ Wall Thickness: PTAC sleeves typically fit 8–16 inch walls.
-
✅ Electrical Supply: Verify you have the correct voltage (often 208/230V). Plug-in units are easier; hardwired ones may need an electrician.
-
✅ Drainage Plan: Ensure condensation drains outside.
-
✅ Building Codes & HOA Rules: Some municipalities require permits to cut exterior walls.
👉 For sizing help, see ENERGY STAR Room AC Guide.
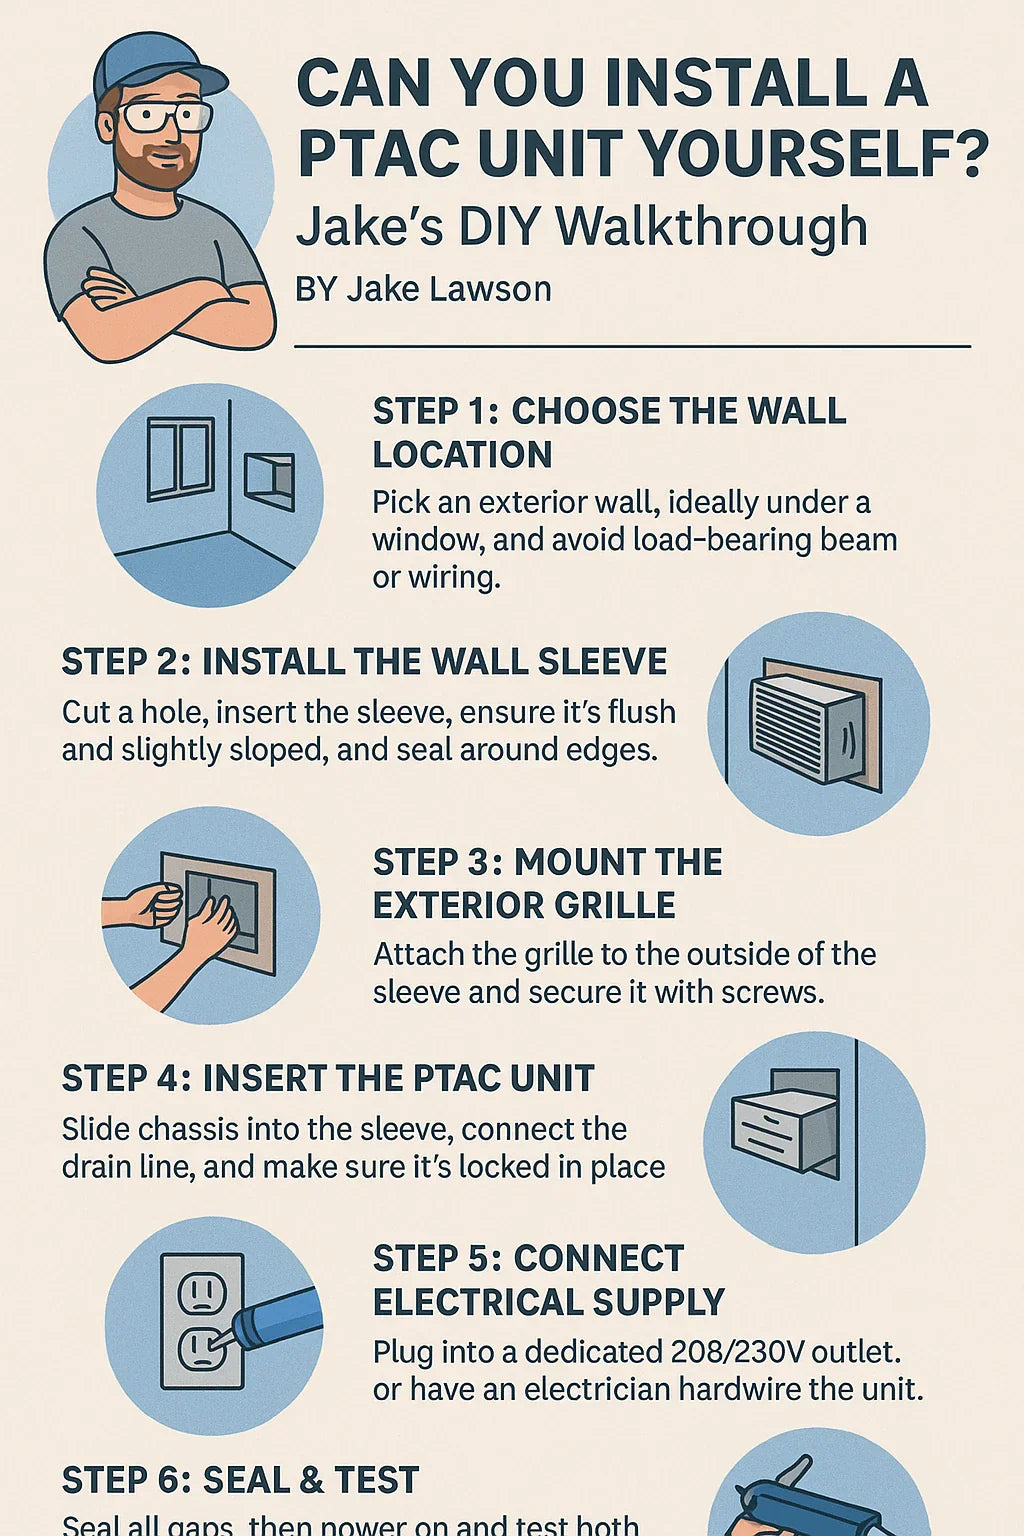
🧱 3. Step-by-Step Jake’s DIY PTAC Installation
🔎 Step 1: Choose the Wall Location
-
Select an exterior wall, preferably beneath a window for airflow balance.
-
Avoid cutting through load-bearing beams, plumbing pipes, or electrical wiring.
🔎 Step 2: Install the Wall Sleeve
-
Cut the Opening: Measure the sleeve dimensions carefully; cut slightly larger than the sleeve frame.
-
Insert Sleeve: Slide into the wall, ensuring a slight tilt to the outside (about 1/4 inch) for proper drainage.
-
Seal Edges: Use caulk to weatherproof the perimeter.
🔎 Step 3: Mount the Exterior Grille
-
Secure grille over the sleeve’s outdoor side.
-
Double-check that airflow isn’t obstructed by landscaping or objects.
🔎 Step 4: Insert the PTAC Unit
-
Slide the PTAC chassis into the sleeve until it locks into place.
-
Connect the condensate drain kit. Ensure tubing angles downward to avoid backflow.
🔎 Step 5: Connect Electrical Supply
-
Plug-in Units: Simply connect to a dedicated 208/230V outlet.
-
Hardwired Units: Requires running conduit and connecting to a breaker. ⚠️ If unsure, hire a licensed electrician.
🔎 Step 6: Seal & Test the System
-
Use foam or weatherstripping to close interior gaps.
-
Power on the unit. Test both cooling and heating modes.
-
Check for proper drainage and airflow.
⚡ 4. Safety Considerations
Even if you’re handy, PTAC installation involves risks.
⚡ Electrical Safety
-
PTAC units typically run on 208/230 volts—far more dangerous than 120V household outlets.
-
If you’re not experienced with high-voltage circuits, call an electrician.
🏗️ Structural Safety
-
Cutting a wall incorrectly can weaken the structure.
-
Always avoid studs, beams, and joists unless approved by a contractor.
💧 Water Safety
-
Poor drainage is the #1 DIY mistake. Without a proper slope, water leaks inside → mold, drywall damage, and expensive repairs.
👉 Review guidelines from the U.S. Department of Energy – Air Conditioner Safety.
🛠️ 5. DIY vs. Professional Installation
| Task | DIY Possible? | Pro Recommended? |
|---|---|---|
| Wall Sleeve Install | ✅ Yes | Sometimes |
| Exterior Grille Mount | ✅ Yes | Optional |
| Condensate Drain Setup | ✅ Yes | Optional |
| Electrical Hookup | ⚠️ Only plug-in | ✅ Hardwired |
| Warranty Compliance | ❌ Not always | ✅ Often required |
✅ Cost Comparison
-
DIY Install:
-
Unit: ~$900
-
Accessories: ~$200
-
Labor: $0
-
Total: ~$1,100
-
-
Pro Install:
-
Unit: ~$900
-
Accessories: ~$200
-
Labor: ~$350–$500
-
Total: ~$1,500–$1,700
-
💡 6. Jake’s Pro Tips for DIY Success
-
Measure Twice, Cut Once: Wall sleeves must be perfectly level to prevent drainage issues.
-
Seal Everything: Use high-quality silicone caulk around the sleeve—air leaks kill efficiency.
-
Use a Drain Kit: Don’t rely solely on sleeve slope; drain tubes ensure proper water removal.
-
Plan the Electrical First: Don’t buy your PTAC until you confirm your home has the correct voltage.
-
Keep the Manual Handy: Manufacturer diagrams are lifesavers when it comes to wiring and mounting.
📊 7. Cost & Time Investment Breakdown
| Category | DIY Cost | Pro Install Cost |
|---|---|---|
| PTAC Unit | $900 | $900 |
| Wall Sleeve + Grille | $175 | $175 |
| Drain Kit | $50 | $50 |
| Labor | $0 | $350–$500 |
| Electrical Setup | $0 (if plug-in) | $200–$400 extra |
| Total Investment | ~$1,125 | ~$1,600–$1,800 |
| Time Required | 4–6 hrs | 2–3 hrs (pro) |
🧼 8. Maintenance After Installation
Once installed, keeping your PTAC running smoothly is crucial.
-
Clean Filters: Every 30–60 days
-
Vacuum Coils: Seasonally
-
Clear Drain Lines: Monthly during cooling season
-
Pro Service Check: Once per year
👉 See HVAC.com – PTAC Maintenance Tips.
🏡 9. Real-World Scenarios
-
Rental Property: I installed PTACs in a duplex—did sleeves & drainage DIY, but hired an electrician for wiring. Saved ~$800 total.
-
Home Office Addition: With a pre-installed sleeve, I slid in a heat pump PTAC in under 3 hours.
-
Small Business Office: Paid for pro installation to meet warranty requirements—worth it for peace of mind.
📌 Conclusion: Should You DIY or Hire a Pro?
Installing a PTAC yourself is totally doable if:
-
You already have a sleeve installed
-
Your electrical line is ready
-
You’re confident in sealing and drainage work
But if you need wall cutting, new wiring, or want full manufacturer warranty protection, it’s smart to call a pro.
💡 Jake’s Takeaway: A hybrid approach often works best. Do the sleeve and prep yourself, then let an electrician handle the high-voltage wiring.
Expect a total investment of $1,100 DIY vs. $1,600–$1,800 professional install.
In the next topic we will read more about: Do PTAC Units Work in Winter? Understanding Electric Heat vs. Heat Pump Models


