1. Introduction – The DIY Temptation
Hey, Savvy here.
If you’re anything like me, you’ve probably seen a few YouTube videos where someone installs a brand-new air conditioner and furnace in a weekend, saving thousands in labor costs. The appeal is real:
-
Save money — potentially $3,000–$6,000 on labor.
-
Sense of accomplishment — telling friends, “Yeah, I installed it myself.”
-
Curiosity — wanting to see how all the pieces come together.
But before you grab a wrench and start watching tutorial #37, let’s get something straight: installing a 4-ton AC + furnace system is not like swapping out a faucet or replacing a garbage disposal. We’re talking high voltage electricity, natural gas, pressurized refrigerants, and precise airflow calculations.
So I decided to dig deep — talking to HVAC pros, checking codes, and even shadowing a professional install — to find out: Is DIY really worth it, or a disaster waiting to happen?
2. The Reality Check – Why It’s Not Like Installing a Window Unit
A 4-ton AC + furnace combo is a major piece of home infrastructure. It’s designed to heat and cool a large space (usually 2,000–2,500 sq. ft.) efficiently and safely.
A proper installation requires knowledge in:
-
Electrical wiring (120V and 240V)
-
Gas piping (natural gas or propane)
-
Plumbing (condensate drain, sometimes water for humidifiers)
-
Sheet metal work (duct transitions and sealing)
-
Refrigerant science (charging, leak testing, evacuation)
One mistake in any of these areas can mean:
-
The system runs inefficiently and wears out early.
-
Your warranty is voided.
-
You create a safety hazard (fire, gas leak, refrigerant leak).
3. Legal & Licensing Requirements
EPA Section 608 Certification
In the U.S., it is illegal to purchase or handle refrigerants like R-410A without an EPA 608 certification. That means if you plan to connect the AC lines and charge the system yourself, you must be certified.
Building Permits & Inspections
Most municipalities require a permit for HVAC installation. The work must be inspected to ensure it meets safety codes. Installing without a permit can cause headaches when selling your home.
Manufacturer Warranties
Many HVAC brands clearly state:
“Warranty is valid only if installed by a licensed contractor.”
Even if you do everything right, DIY may void the equipment warranty — leaving you unprotected on big-ticket failures.
4. Tools & Equipment Needed
Here’s what a professional brings that you probably don’t have in your garage:
Specialty Tools:
-
Vacuum pump ($150–$300)
-
Manifold gauge set ($80–$150)
-
Nitrogen tank & regulator ($150–$250)
-
Refrigerant recovery machine ($400–$800)
-
Flaring & swaging tools ($50–$100)
-
Torque wrenches for flare fittings ($100+)
Safety Gear:
-
Nitrile gloves
-
Safety glasses or goggles
-
Respirator for coil cleaning chemicals
Approximate Tool Cost for DIYer: $800–$2,000+
And that’s before you buy the actual equipment.
5. Step-by-Step Overview of a Professional Install
Here’s how pros do it — and why each step matters.
-
Load Calculation
-
Verify 4-ton size using Manual J calculations.
-
Oversized systems short-cycle and wear out faster.
-
-
Remove Old System
-
Safely recover refrigerant per EPA rules.
-
Disconnect gas and electrical lines.
-
-
Ductwork Adjustments
-
Modify plenum to fit new equipment.
-
Seal joints with mastic or UL-rated tape.
-
-
Furnace Installation
-
Position for proper airflow.
-
Connect to gas, electrical, and venting systems.
-
-
Evaporator Coil & Line Set Installation
-
Braze copper lines and pressure test with nitrogen.
-
Evacuate system to 500 microns to remove moisture.
-
-
Condensing Unit Installation
-
Level on pad, connect refrigerant lines, and wire high-voltage connections.
-
-
Refrigerant Charging & Testing
-
Charge to manufacturer’s specs using superheat/subcooling measurements.
-
-
System Balancing & Final Inspection
-
Adjust blower speed, verify airflow, and check for leaks.
-
6. Potential Risks of DIY
Here’s where things get dangerous — and expensive.
Electrical Hazards
-
Both furnace and AC require 240V power — one wrong move can be fatal.
Gas Leaks & Carbon Monoxide
-
Improper furnace installation can cause deadly CO leaks.
Refrigerant Exposure
-
Contact with liquid refrigerant can cause frostbite or blindness.
Airflow Mistakes
-
Wrong duct sizing or blower speed can reduce efficiency by 20% or more.
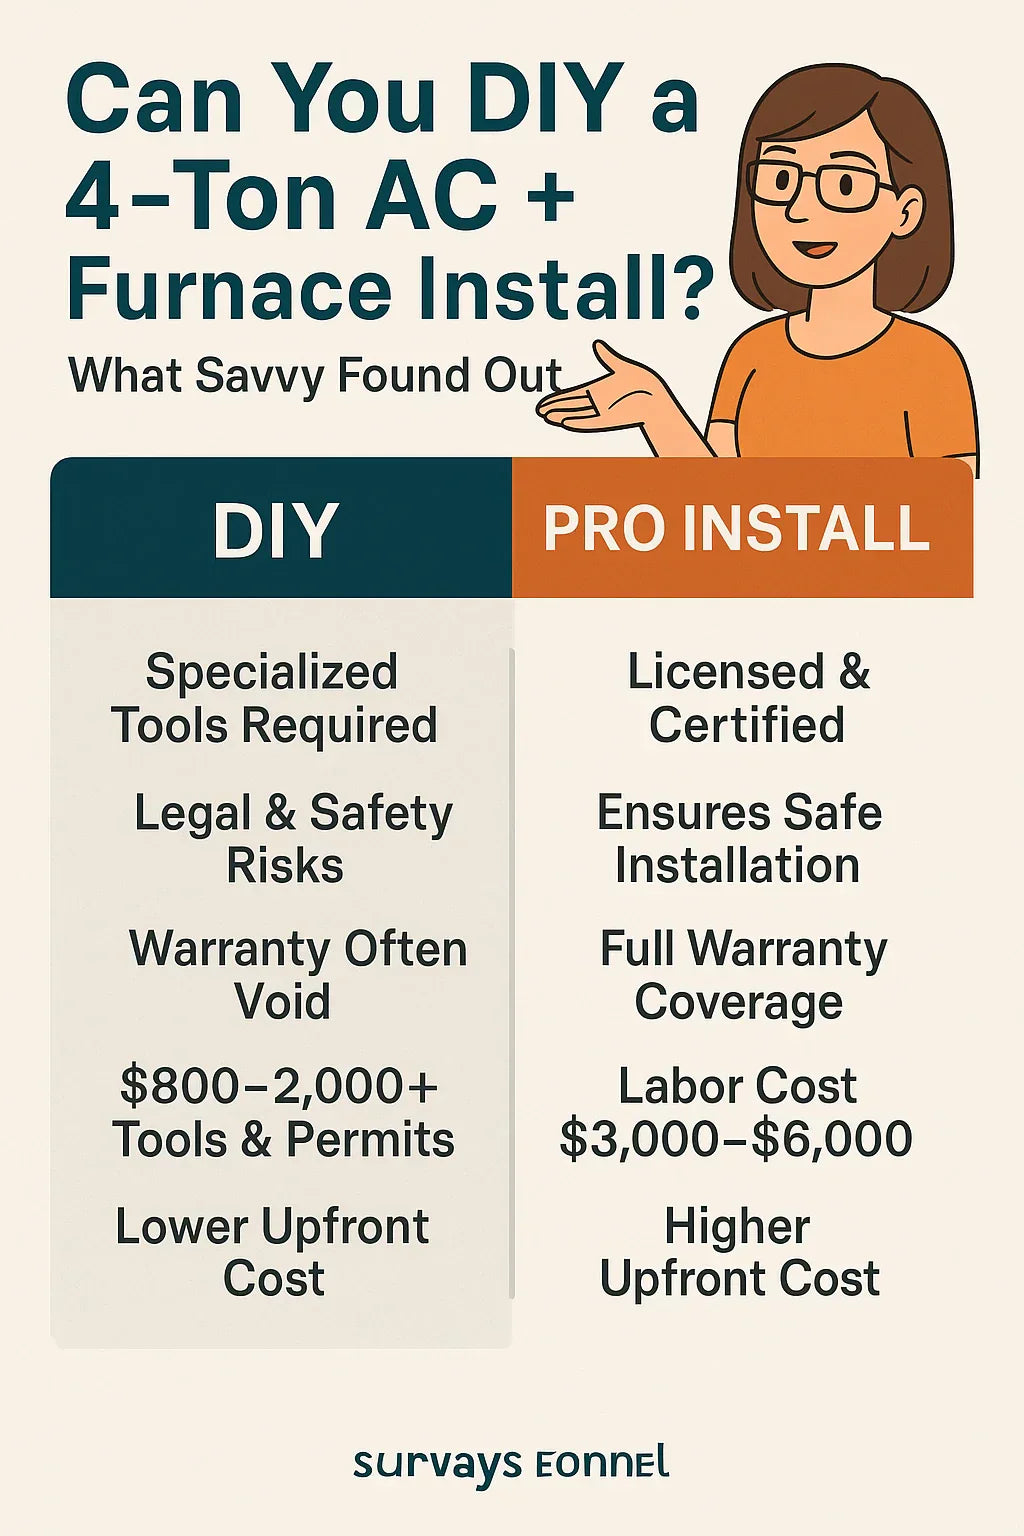
7. Cost Comparison – DIY vs. Pro
| Factor | DIY | Pro Install |
|---|---|---|
| Equipment | $5,000–$8,000 | $5,000–$8,000 |
| Tools | $800–$2,000+ | Included |
| Permits | $100–$300 | Included |
| Labor | Free (your time) | $3,000–$6,000 |
| Warranty | Often void | Full coverage |
| Risk of Mistakes | High | Low |
8. Savvy’s Case Study – Watching the Pros
I shadowed an installation of a 4-ton, 16 SEER2 AC with a 96% AFUE furnace.
Highlights:
-
Two techs worked 8 hours straight.
-
Nitrogen pressure test held at 350 psi for 20 minutes — something most DIYers skip.
-
Blower speed was fine-tuned for 1,600 CFM airflow.
My takeaway: Even though I’m mechanically handy, I wouldn’t have nailed the airflow or refrigerant charge without training.
9. If You Still Want to Try DIY
I get it — some folks will still want to roll up their sleeves.
Hybrid Approach (Safer):
-
DIY: Remove old equipment, prepare pad, run thermostat wire, basic duct prep.
-
Pro: Connect refrigerant, gas, and high-voltage; perform charging and testing.
This can still save $1,000–$2,000 while keeping warranty coverage intact in some cases.
10. Savvy’s Final Verdict
Full DIY? Not worth the risk for most homeowners.
Hybrid DIY? Possible, but only if you’re confident in basic carpentry and electrical work — and you let the pros handle the dangerous parts.
12. External Verified Sources
In the Next topic we will read more about: How Long Should a 4-Ton AC + Furnace Last? Lifespan & Warranty Insights


