Newsletter Subscribe
Enter your email address below and subscribe to our newsletter

HVAC made simple
By Jake Lawson — the HVAC Specialist
If you have been researching DIY mini splits, you have probably seen phrases such as “pre-charged line set,” “Quick Connect,” “No-Vac,” and “no vacuum pump required.” Those descriptions make installation sound remarkably simple, and with a genuine purpose-built DIY system, the refrigerant side of the job really can be much easier than it is with a conventional mini split.
But there is one distinction I want homeowners to understand before buying anything: a pre-charged outdoor condenser and a pre-charged sealed line set are not the same thing. A conventional mini split can arrive with refrigerant already stored in the outdoor unit and still require the field-installed refrigerant piping to be leak-tested and evacuated. A true no-vacuum DIY design approaches the connection differently by using factory-prepared, sealed refrigerant lines and compatible fittings intended to keep ordinary air and moisture out of the refrigerant circuit during installation.
That difference is the reason some mini splits require vacuum pumps and specialized HVAC procedures while certain purpose-built DIY systems do not.
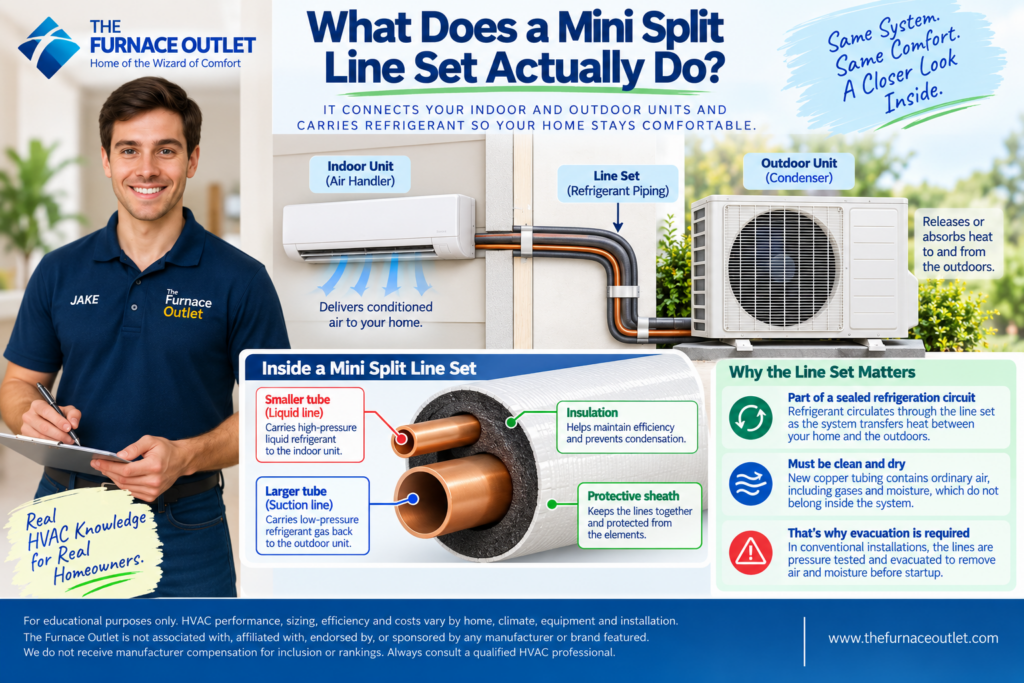
A mini split has an indoor air handler and an outdoor condenser connected by refrigerant piping. The line set normally contains two copper tubes of different diameters, insulated as required for the particular system. Refrigerant circulates between the indoor and outdoor equipment through these lines as the system transfers heat.
Although homeowners often think of the line set as simply “the pipes between the units,” it is part of the sealed refrigeration circuit. What is inside those pipes before startup therefore matters tremendously.
In a conventional installation, new copper tubing initially contains ordinary atmospheric air. That air contains gases and moisture that do not belong inside a properly prepared refrigeration system. Simply attaching the copper to a factory-charged condenser and opening the service valves would not magically remove those contaminants.
That is one of the primary reasons conventional installations include an evacuation procedure.
When I explain evacuation to homeowners, I describe it as preparing the refrigerant circuit before the refrigerant is allowed to operate through it.
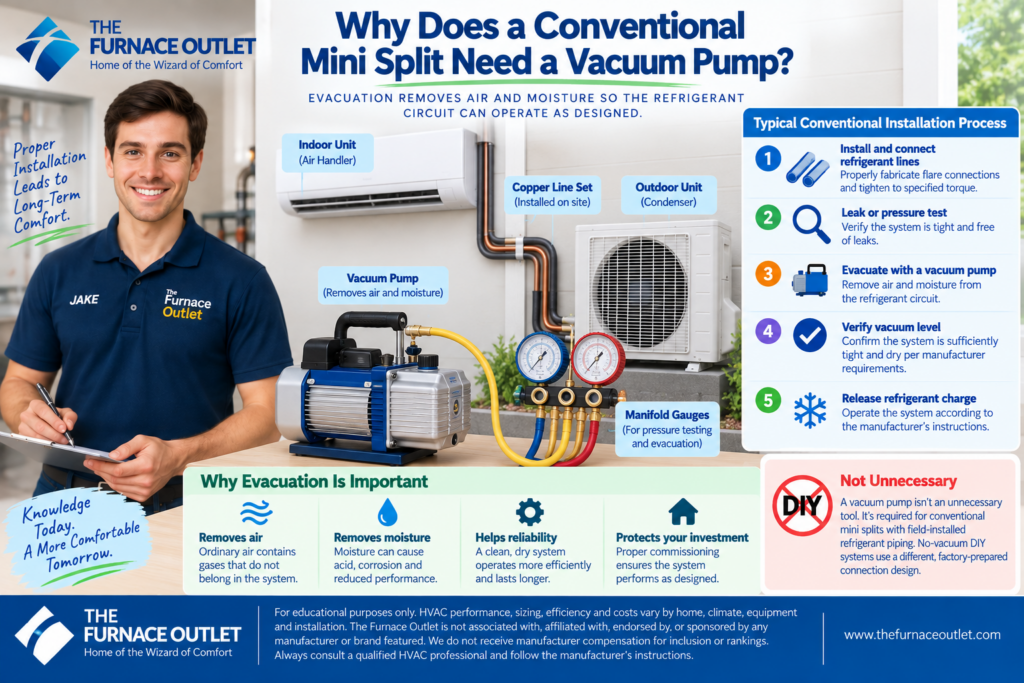
After conventional copper refrigerant lines have been installed and connected, the installer typically follows the manufacturer’s specified procedures for verifying the integrity of the system and removing unwanted air and moisture. Depending on the equipment and installation instructions, that can involve properly fabricated flare connections, correct torque, pressure or leak testing and evacuation using appropriate HVAC instruments.
The vacuum pump is only one part of that process. A good installation isn’t defined by someone simply attaching a pump and letting it run for a while. The installer needs to determine that the circuit is sufficiently tight and dry according to the manufacturer’s commissioning requirements.
This distinction is important because DIY discussions sometimes make a vacuum pump sound like an unnecessary tool that manufacturers have finally eliminated. It isn’t unnecessary on equipment designed for conventional field-installed refrigerant piping. Instead, a genuine no-vacuum DIY system has been engineered so that the refrigerant connection is prepared differently.
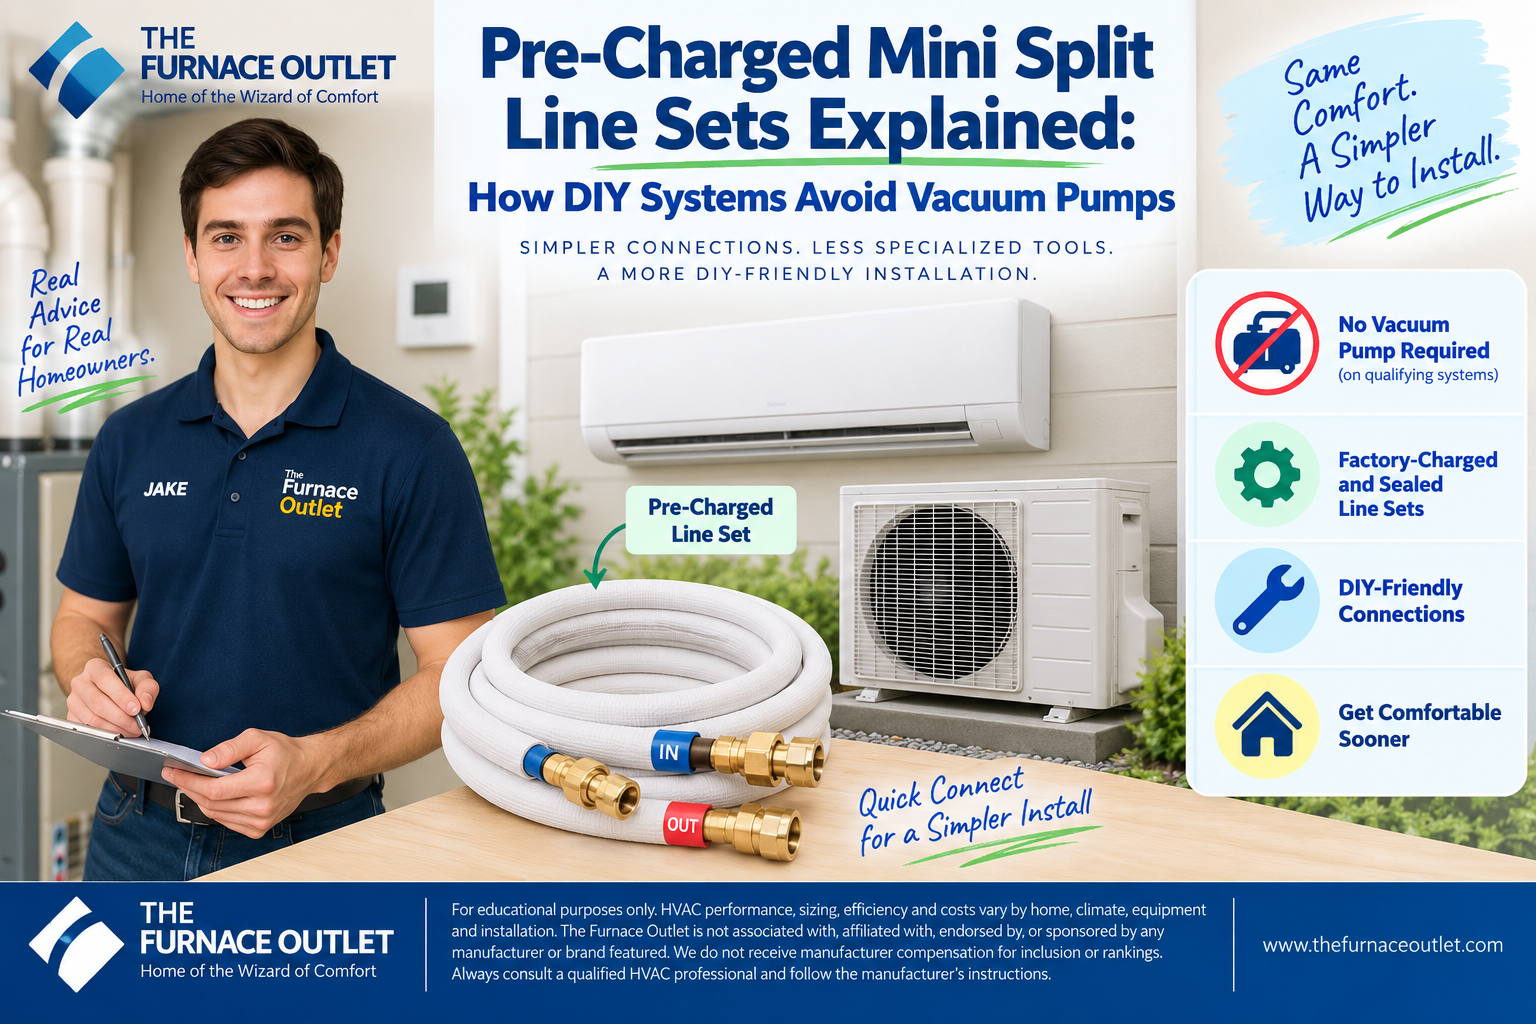
In the DIY context, a genuine pre-charged line set is a factory-prepared refrigerant-line assembly designed to remain sealed until it is correctly connected to compatible equipment.
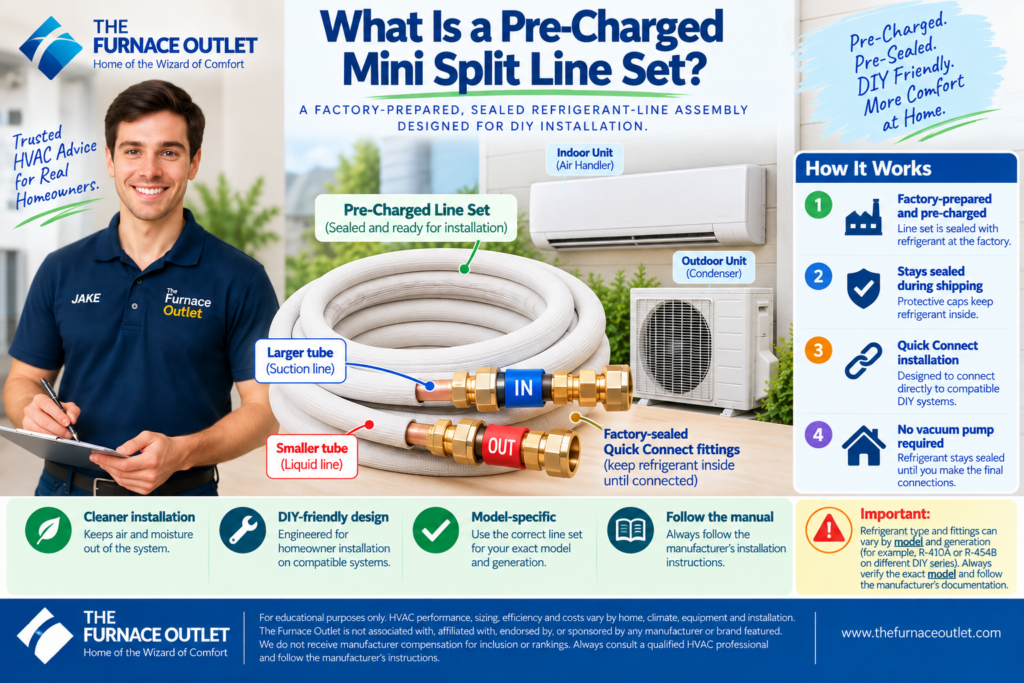
Rather than receiving an ordinary length of copper tubing that contains atmospheric air and must subsequently be evacuated, the homeowner receives a line assembly specifically engineered for the compatible DIY system. The connection method is just as important as the refrigerant already being present.
For example, MRCOOL documents pre-charged Quick Connect line sets for its DIY series. Current fifth-generation MRCOOL DIY equipment uses pre-charged Quick Connect line sets with R-454B on specified models, while documentation for earlier DIY line sets identifies R-410A. That is a good reminder that homeowners should never assume the refrigerant, fitting or line-set requirements based simply on the brand name or an older installation video.
MRCOOL DIY support documentation
The exact model, generation and installation manual should determine what you buy and how you install it.
This is where the engineering becomes interesting. A conventional installation essentially creates and prepares part of the refrigeration circuit in the field. The installer connects the piping and then uses the required testing and evacuation procedures before releasing or establishing the system’s refrigerant charge as directed by the manufacturer.
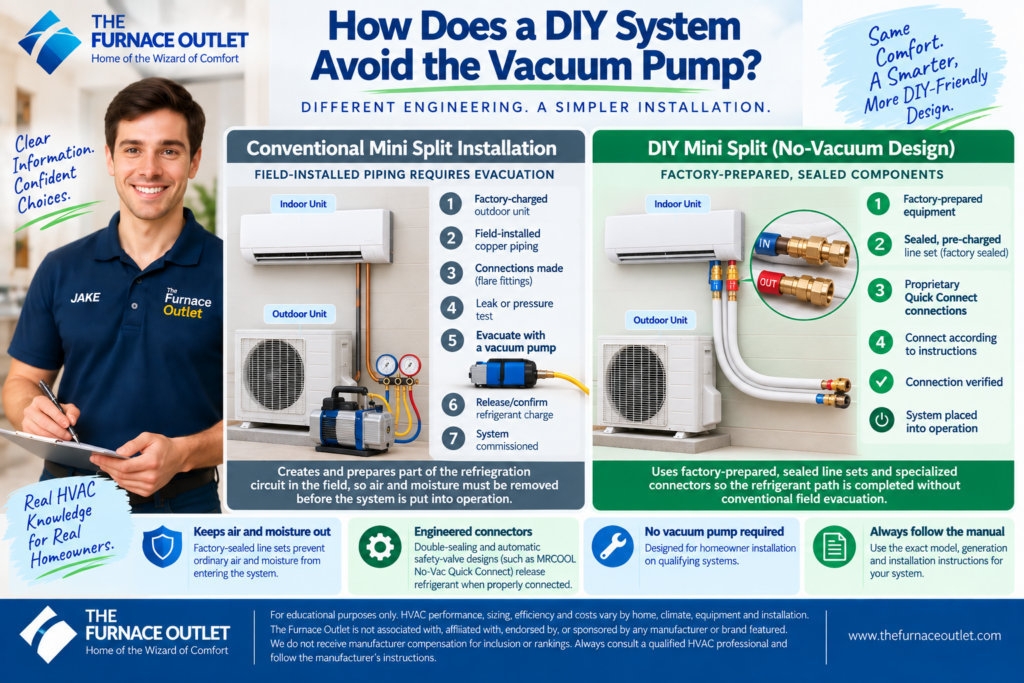
A qualifying no-vacuum DIY system instead uses factory-prepared sealed components and specialized connectors so that the refrigerant path can be completed without performing the conventional field evacuation process.
MRCOOL’s current No-Vac Quick Connect documentation, for example, describes precharged line sets using a double-sealing arrangement and an automatic safety-valve design. The manufacturer’s instructions state that the connection mechanism releases refrigerant when the indoor and outdoor equipment are correctly connected and sealed, eliminating the need for conventional field vacuuming or adding refrigerant for that specified installation.
In simplified terms, the difference looks like this:
That is why I prefer calling these systems no-vacuum designs rather than saying that they somehow “skip” evacuation. The manufacturer has changed the installation architecture so conventional field evacuation is not required for the qualifying configuration.
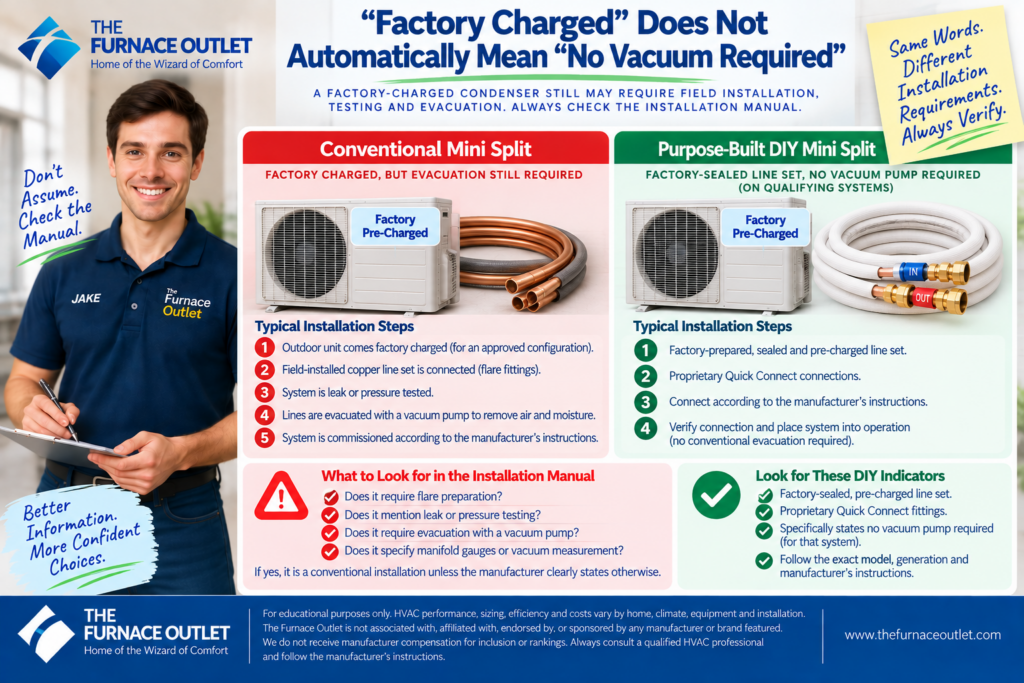
This is probably the most common misunderstanding I encounter when people shop for mini splits online. Suppose an outdoor condenser specification says “factory pre-charged.” A homeowner may understandably interpret that as meaning all necessary refrigerant work has already been completed. Not necessarily. Many conventional split systems leave the factory containing a refrigerant charge intended for a particular approved piping configuration. The separate field-installed line set still needs to be installed and prepared according to the manufacturer’s instructions.
So I would never decide whether a system needs evacuation from the words “pre-charged condenser.” Instead, look at the refrigerant-piping section of the installation manual. If the instructions discuss conventional flare preparation, leak or pressure testing, evacuation, vacuum measurement, manifold gauges or similar field procedures, you should treat it as a conventional installation unless the manufacturer explicitly says otherwise.
If the documentation instead identifies a factory-sealed, pre-charged, proprietary quick-connect line set and specifically states that conventional field evacuation isn’t required, that is a fundamentally different design.
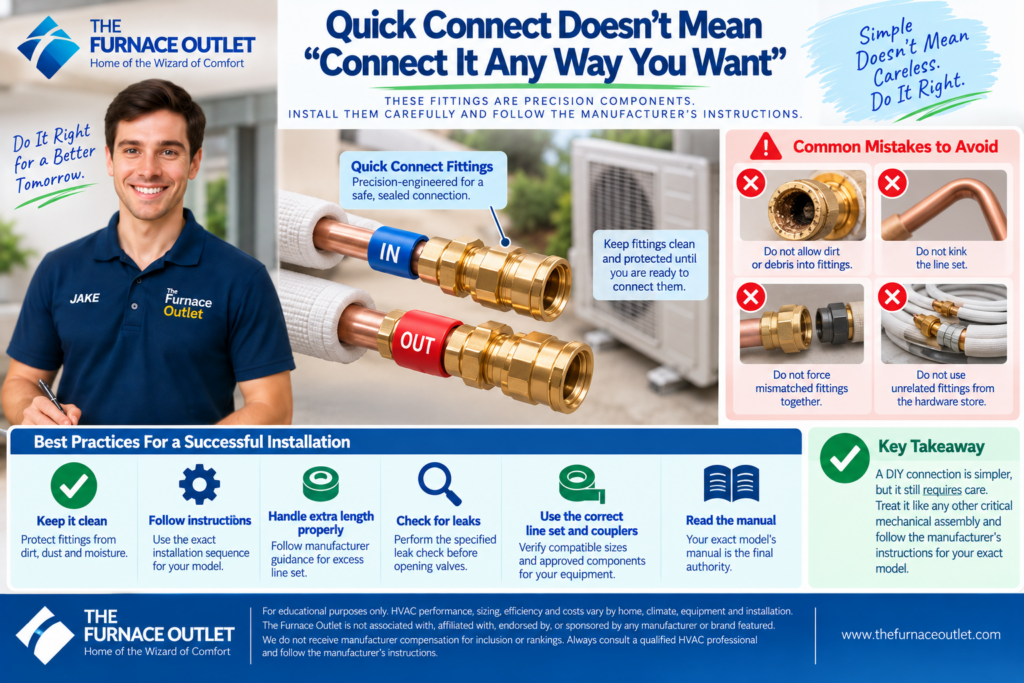
There is another mistake I want DIY installers to avoid. Simplifying a refrigerant connection does not make the connection unimportant. These fittings are precision components. MRCOOL’s support guidance for its DIY pre-charged line sets, for example, instructs installers to keep fittings clean, avoid kinking the line, handle extra line length appropriately and perform the specified leak check before opening valves. The manufacturer also specifies compatible line-set sizes and couplers for particular equipment.
A DIY connection therefore deserves the same careful attitude you would bring to any critical mechanical assembly. Protect the fittings until you are ready to connect them. Do not allow dirt or debris into them. Do not force mismatched threads together. Do not aggressively bend the tubing to make it fit an inconvenient route, and do not substitute unrelated fittings because something at the hardware store appears to have the correct diameter. Most importantly, follow the installation sequence for your exact model rather than relying on a generic online tutorial.
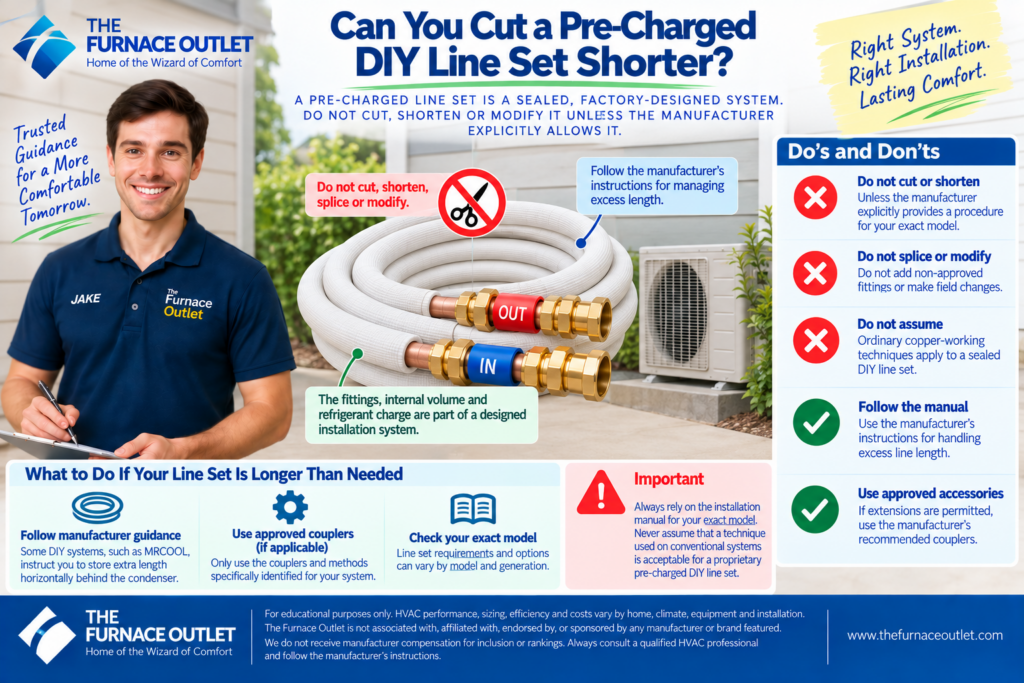
This is another area where conventional HVAC instincts can cause problems. With conventional copper piping, an installer can often size and route the tubing according to the equipment manufacturer’s allowable line-length specifications, then properly prepare the ends and commission the system. A factory-prepared DIY line set is different because its fittings, internal volume and refrigerant configuration are part of a designed installation system.
That means you should not cut, shorten, splice or modify a proprietary pre-charged line set unless the manufacturer explicitly provides a procedure permitting it for your exact equipment. If your supplied line is longer than the physical distance between the indoor and outdoor units, follow the manufacturer’s instructions for managing the excess. MRCOOL’s published guidance for some DIY line sets, for example, tells installers to store extra length horizontally behind the condenser and identifies compatible Quick Couplers where extension is permitted. Never assume that ordinary copper-working techniques apply to a sealed DIY assembly.
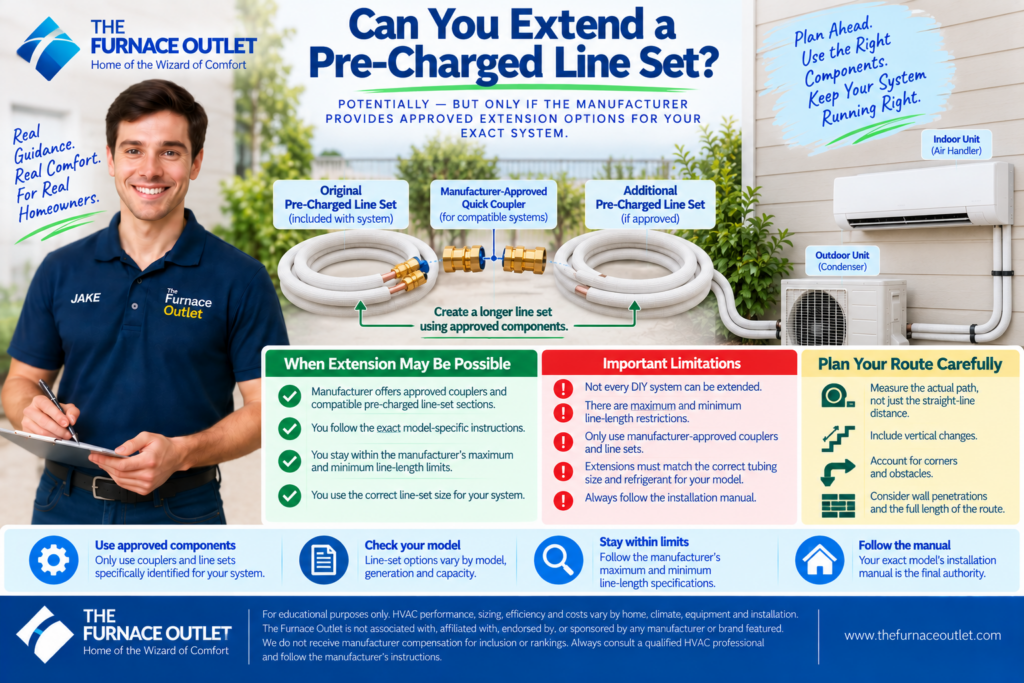
Potentially—but once again, compatibility matters more than improvisation. Some DIY product families offer manufacturer-approved couplers and additional compatible pre-charged line-set sections. MRCOOL lists Quick Couplers for specified DIY line-set configurations, for example. That doesn’t mean every DIY system can be extended indefinitely. Manufacturers may specify maximum and minimum line lengths, compatible combinations, capacity-specific tubing dimensions and procedures for handling extensions.
Before ordering equipment, measure your intended route carefully. Include vertical changes, corners, wall penetrations and the actual path the tubing must follow—not simply the straight-line distance between the indoor and outdoor units. A ten-foot distance between the two pieces of equipment can easily require considerably more than ten feet of line set once a realistic route is planned.
The reason HVAC technicians take evacuation seriously isn’t ceremonial. A refrigeration circuit is designed to operate with refrigerant and oil under carefully controlled conditions, not with ordinary atmospheric air and moisture trapped inside. This is why I don’t like advice suggesting that a homeowner can install a conventional mini split and simply “purge the lines” instead of properly evacuating them. If the manufacturer specifies evacuation, follow that procedure and use a qualified technician where appropriate.
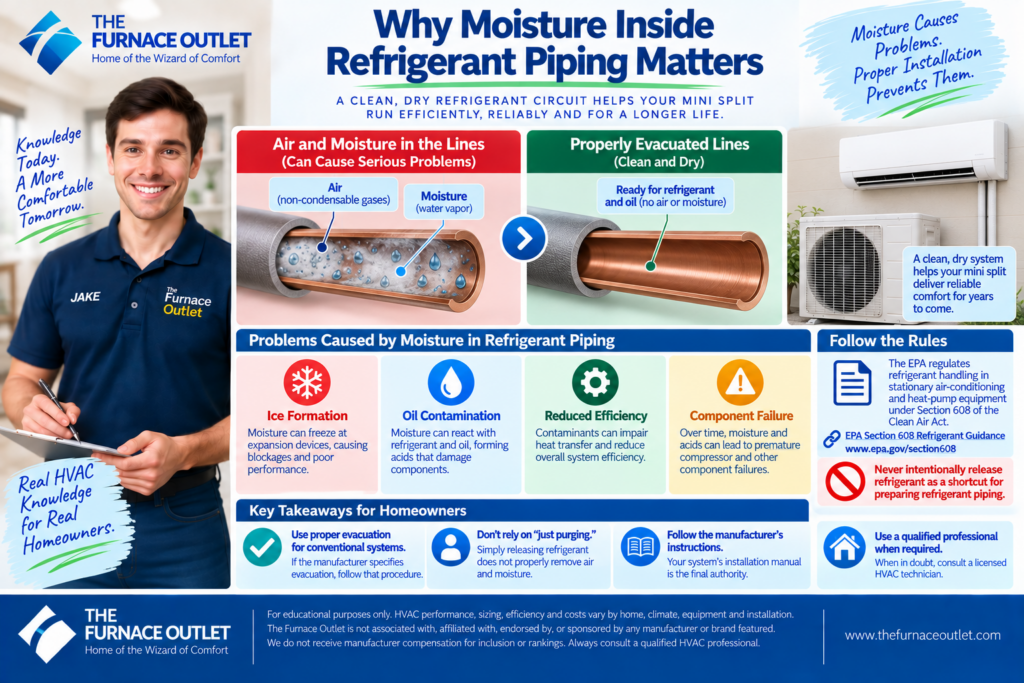
EPA also regulates refrigerant handling in stationary air-conditioning and heat-pump equipment under Section 608 of the Clean Air Act. Among other provisions, federal rules prohibit intentional venting of regulated refrigerants and substitutes during servicing, maintenance, repair and disposal, subject to defined exceptions.
EPA Section 608 refrigerant guidance
A homeowner should never intentionally release refrigerant as a shortcut for preparing refrigerant piping.
This is where DIY should stop becoming experimentation. If you follow the installation procedure and detect a suspected leak, damaged fitting or unexpected refrigerant loss, consult the manufacturer’s troubleshooting instructions and get qualified HVAC assistance when the solution involves opening or repairing the refrigerant circuit.
Do not start cutting tubing, replacing fittings with conventional hardware, adding refrigerant or repeatedly opening connections to “see what happens.” EPA’s Section 608 framework governs refrigerant servicing practices and includes requirements concerning technician certification, refrigerant management and venting. The whole advantage of a purpose-built DIY design is that the homeowner should not need to become a refrigeration technician. Once a problem requires actual refrigerant service, the installation has crossed an important boundary.
This is another distinction worth emphasizing. No vacuum pump does not mean no tools, no planning and no professional assistance. You still need to locate and mount the indoor unit correctly, establish an appropriate wall penetration, position the condenser, route the line set without damaging it, provide reliable condensate drainage and follow equipment-clearance requirements.
Electrical work remains a separate consideration. A mini split commonly needs a dedicated electrical supply and may require a correctly sized breaker, conductors, disconnect, grounding and outdoor-rated components depending on the equipment and applicable electrical rules. Local permits and inspections can also apply. A homeowner can therefore legitimately install a DIY mini split while still hiring a licensed electrician for the electrical portion. There is nothing inconsistent about that approach.
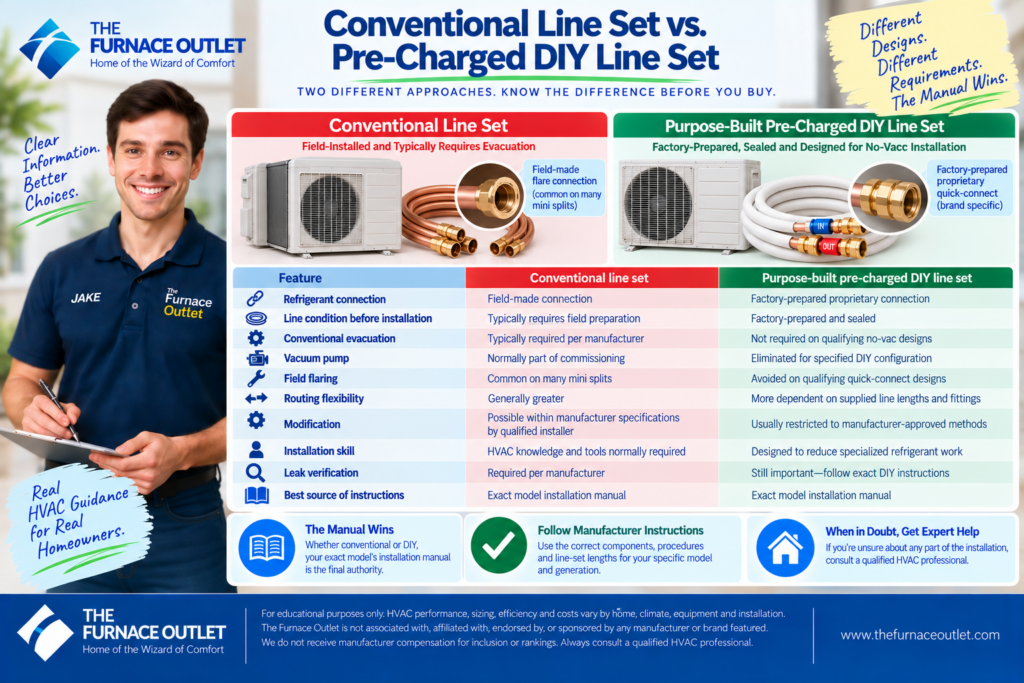
| Feature | Conventional line set | Purpose-built pre-charged DIY line set |
|---|---|---|
| Refrigerant connection | Field-made connection | Factory-prepared proprietary connection |
| Line condition before installation | Typically requires field preparation | Factory-prepared and sealed |
| Conventional evacuation | Typically required per manufacturer | Not required on qualifying no-vac designs |
| Vacuum pump | Normally part of commissioning | Eliminated for specified DIY configuration |
| Field flaring | Common on many mini splits | Avoided on qualifying quick-connect designs |
| Routing flexibility | Generally greater | More dependent on supplied line lengths and fittings |
| Modification | Possible within manufacturer specifications by qualified installer | Usually restricted to manufacturer-approved methods |
| Installation skill | HVAC knowledge and tools normally required | Designed to reduce specialized refrigerant work |
| Leak verification | Required per manufacturer | Still important—follow exact DIY instructions |
| Best source of instructions | Exact model installation manual | Exact model installation manual |
The last row is deliberately identical. Whether you’re installing conventional equipment or a purpose-built DIY system, the manual wins.
This issue is becoming increasingly important as the HVAC market transitions between refrigerants and manufacturers update product families. For example, MRCOOL’s older documented DIY line sets include R-410A configurations, while its current fifth-generation DIY condenser documentation identifies pre-charged R-454B Quick Connect line sets for specified equipment.
That means a homeowner should never think, “It says MRCOOL DIY, so this line set should work.” Verify the complete equipment combination: outdoor model, indoor model, line-set part number, refrigerant, connection size, generation and any required coupler or installation kit. The same principle applies to every manufacturer. Compatibility is a technical requirement, not a branding assumption.
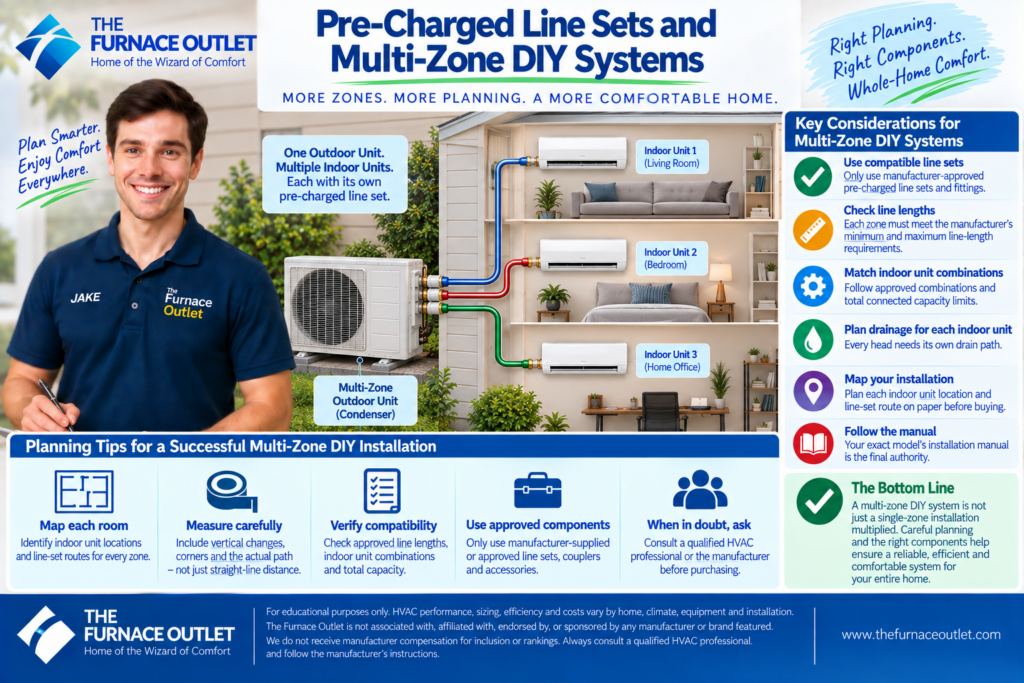
Multi-zone DIY installations make this subject even more important because you are no longer planning one indoor-to-outdoor connection. Each indoor air handler may require its own compatible line-set route, drainage path and connection to the outdoor equipment. Line lengths, indoor-unit combinations and total connected capacity must comply with the manufacturer’s approved configuration.
Don’t treat a multi-zone system as a single-zone DIY installation multiplied by three or four. Planning becomes substantially more important because every additional head creates another route, another drain and another potential installation constraint. Before buying a multi-zone system, I would map every indoor-unit location and every line-set path on paper. Determine required lengths and compatible combinations before the equipment arrives.

Product pages can use DIY language loosely, so I recommend checking the manufacturer’s documentation rather than relying on retailer descriptions.
Before buying, confirm the following:
If you cannot confirm those points from manufacturer documentation, don’t assume the system is truly DIY just because an online seller describes it that way.
This is the idea I want homeowners to remember. A purpose-built DIY mini split doesn’t avoid a vacuum pump because evacuation suddenly stopped being important in refrigeration systems. It avoids conventional field evacuation because the manufacturer has redesigned how the refrigerant circuit is delivered and connected.
Instead of expecting the homeowner to install atmospheric copper piping, fabricate conventional connections, test the circuit and evacuate it, a genuine no-vacuum DIY design uses factory-prepared sealed components and compatible connection technology intended to preserve the required refrigerant environment during installation. That can remove one of the biggest technical barriers between a capable homeowner and a mini-split installation.
But it doesn’t eliminate careful workmanship. Keep fittings clean. Protect the tubing. Avoid kinks. Follow routing requirements. Use only compatible components. Perform every manufacturer-required check. Plan electrical work and permits properly, and never modify or open the refrigeration circuit simply because the original DIY connection didn’t go as expected. The smartest DIY installer isn’t the person determined to avoid professional help at all costs. It’s the person who understands why the system can be installed without conventional HVAC commissioning—and where that DIY advantage ends.
Editorial Disclosure: The Furnace Outlet is not associated with, affiliated with, endorsed by, or sponsored by any manufacturer or brand mentioned in this article. We do not receive manufacturer compensation for inclusion or rankings. Product specifications, refrigerants, line-set compatibility, installation procedures and warranty requirements can change. Always verify the current documentation for the exact equipment and consult a qualified HVAC professional when specialized refrigerant, electrical or code-related work is required.